 |
Painting The Wing
By Kirby and Bob Jefferson
As we prepared to paint the wing we learned that for best results it was important that the stream of paint remain continuous as we move across the surface area. The problem that we were faced with was how to keep that stream of paint continuous as we moved from the top to the bottom of the wing. Several options were considered, and a solution was decided on that has turned out to be very successful.
We began by constructing two round discs about 24 inches in diameter, and cut them in half. Using a band saw we notched each piece of the half round to fit the dimensions of the spar. After we placed the two half rounds over the spar we used steel plates drilled with 4 holes to connect the two half rounds together. A wheel was placed on either side of the centerline of the wing spar. See figure 1.
 |
Figure 1
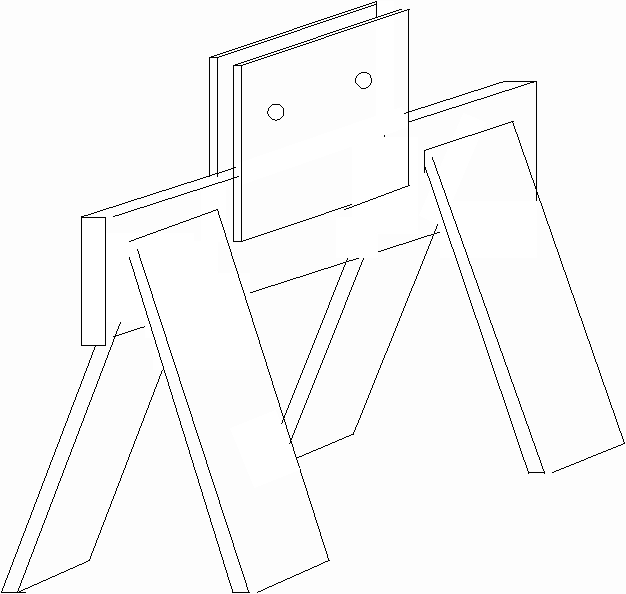
Once the half rounds were completed and attached to the spar, a jig was fabricated to hold each of the half rounds so that we could rotate the wing through the full 360 degrees. This jig was built using two sawhorses. Bolted to each sawhorse (fabricated from 2X4 material) were 2 plywood pieces that were 10X16 inches.
The half round was nested between each of the two pieces of plywood and a location for a pair of rollers was determined. A hole was drilled and a bolt installed at each location. Slipped over each bolt is a sleeve made of 1/2 inch copper pipe. See figure 2
 |
Figure 2
The purpose of the sleeve was to improve the ease by which the wheel would rotate in the nest as you reposition the wing . It is important that the nest rollers maintain enough friction to keep the wing in position at locations that are not natural balance points as you will want to position the wing at several angles as you move through the painting and sanding process.
Once both saw horses jigs were constructed the wheels were nested into the jig.. This allowed the wing to be rotated through a full 360 degrees by lifting the wheels, on hand on each wheel. The wing can now be rotated by one person.
As we painted the wing surface we began at the training edge of the wing, and moved forward to the leading edge. As we approached the leading edge the wing was rotated through to 180 degrees of its original position, allowing a continuous flow of paint from the top side to the bottom.
The total time to construct this jig was about 2 hours. We have found it about the best two hours invested.