N247BR
Final Painting - Preparations
| Painting this plane has been one disaster
after another and it seems
that nothing was going to work. There weren't any options other
than trying to do the painting myself since there is no paint shop on
the field. The only operations on the field with any painting
capability will not do painting for anyone or allow anyone to use their
facilities. Moving the plane to any other field wan't really an
option either. So, after several other attempts including using a
roll and tip painting method used for boat painting and application of
a vinyl overlay this was my final attempt to get the plane painted. |
|
 |
After several attempts to get a
full paint job on my plane I finally resorted to building my own paint
booth and going with a traditional spray paint process. There
were no other painting facilities available at the Lancaster Tx.
airport and I had avoided the idea since my hangar is an open T-Hangar
and I was worried about possible overspray drifting to other
bays. I found a steel garage assembly for just a few hundred
dollars. The basic kit was for a 12 x 21 ft structure. I
ordered an additional section which brought the completed assembly to
12 x 28 ft. Enough to hold the fuselage and still give room to
more around the plane. |
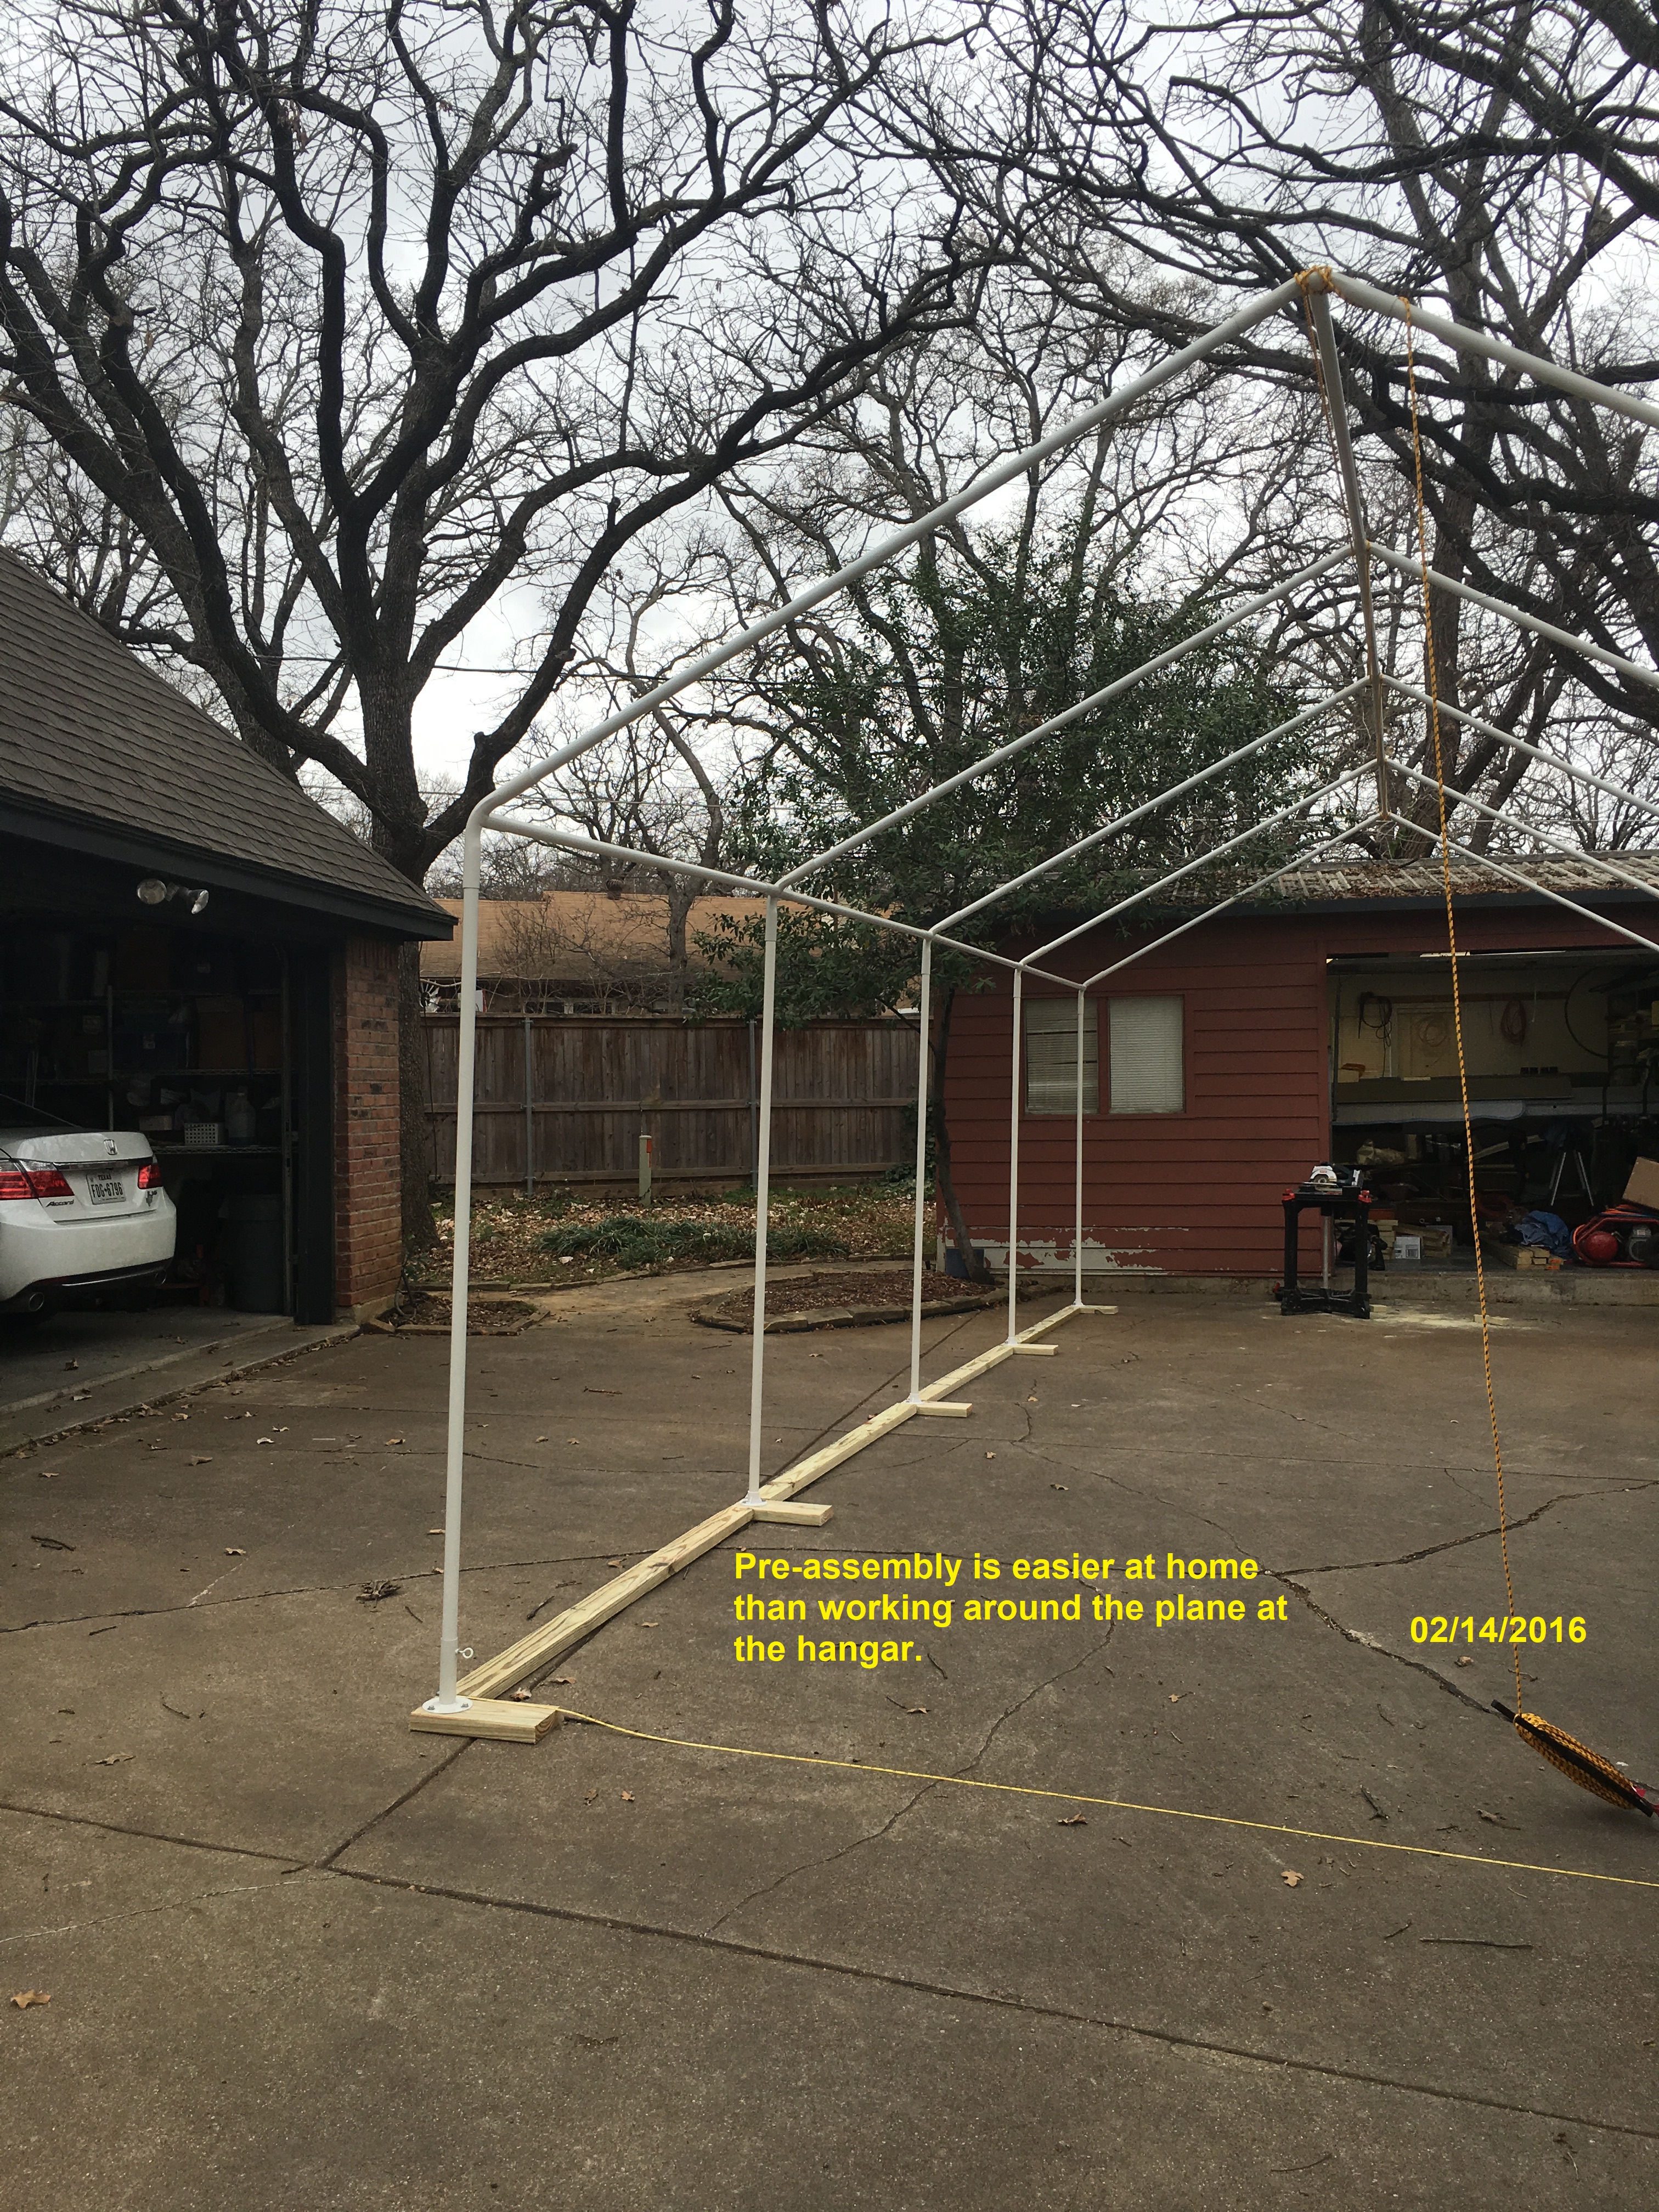 |
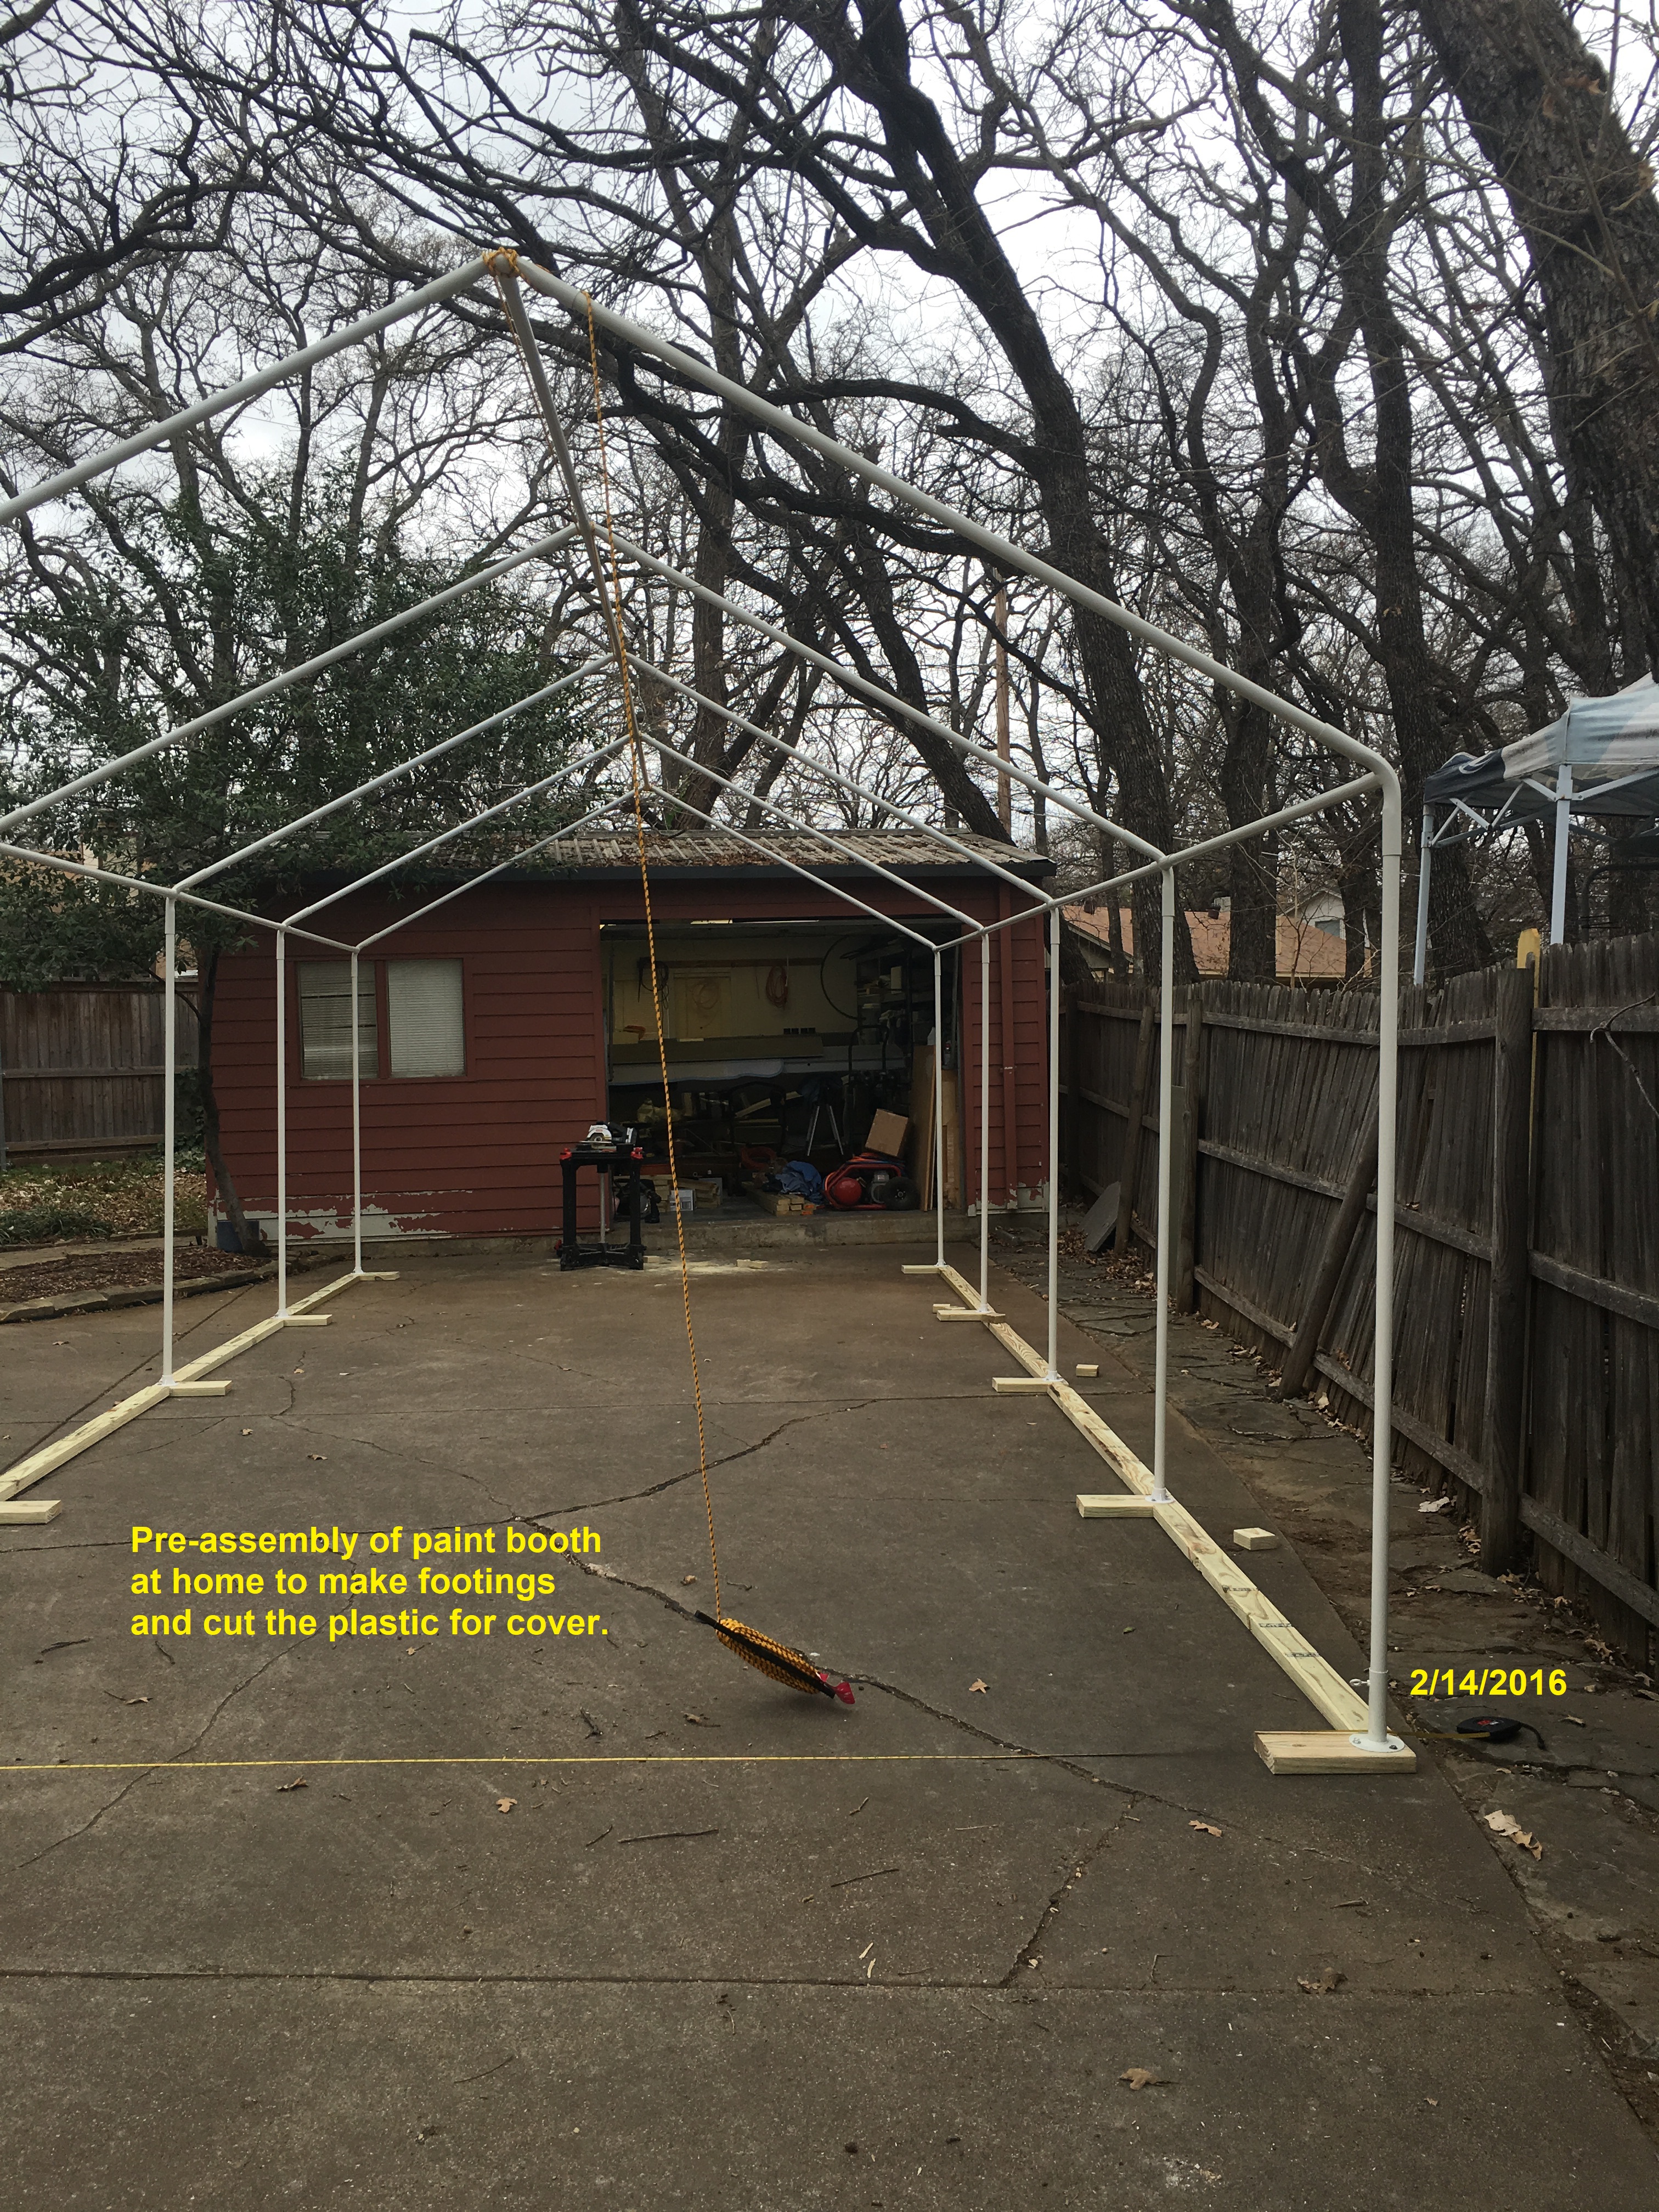
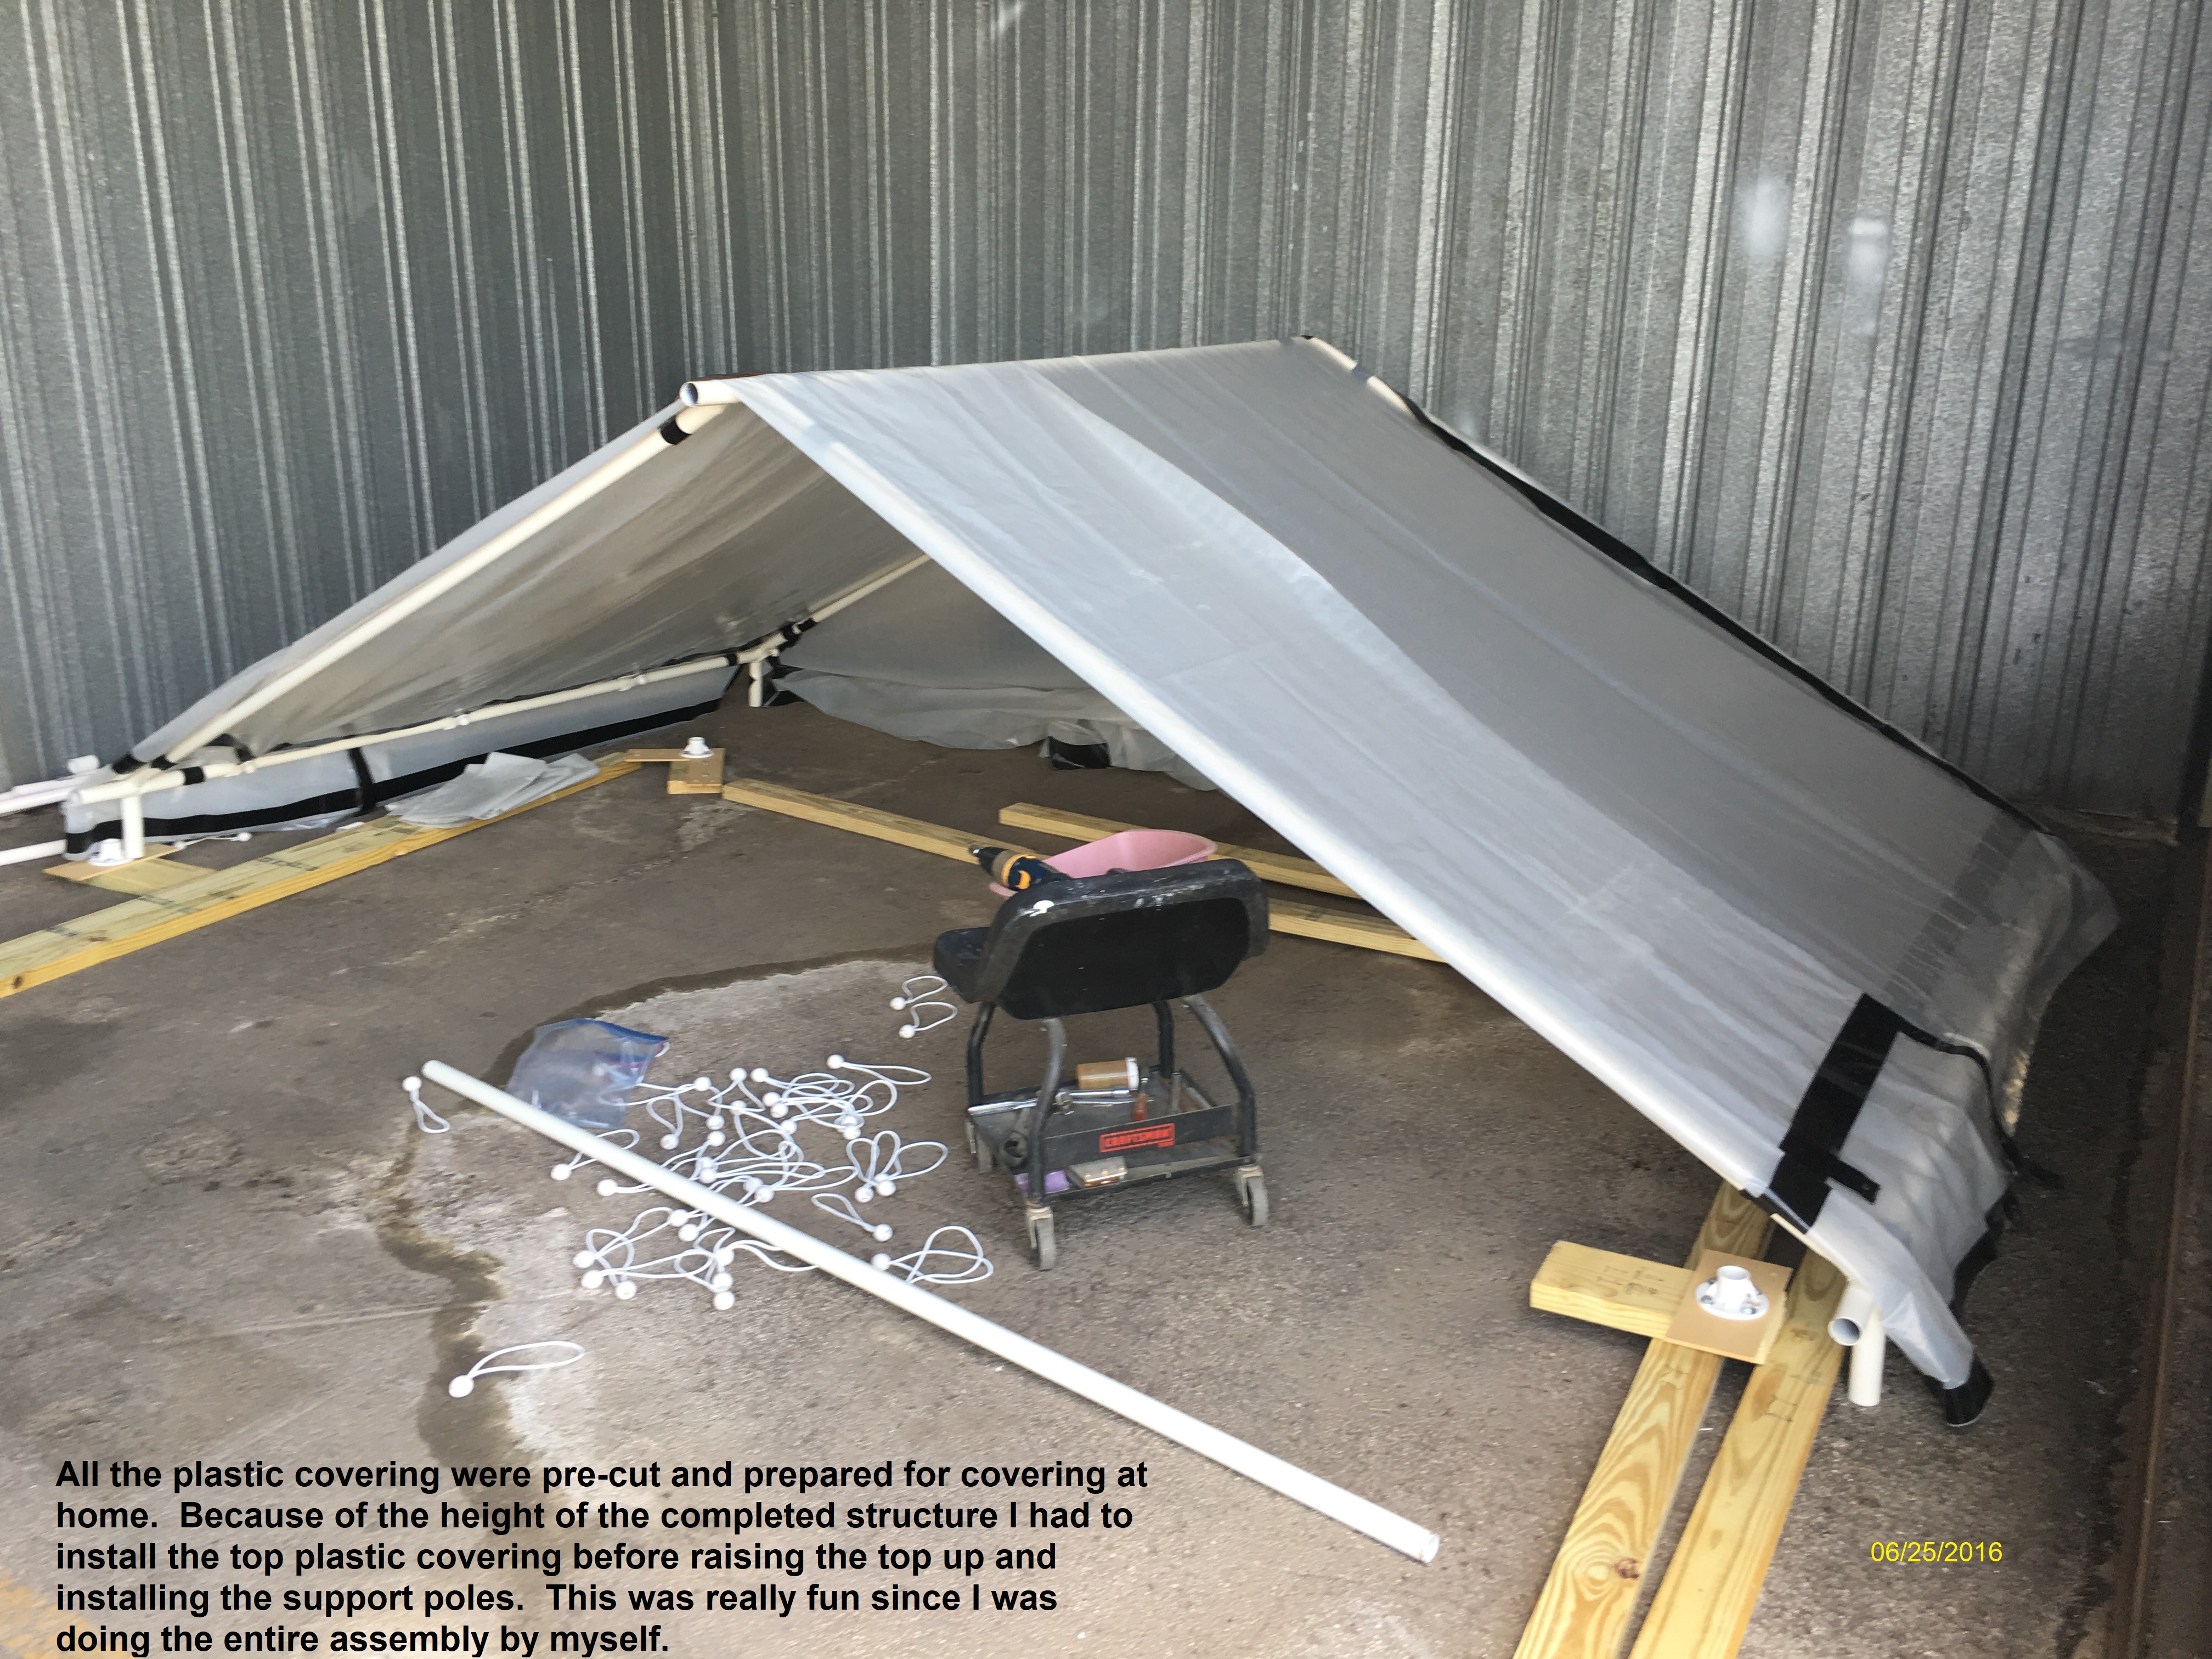
I did a full pre-assembly of the
paint booth in my driveway at home where I could put everything
together and build the bottom support plates needed. I also cut
and fit all of the plastic panels that would be needed for the top,
ends, and sides. All of the panels were fit to the structure,
taped with duct tape and added tie rings for holding the top and sides
flight. The idea was to have everything fully tested and ready
for an easy assembly at the hangar without any additional
fabrications. To that end, it was 95% on target. |
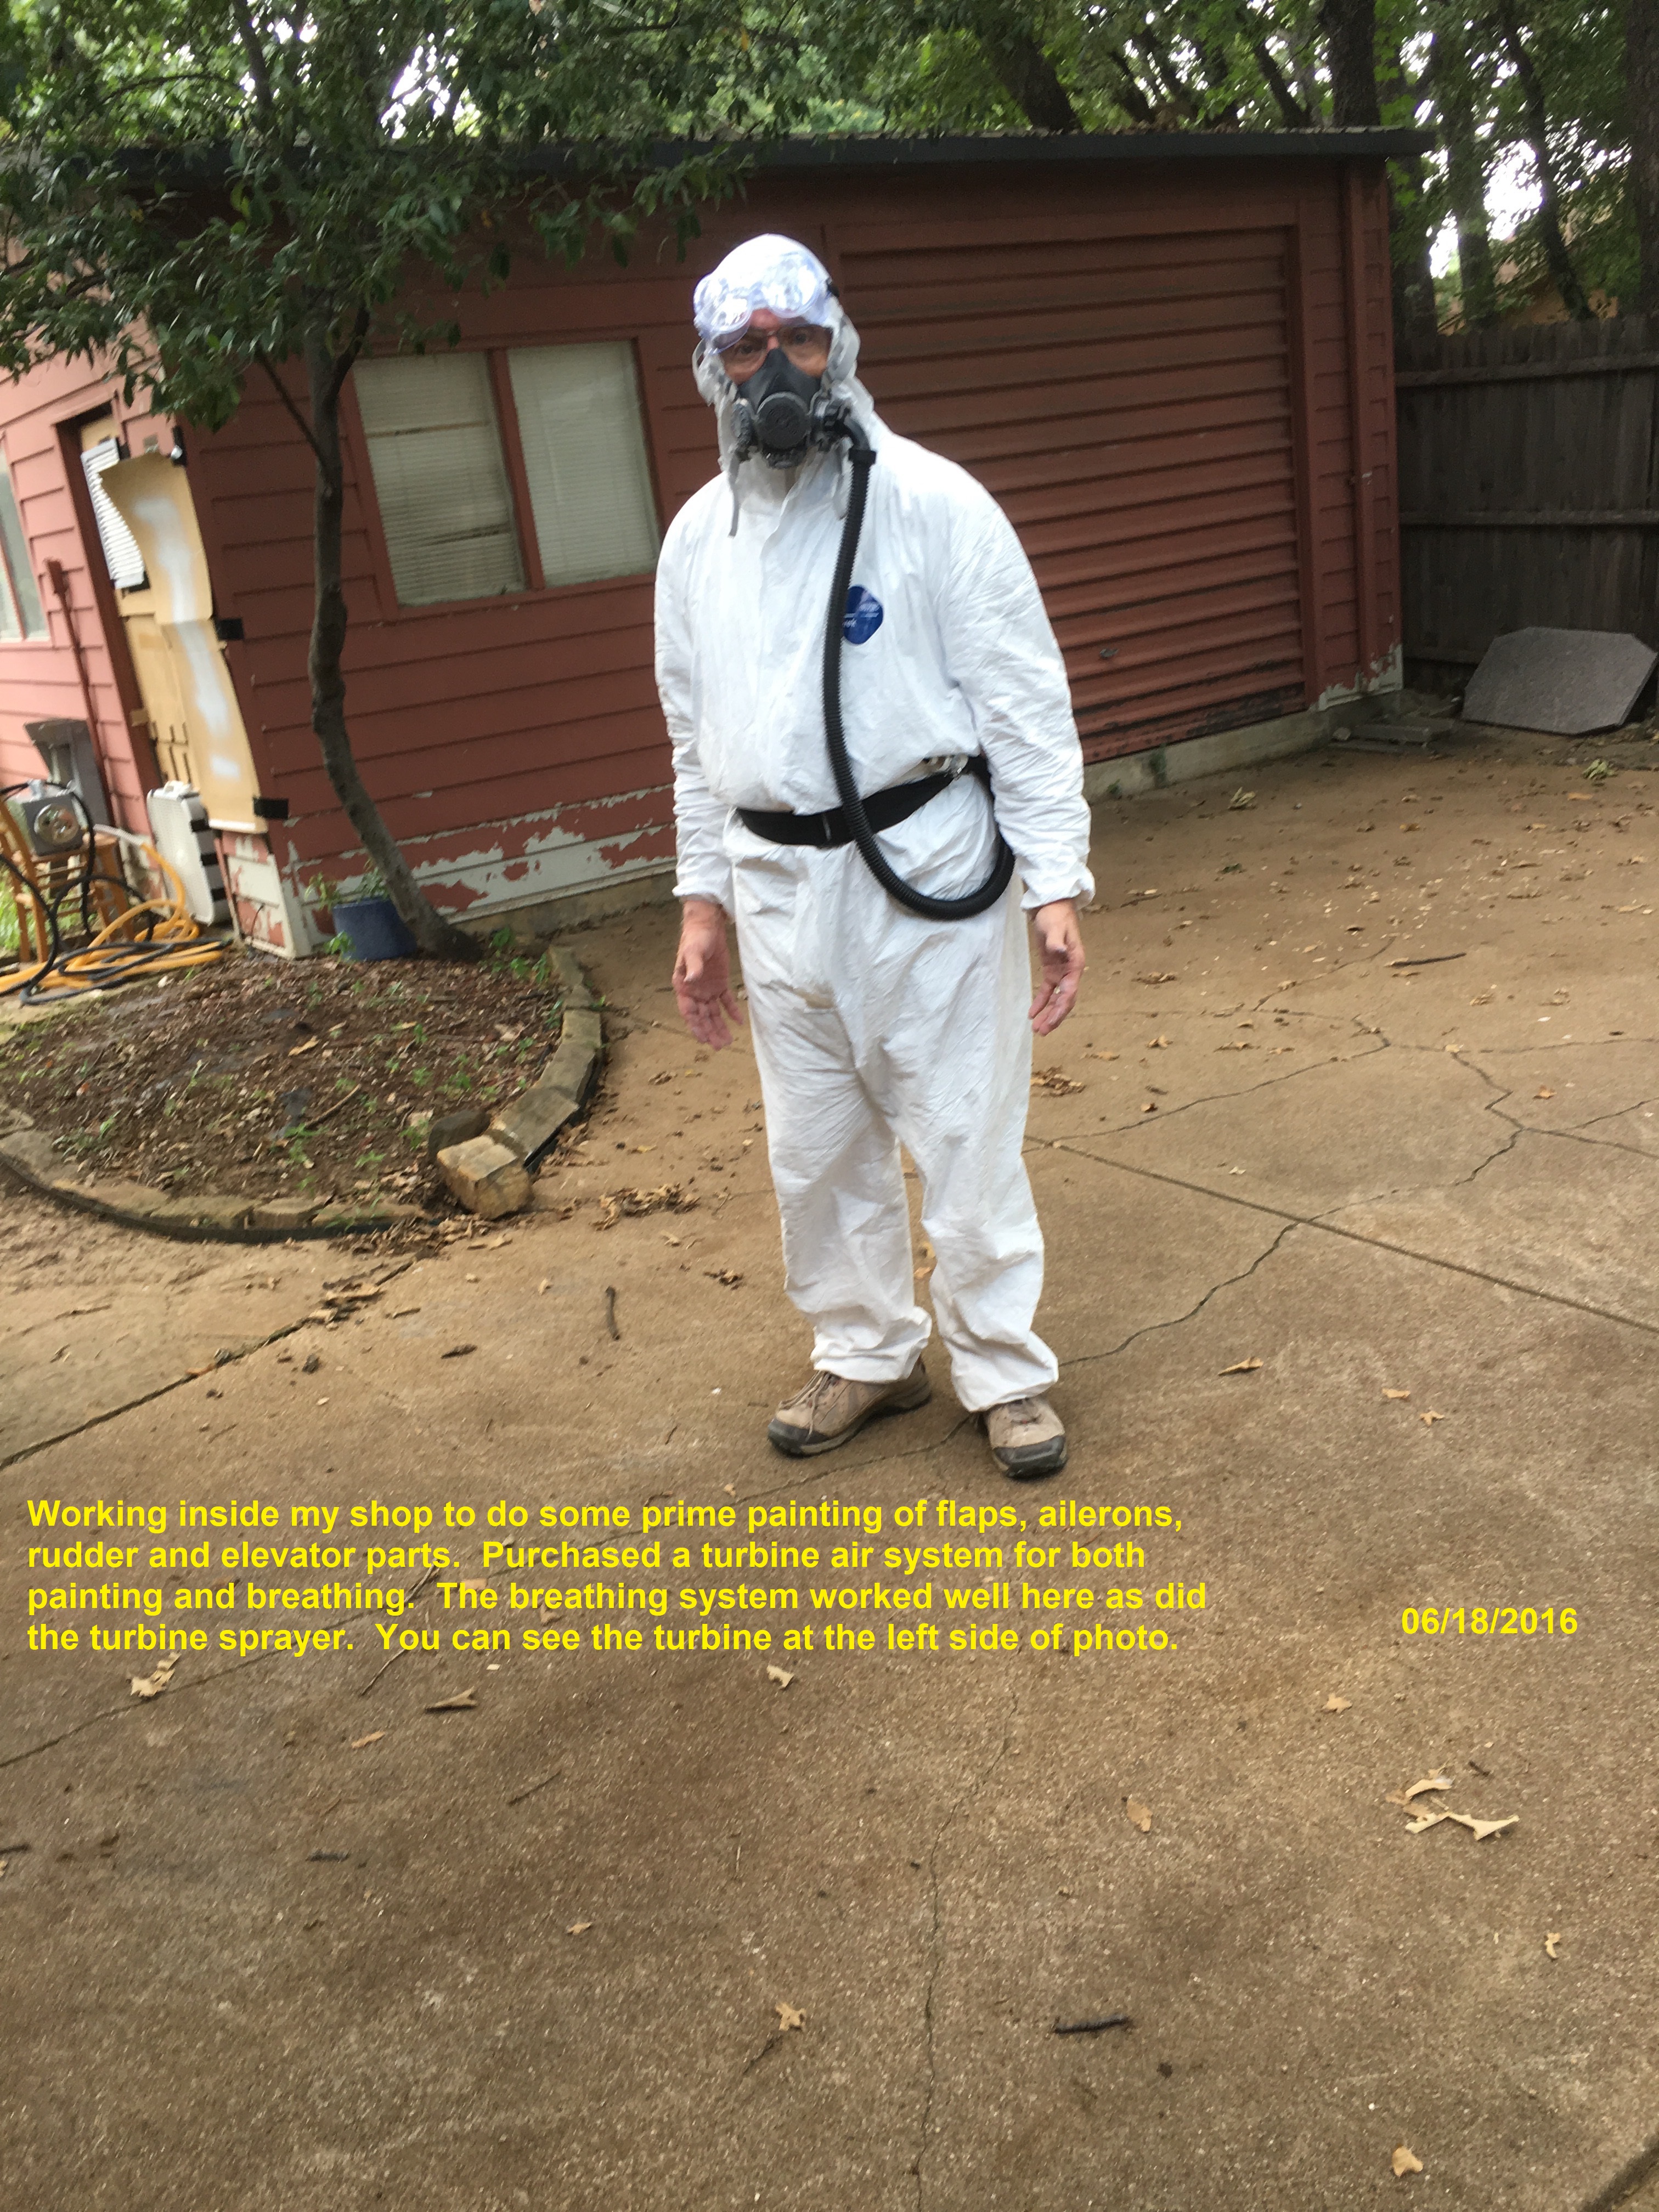 |
Along with the paint booth I
purchased a three stage turbine air spray paint system and a turbine
breathing air system. Between February and June I used the
turbine units to do some of the primer work using the System 3 Water
Based Primer and epoxy paint. One thing I would change if I ever have to work with a spray system again is to get the fresh air hood instead of the mask. The problem one encounters with the mask and goggles is overspray on the goggles and fog from your breath on the goggles. The fresh air hood would eliminate that for the most part. Also, I would try to put some fresh air into the overalls. One of the turbine units can be seen just outside of the door on the left side of the workshop. The turbine unit worked great in my shop and some work I did outside of my garage. It put out a very uniform and easily controlable pattern. I wish I could say the same thing when I tried to use it at the hangar. I can't blame the turbine unit though, it has to have a good source of power and that is NOT available at the hangar. |
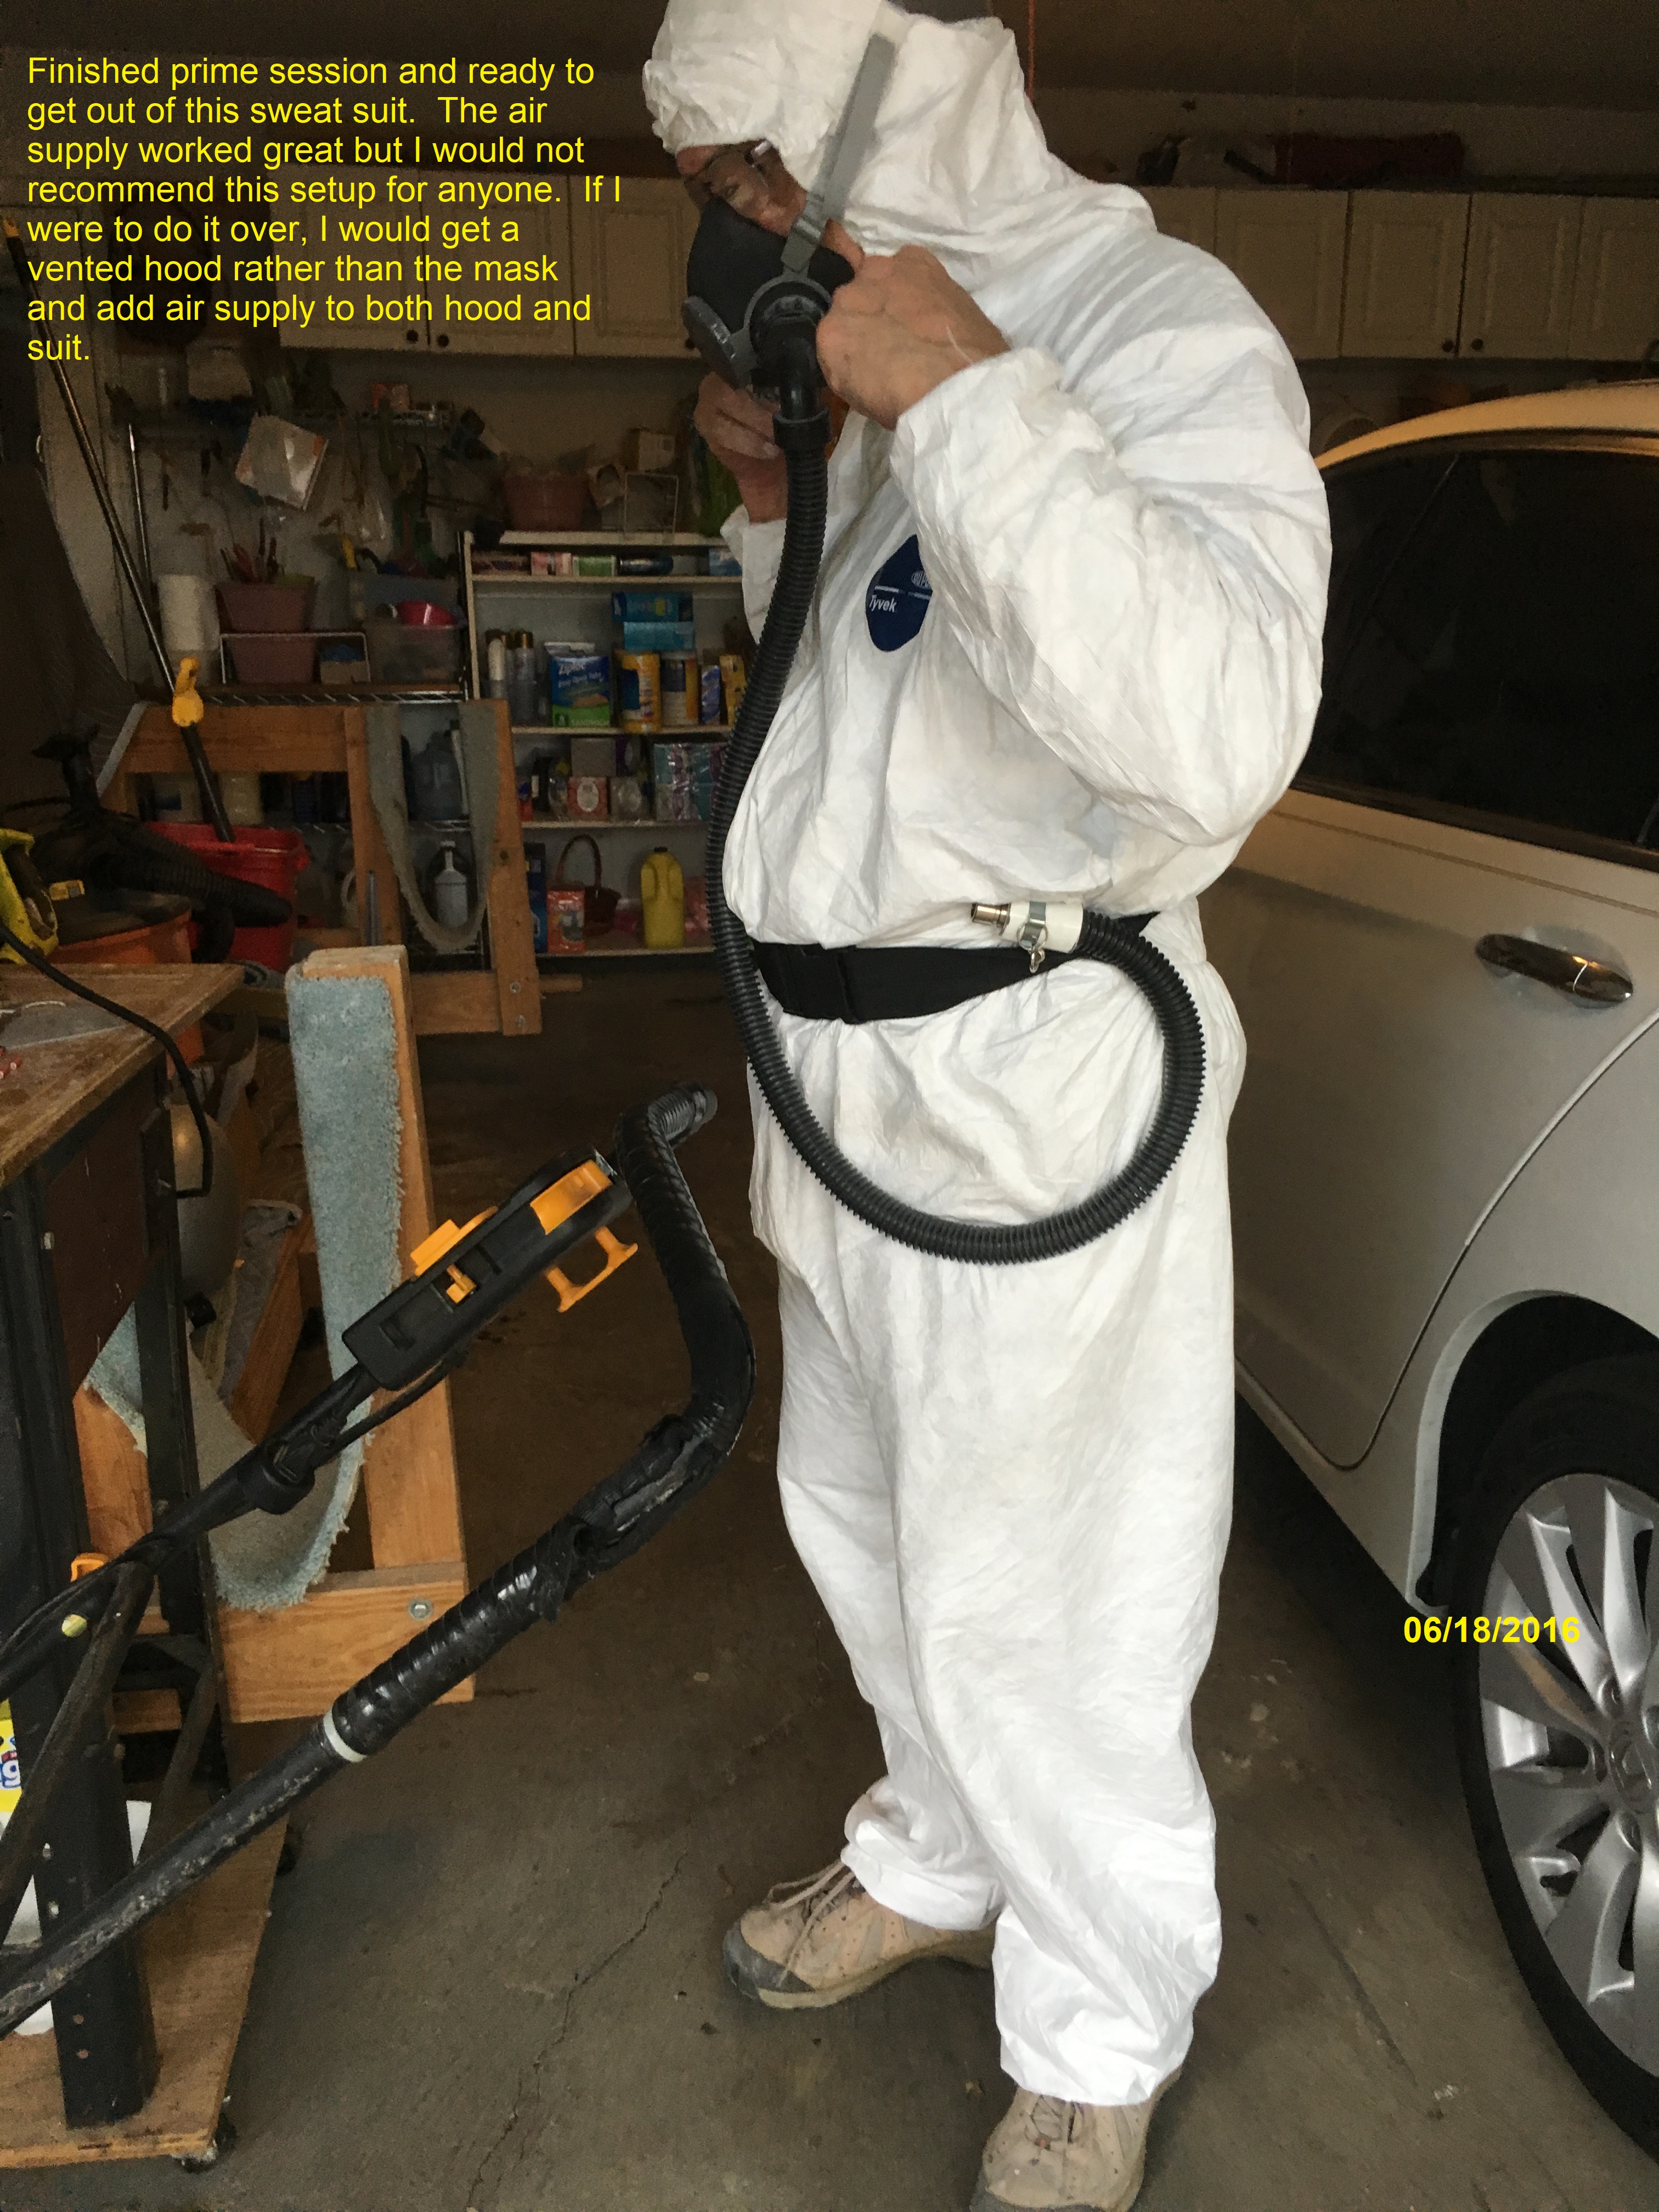 |
These overalls are great for
protection from the overspray and the fresh air system is a
lifesaver. However, in the summer heat of Dallas the overalls are
nothing short of a sauna chamber and withing a few minutes of putting
it on, you will be pouring sweat. A better alternative would be a full body suit and hood with the fresh air going into the back of a hood and then feeding down into the rest of the suit. |
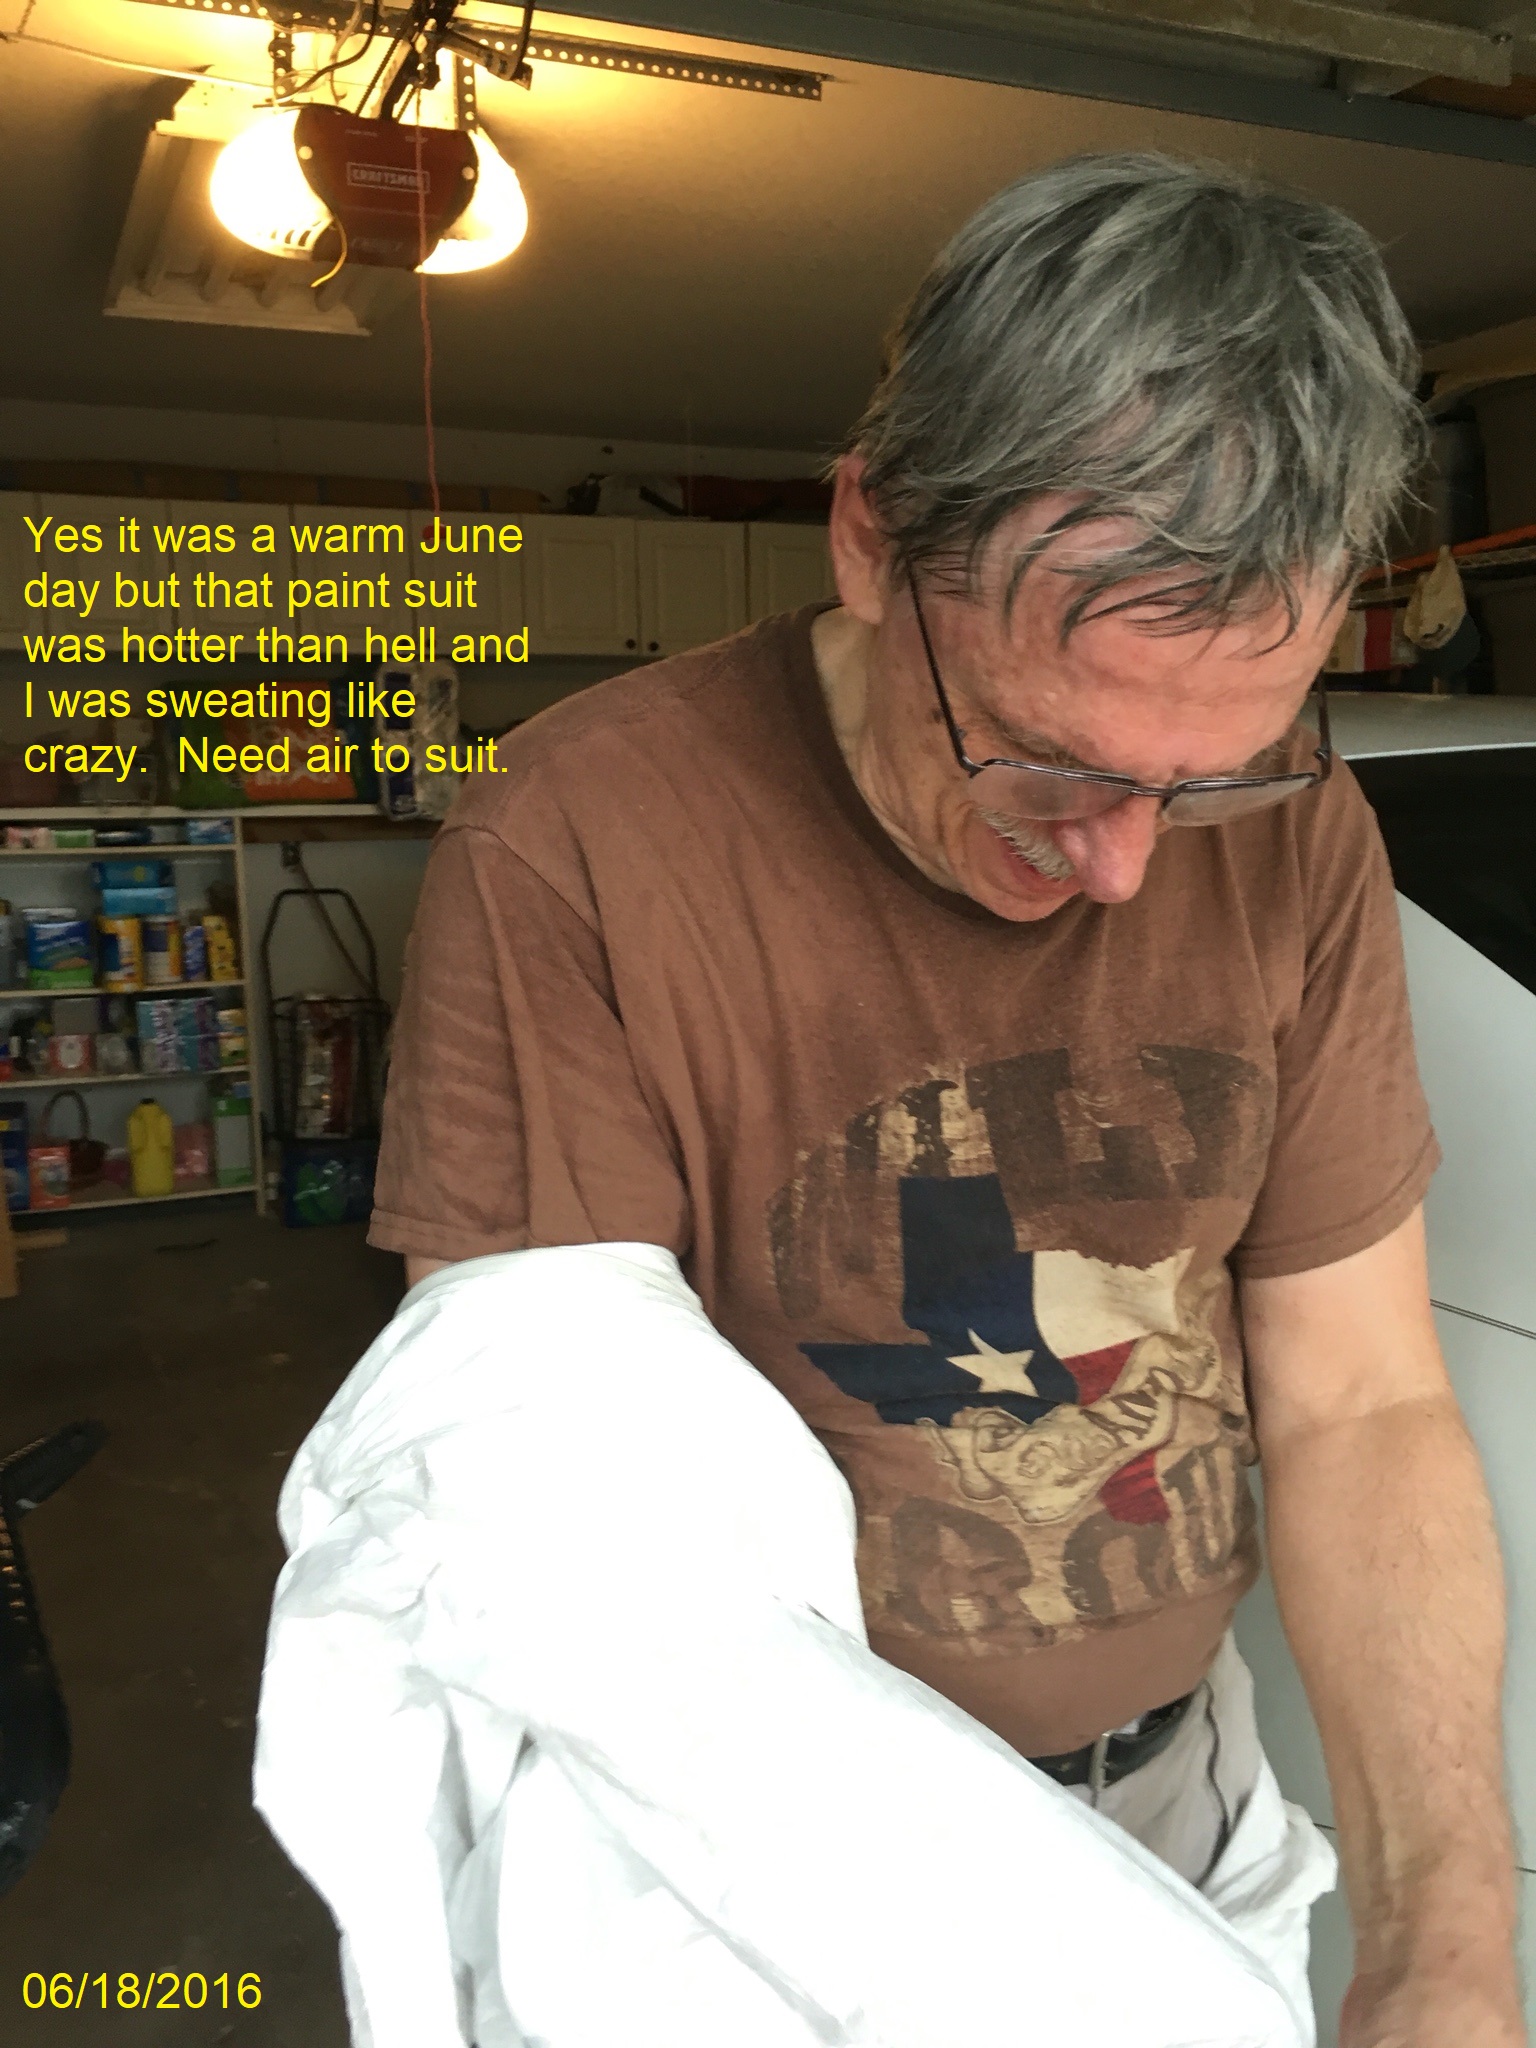 |
My hair was soaked as were my
clothes. I couldn't wait to get out of that thing. It
serves the purpose intended but you will pay a price. |
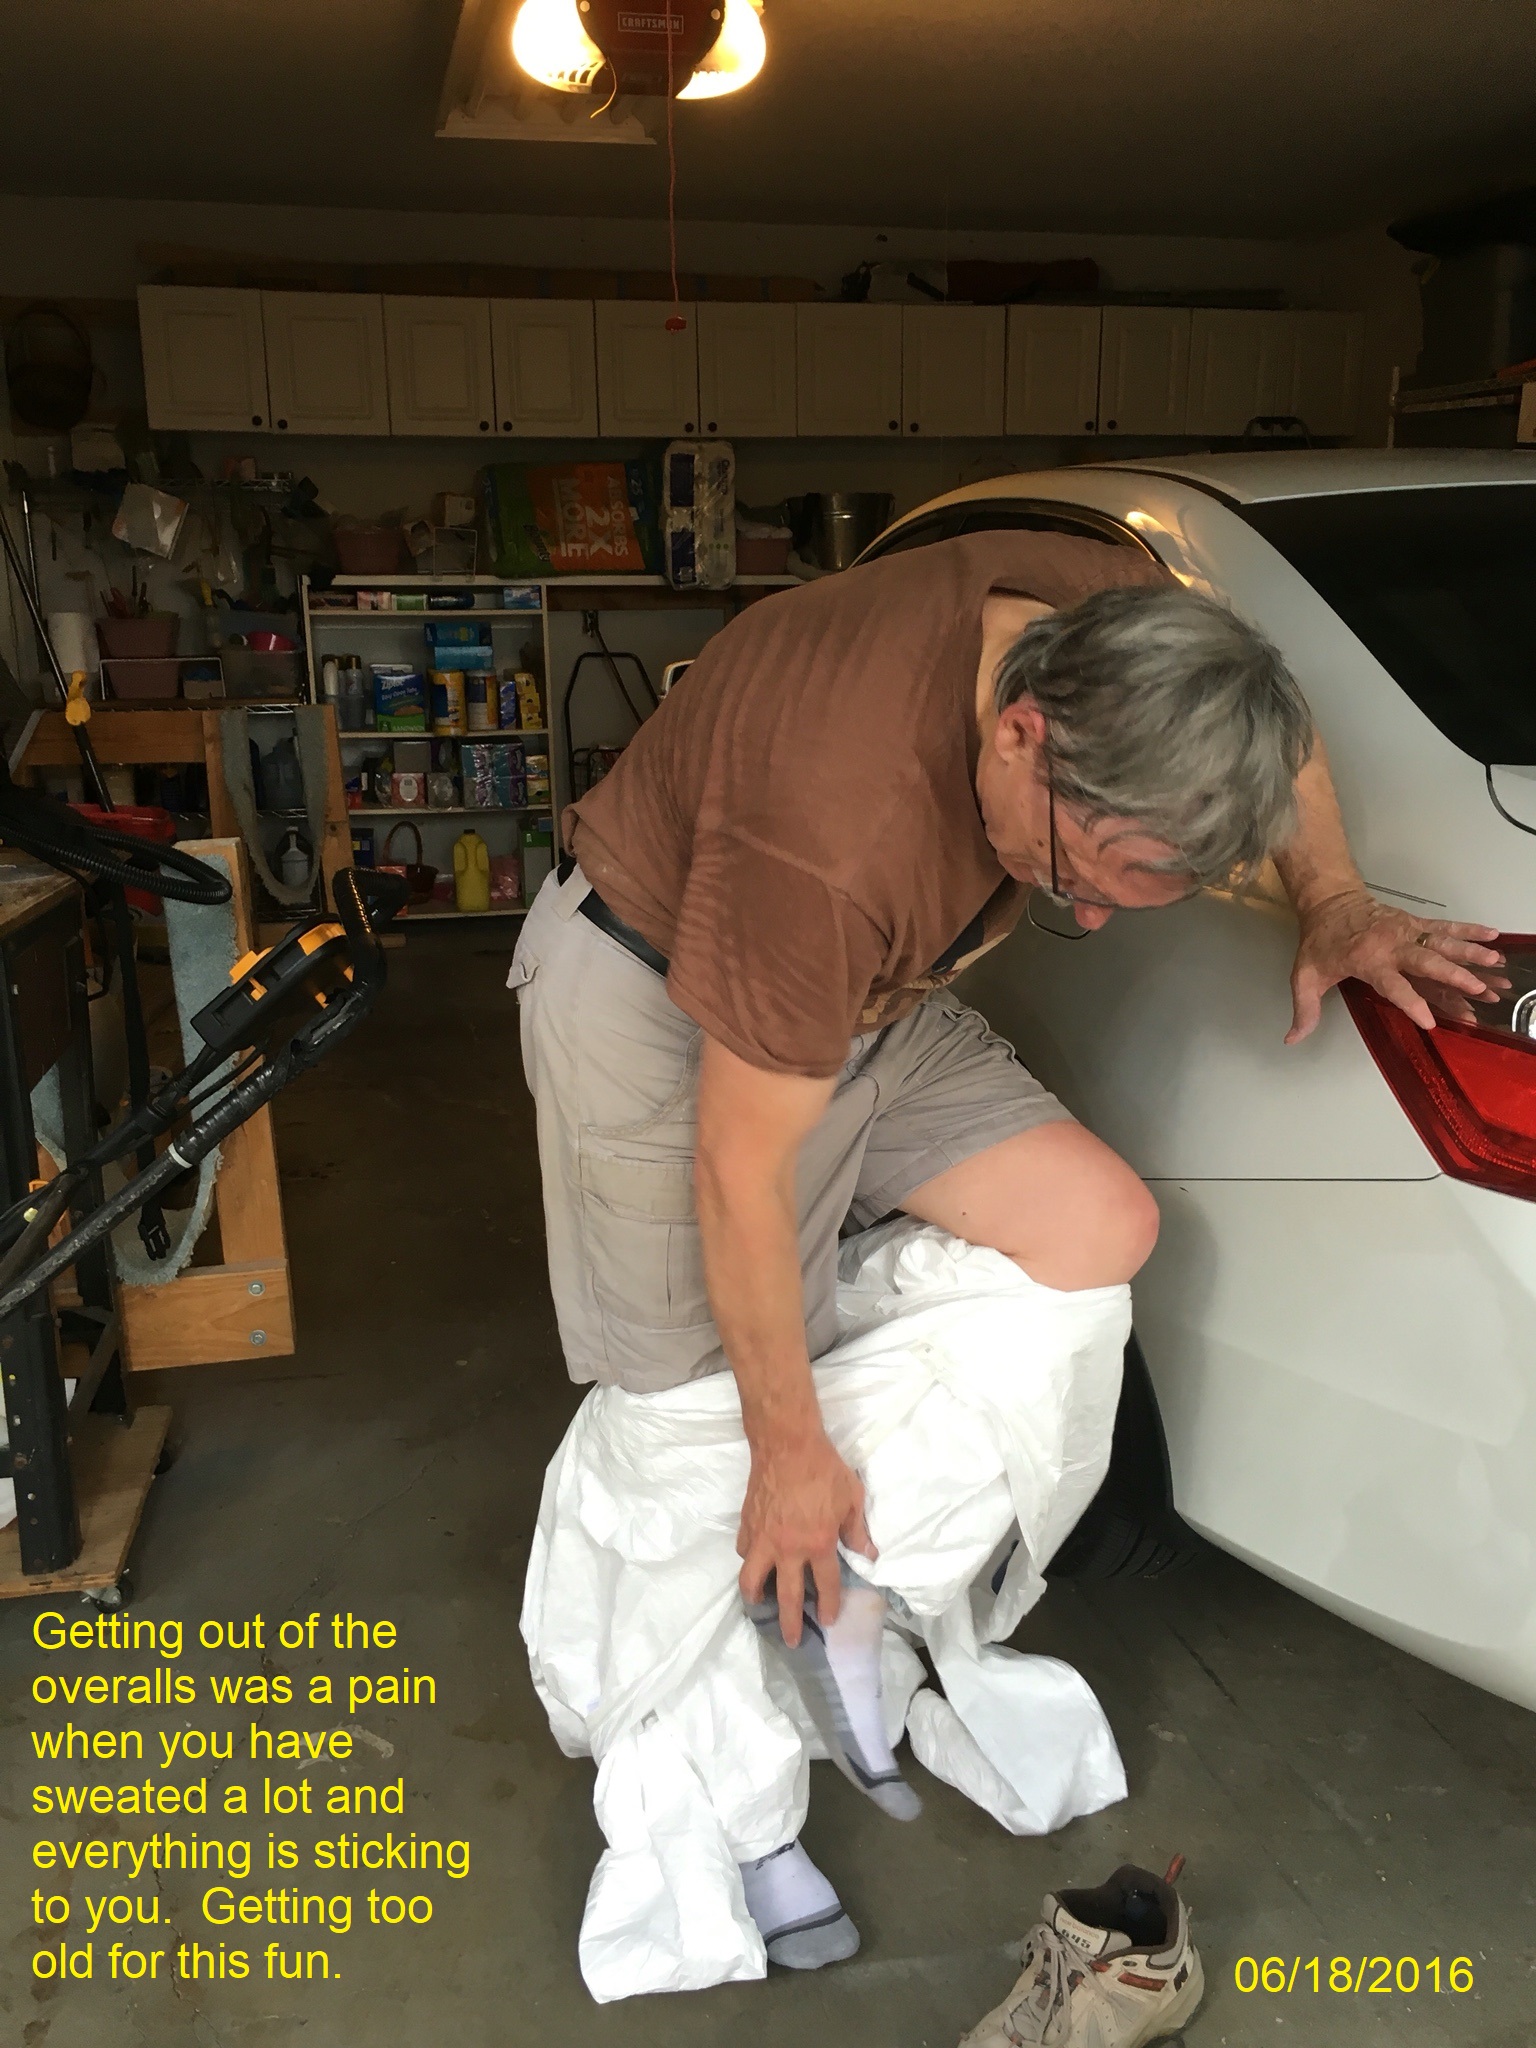 |
Still trying to get out of that
suit and my wife was having fun watching me struggle to get out of
it. It was sticking to me because of the sweat. I was not
singing any praises at this point. |
 |
Finally
moved all of the paint
booth and supplies to the hangar to begin the assembly process and the
finish coat process. |
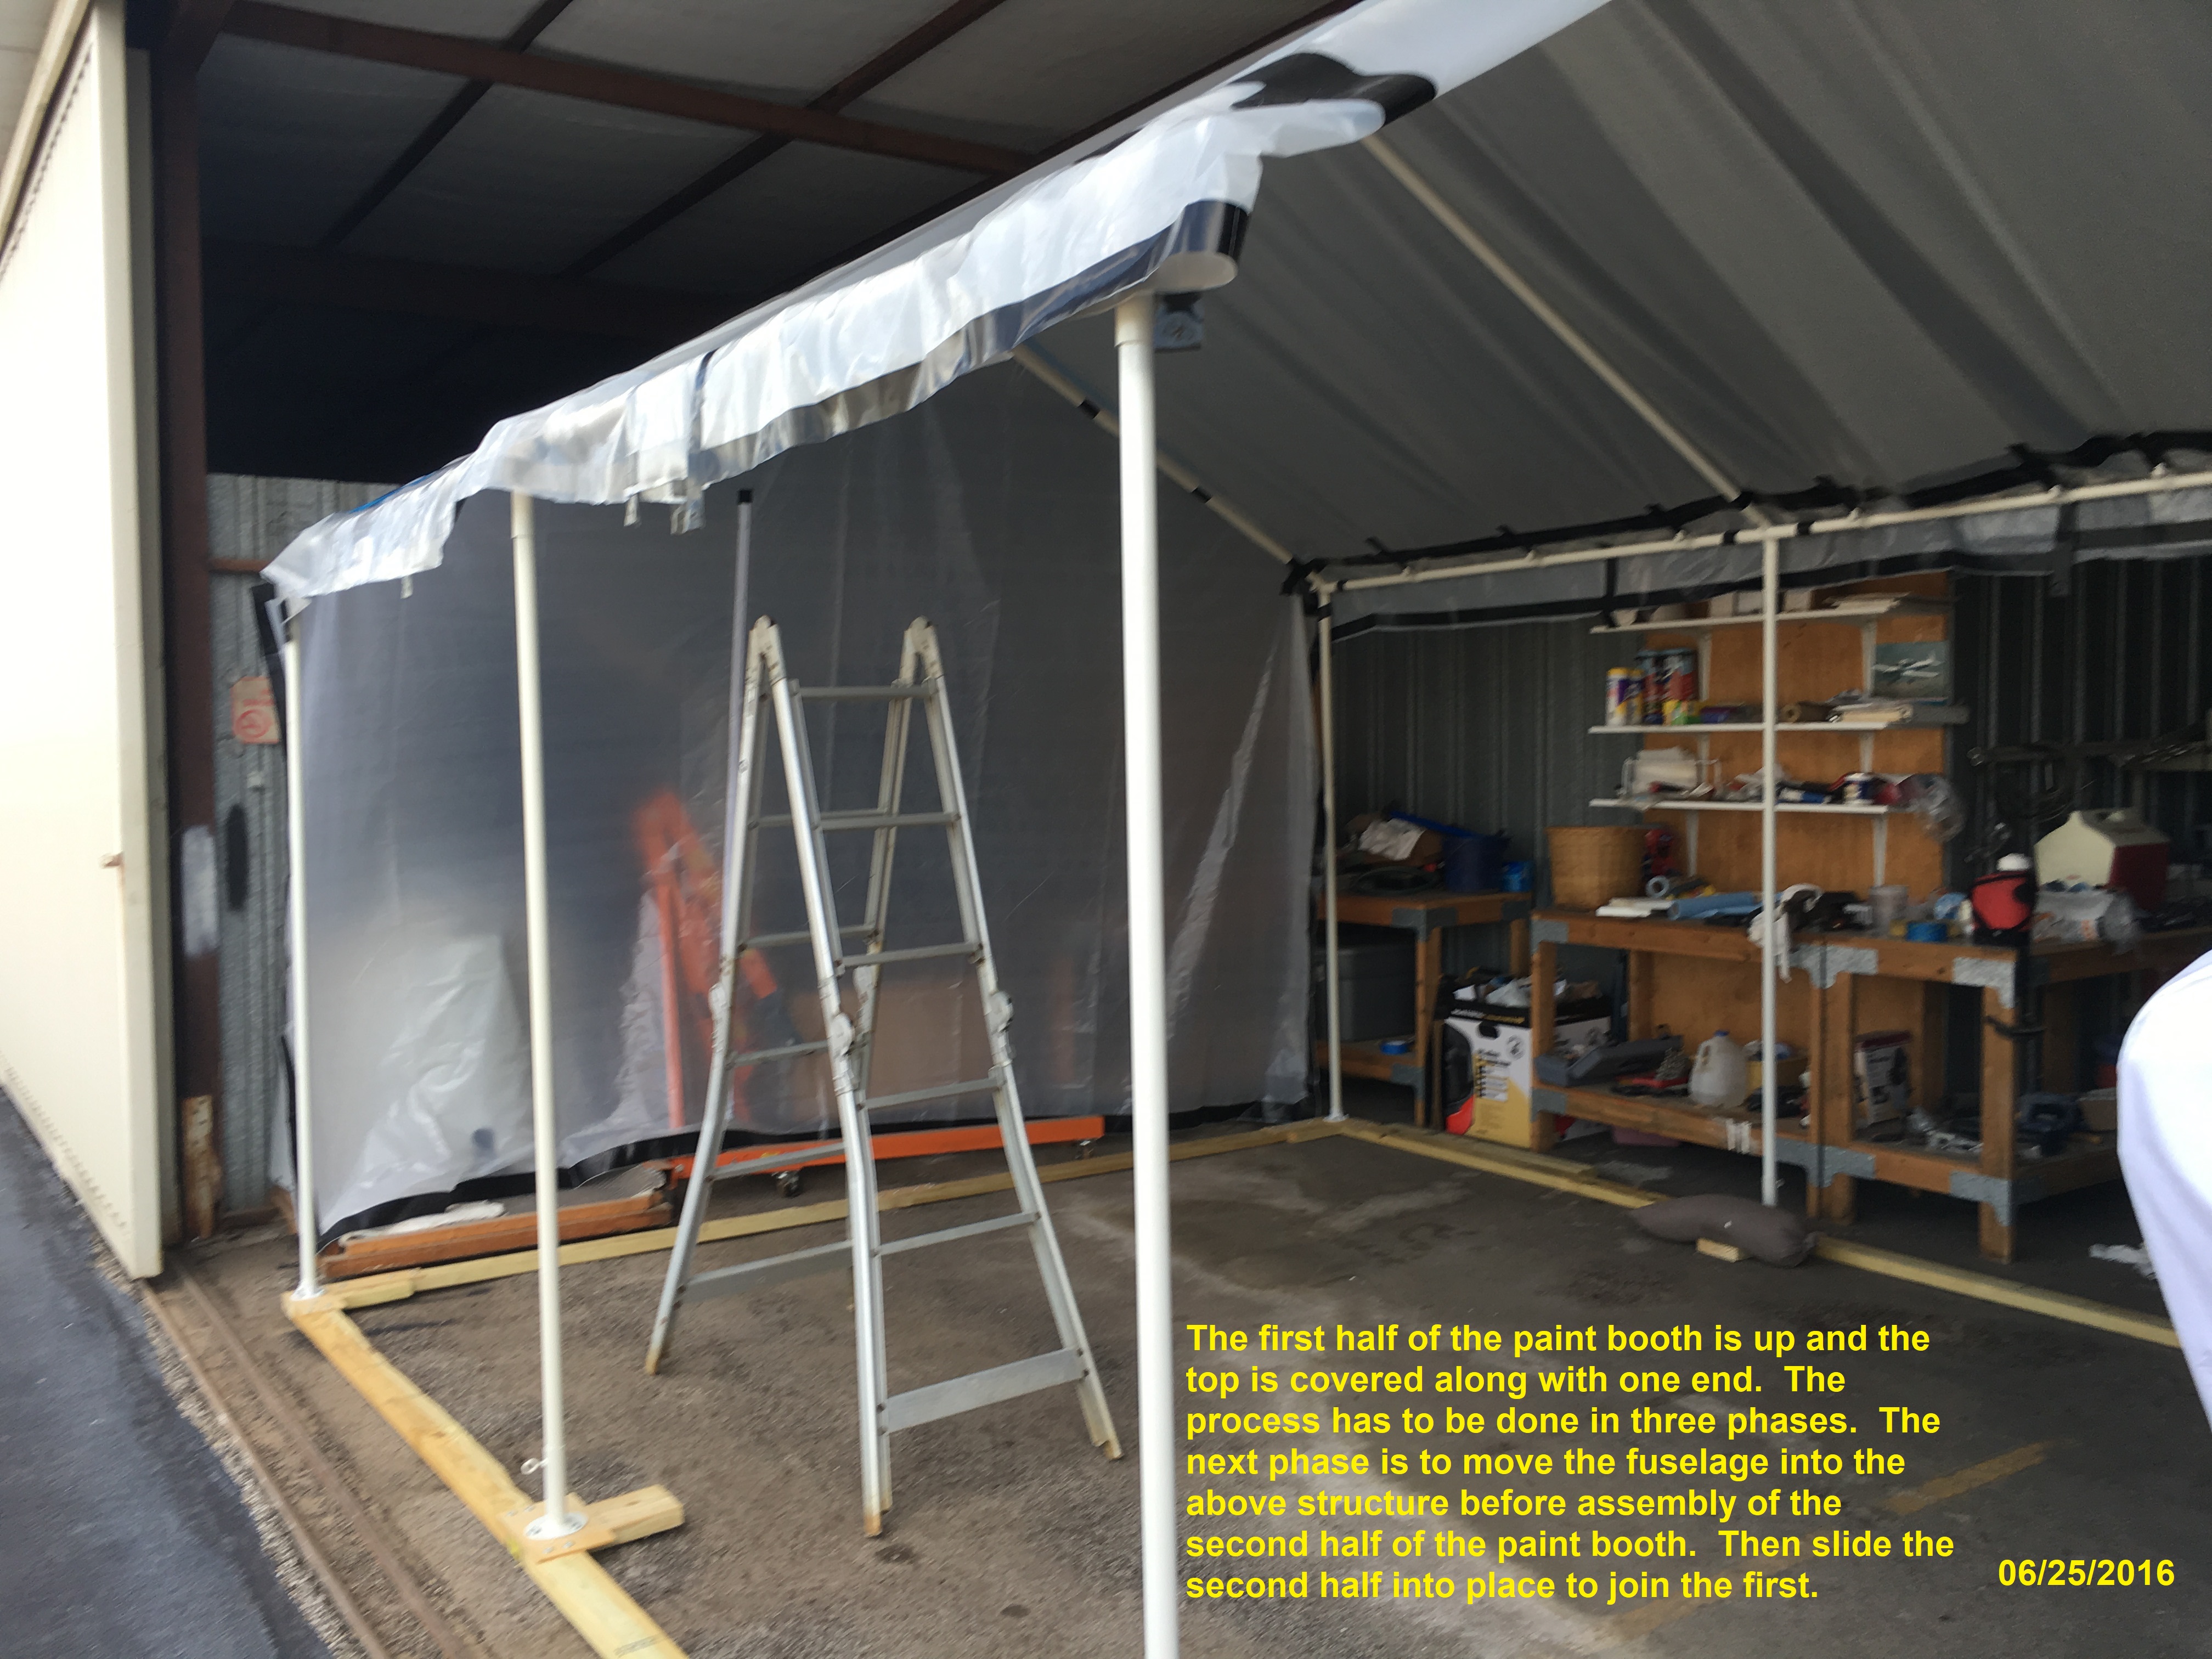 |
Working on this process alone was interesting but having already done a pre-assembly at home the process was straight forward. The eprocess was slightly different since the unit had to be assembled as two separate units. The fuselage had to be move out of the hangar and one end of the paint booth assembled. The fuselage was then moved into that secton as far forward as possible. |
 |
The second half of the structure
was assembled behind the plane and then the section was slid into place
and joined to the front section. There wasn't that much room at both
ends of the fuselage and the top section had to be assembled then
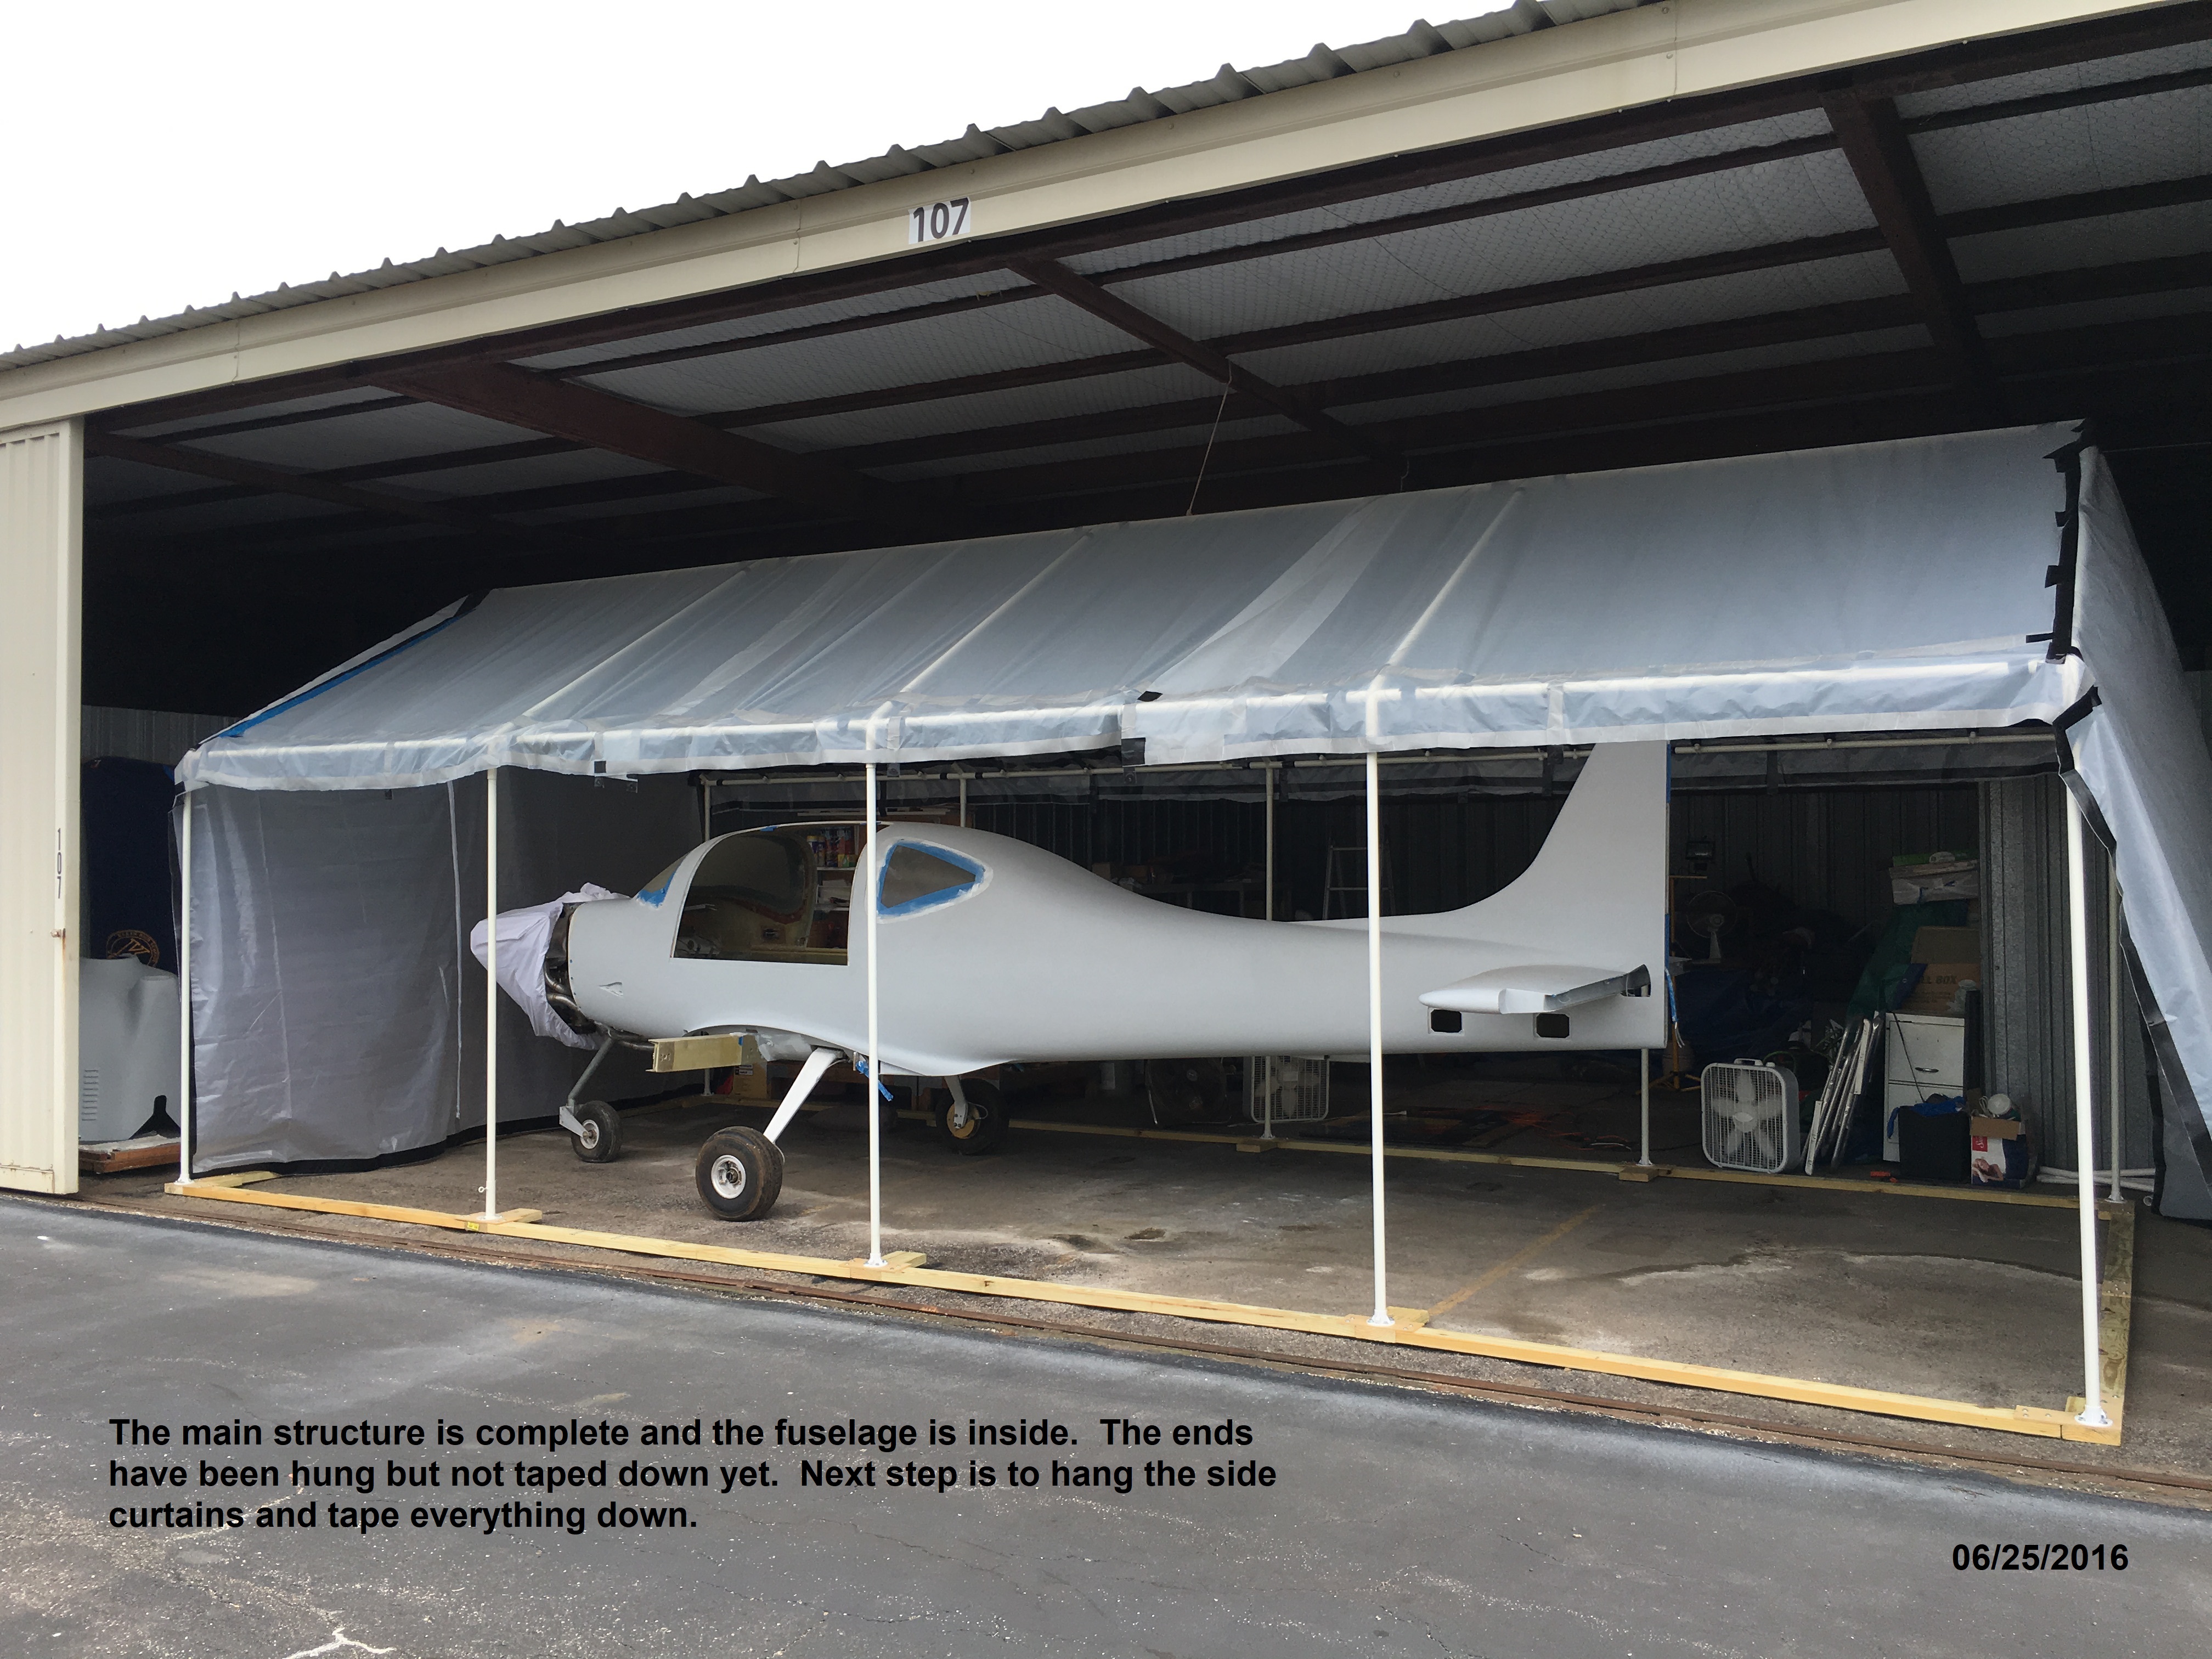
raised with the side poles one side at a time. Once the framework is up, the side curtains will be installed and the seams sealed with tape. |
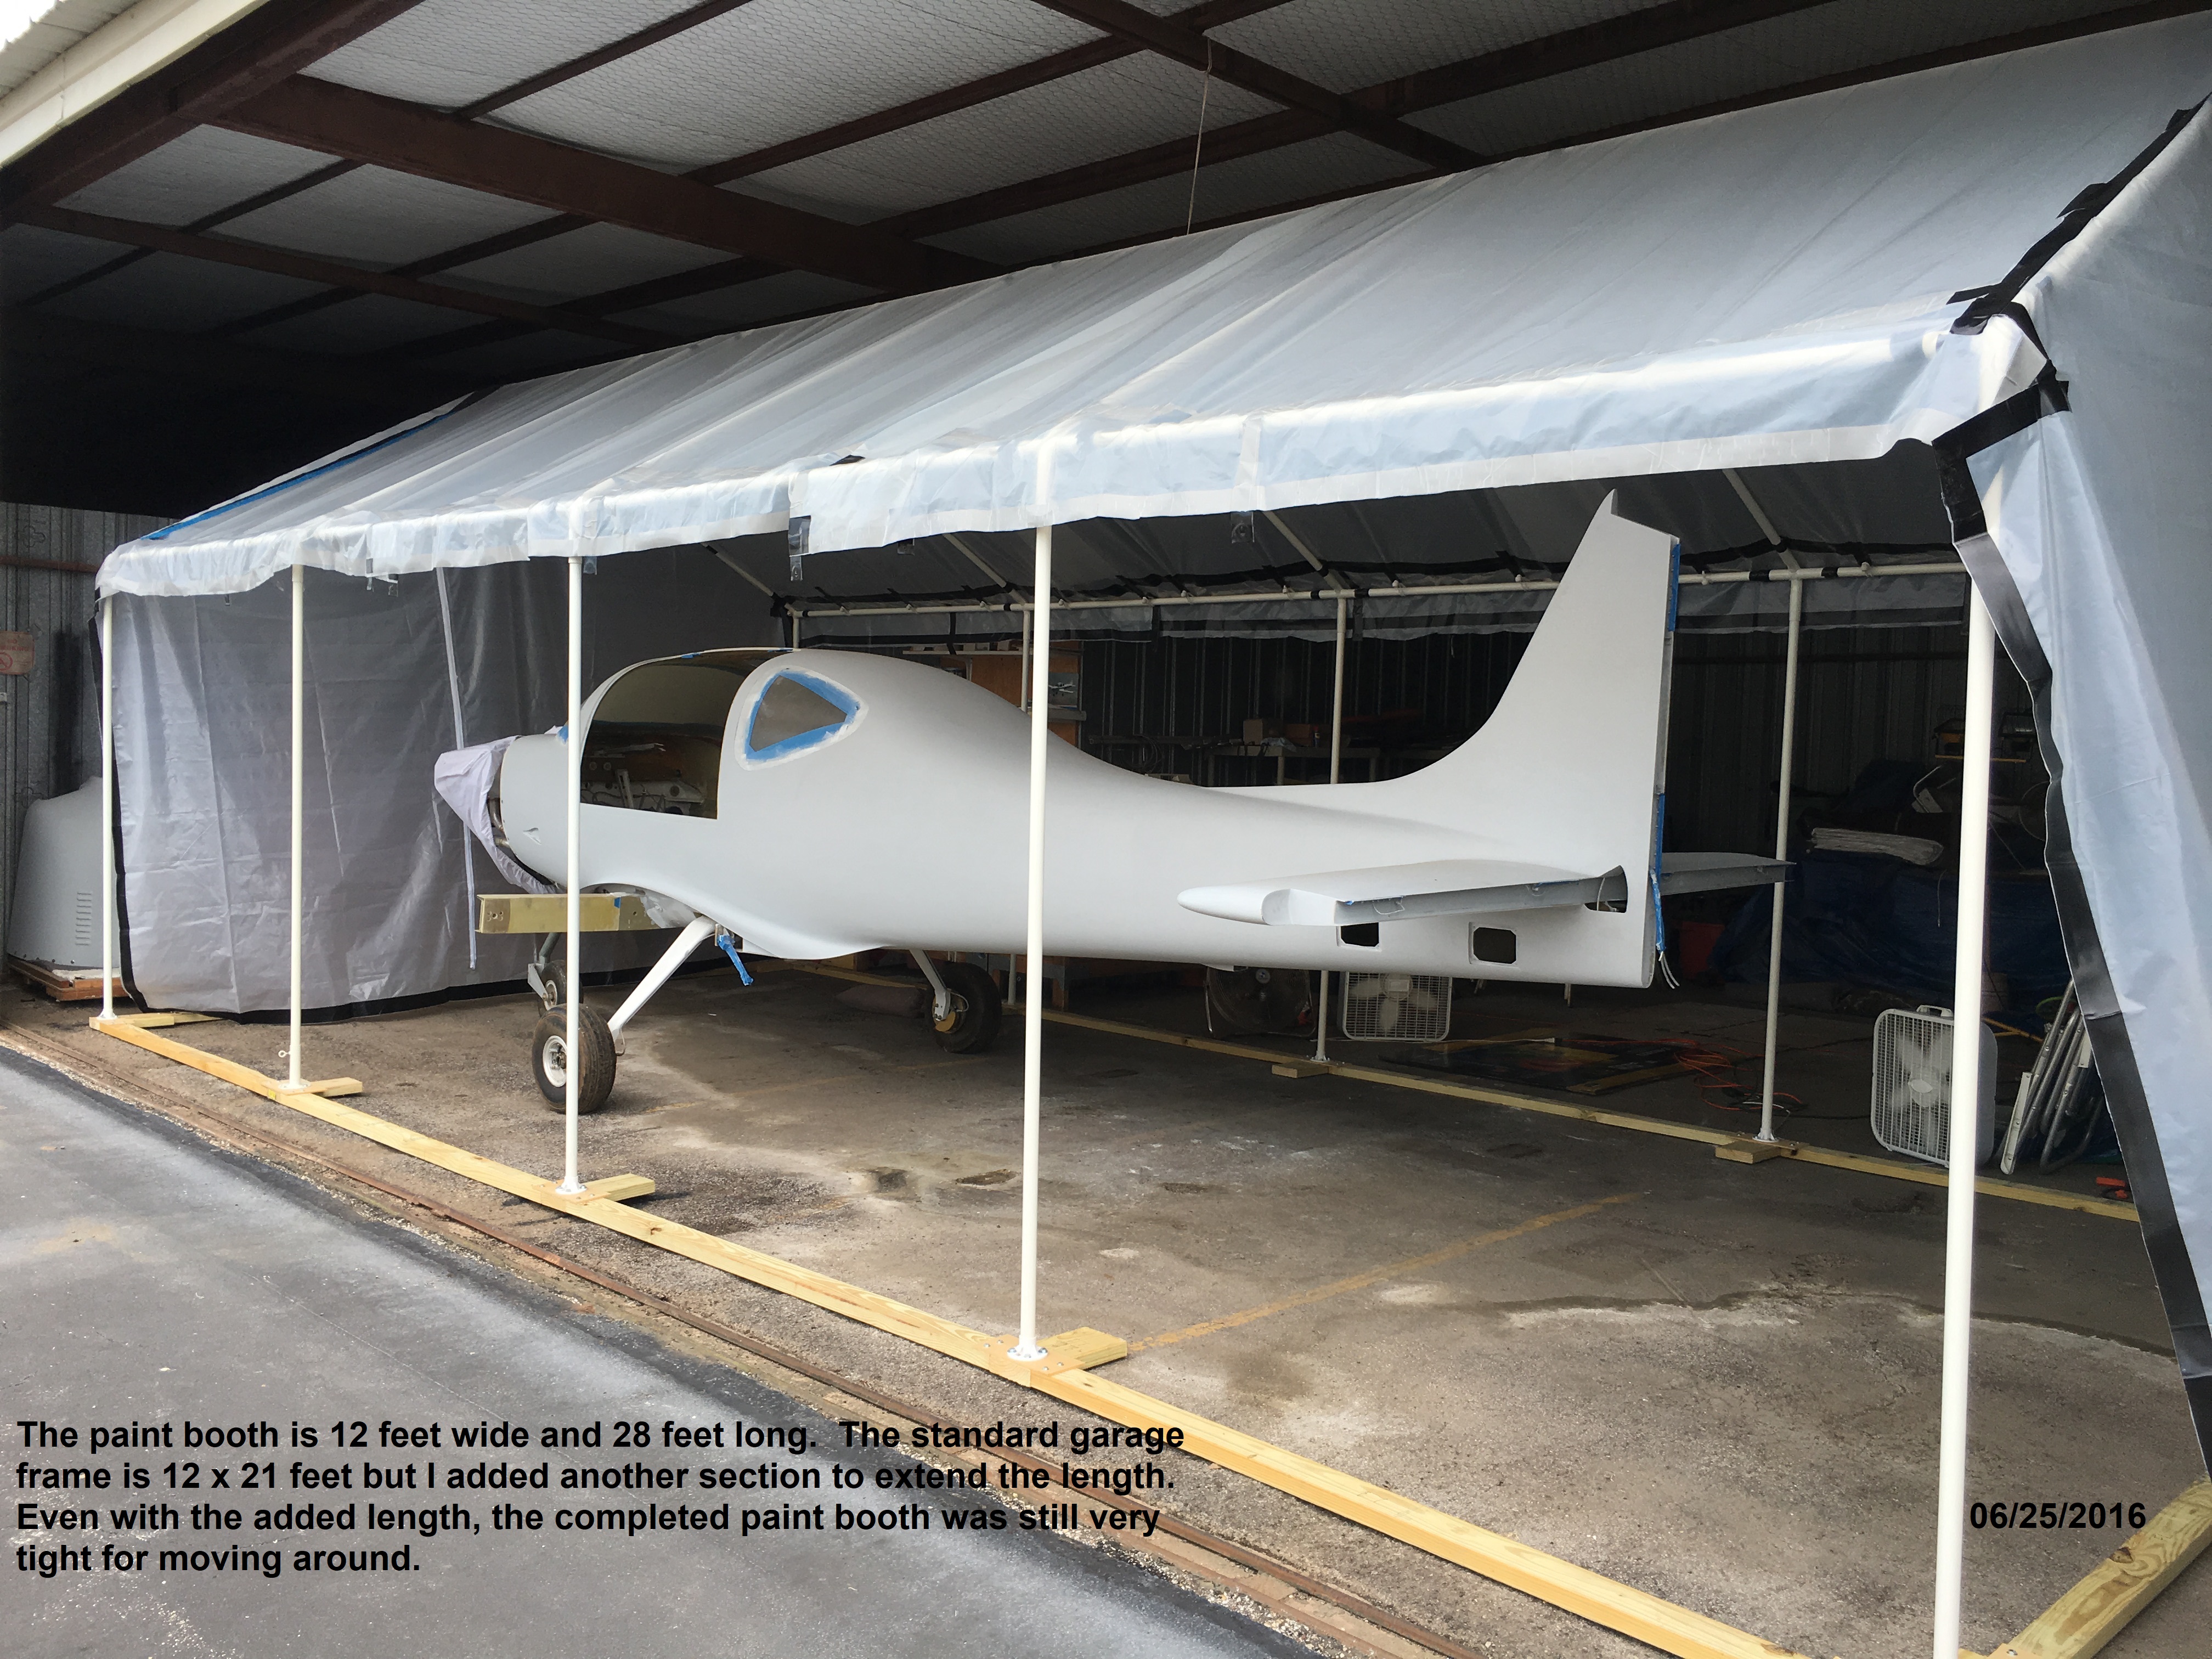 |
The
completed paint booth is 12
feet wide and 28 feet long. That gave good clearance around the
sides and back of the fuselage for painting. The fuselage has already been primed using the System 3 primer and sanded but needs one more coat of primer before the final color coats. This primer had been on too long and needed to be refreshed. |
| Continued on the Next Page |
|