 |
|
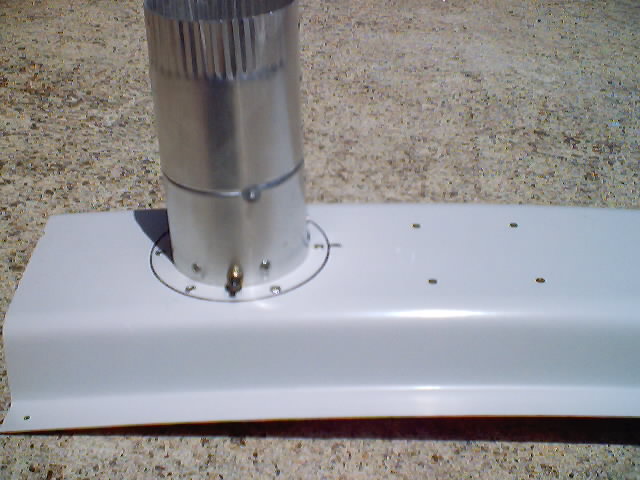
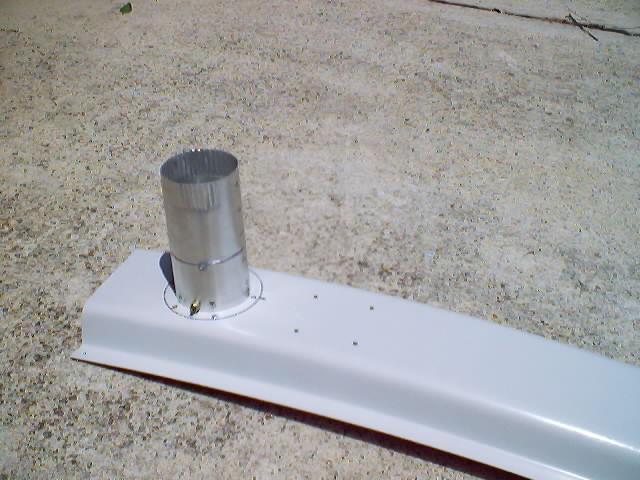
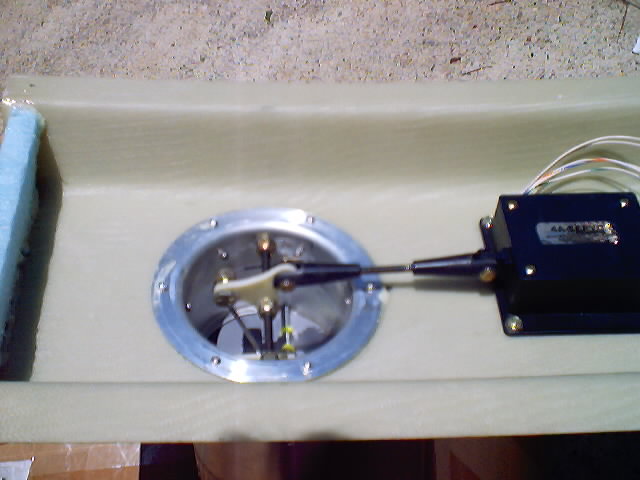
| The photos above and below show the connection of an aluminum tube (3") to the console which contains the valve for closing off the air from the inlet in the vertical stabilizer. I used a very inexpensive damper valve that I obtained from McMaster-Carr. The original unit had a free floating one way valve which I replaced with one I fabricated from some scrap left over from the instrument panel. I fabricated a control horn on it for attaching a stiff wire to use in opening and closing the valve. I used the shaft from the original flapper valve and bonded it into place once installed to provide the pivot point. | |
 |
|
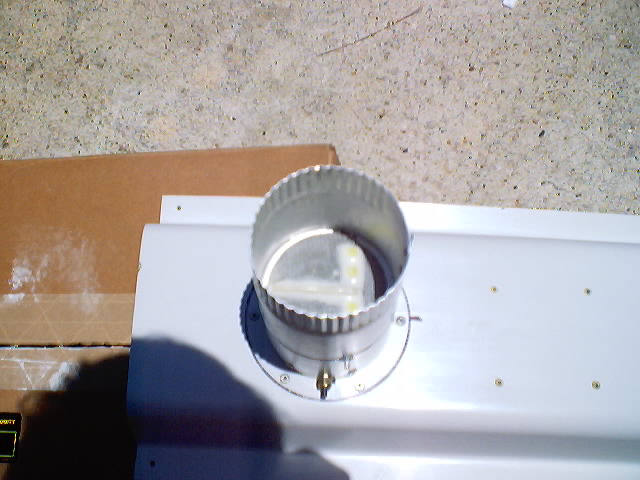
| The tube is attached by pop rivets to a 3" aluminum flange I obtained from Aircraft Spruce. The flange is mounted from the inside of the console with pop rivets as well. I placed a second pivot shaft for mounting a pivot control arm as near the opening to the console as possible. I used the scrap from the servo control arm to fabricate this shaft. I constructed a control arm from scrap 1/8" glass scrap and mounted it on the shaft. It is locked in place by self locking nuts on either side which results in the whole shaft turning instead of the arm wearing on the threaded shaft. I used self locking nuts and washers on both the inside and outside to keep everything snug and tight while still giving free rotation. The servo was a spare which I bought at the flymarket at Oshkosh. | |
 |
|
 |
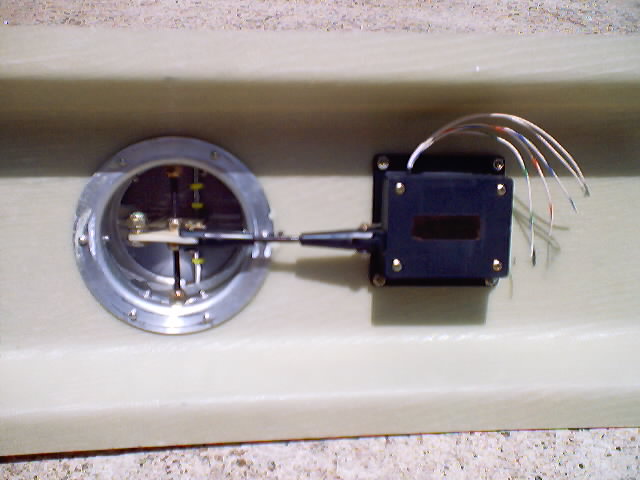
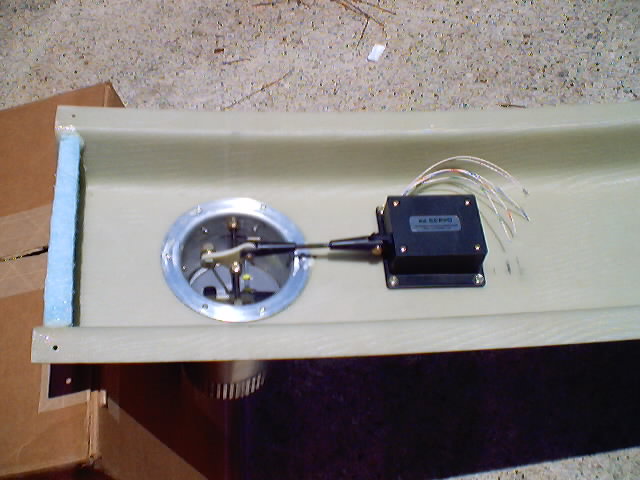
This photo shows the servo, servo arm, control horn to transfer the servo movement to the flapper control. As the servo pushes out, the control arm moves to open the butterfly valve. I played with the length of the servo arm until I was able to obtain a full open valve when the servo was fully extended and a tightly closed valve when the servo was fully retracted. I have tested the process repeatedly and it works great. The whole thing is very light weight as well. |
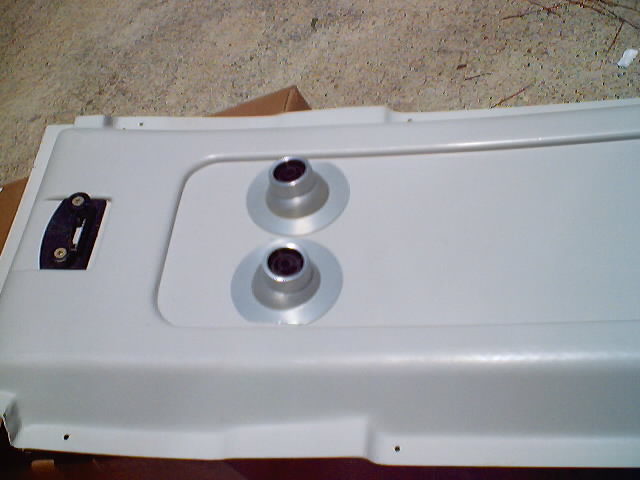 |
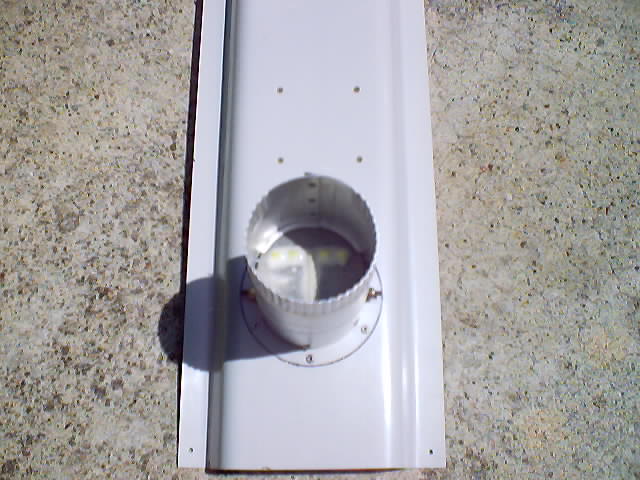
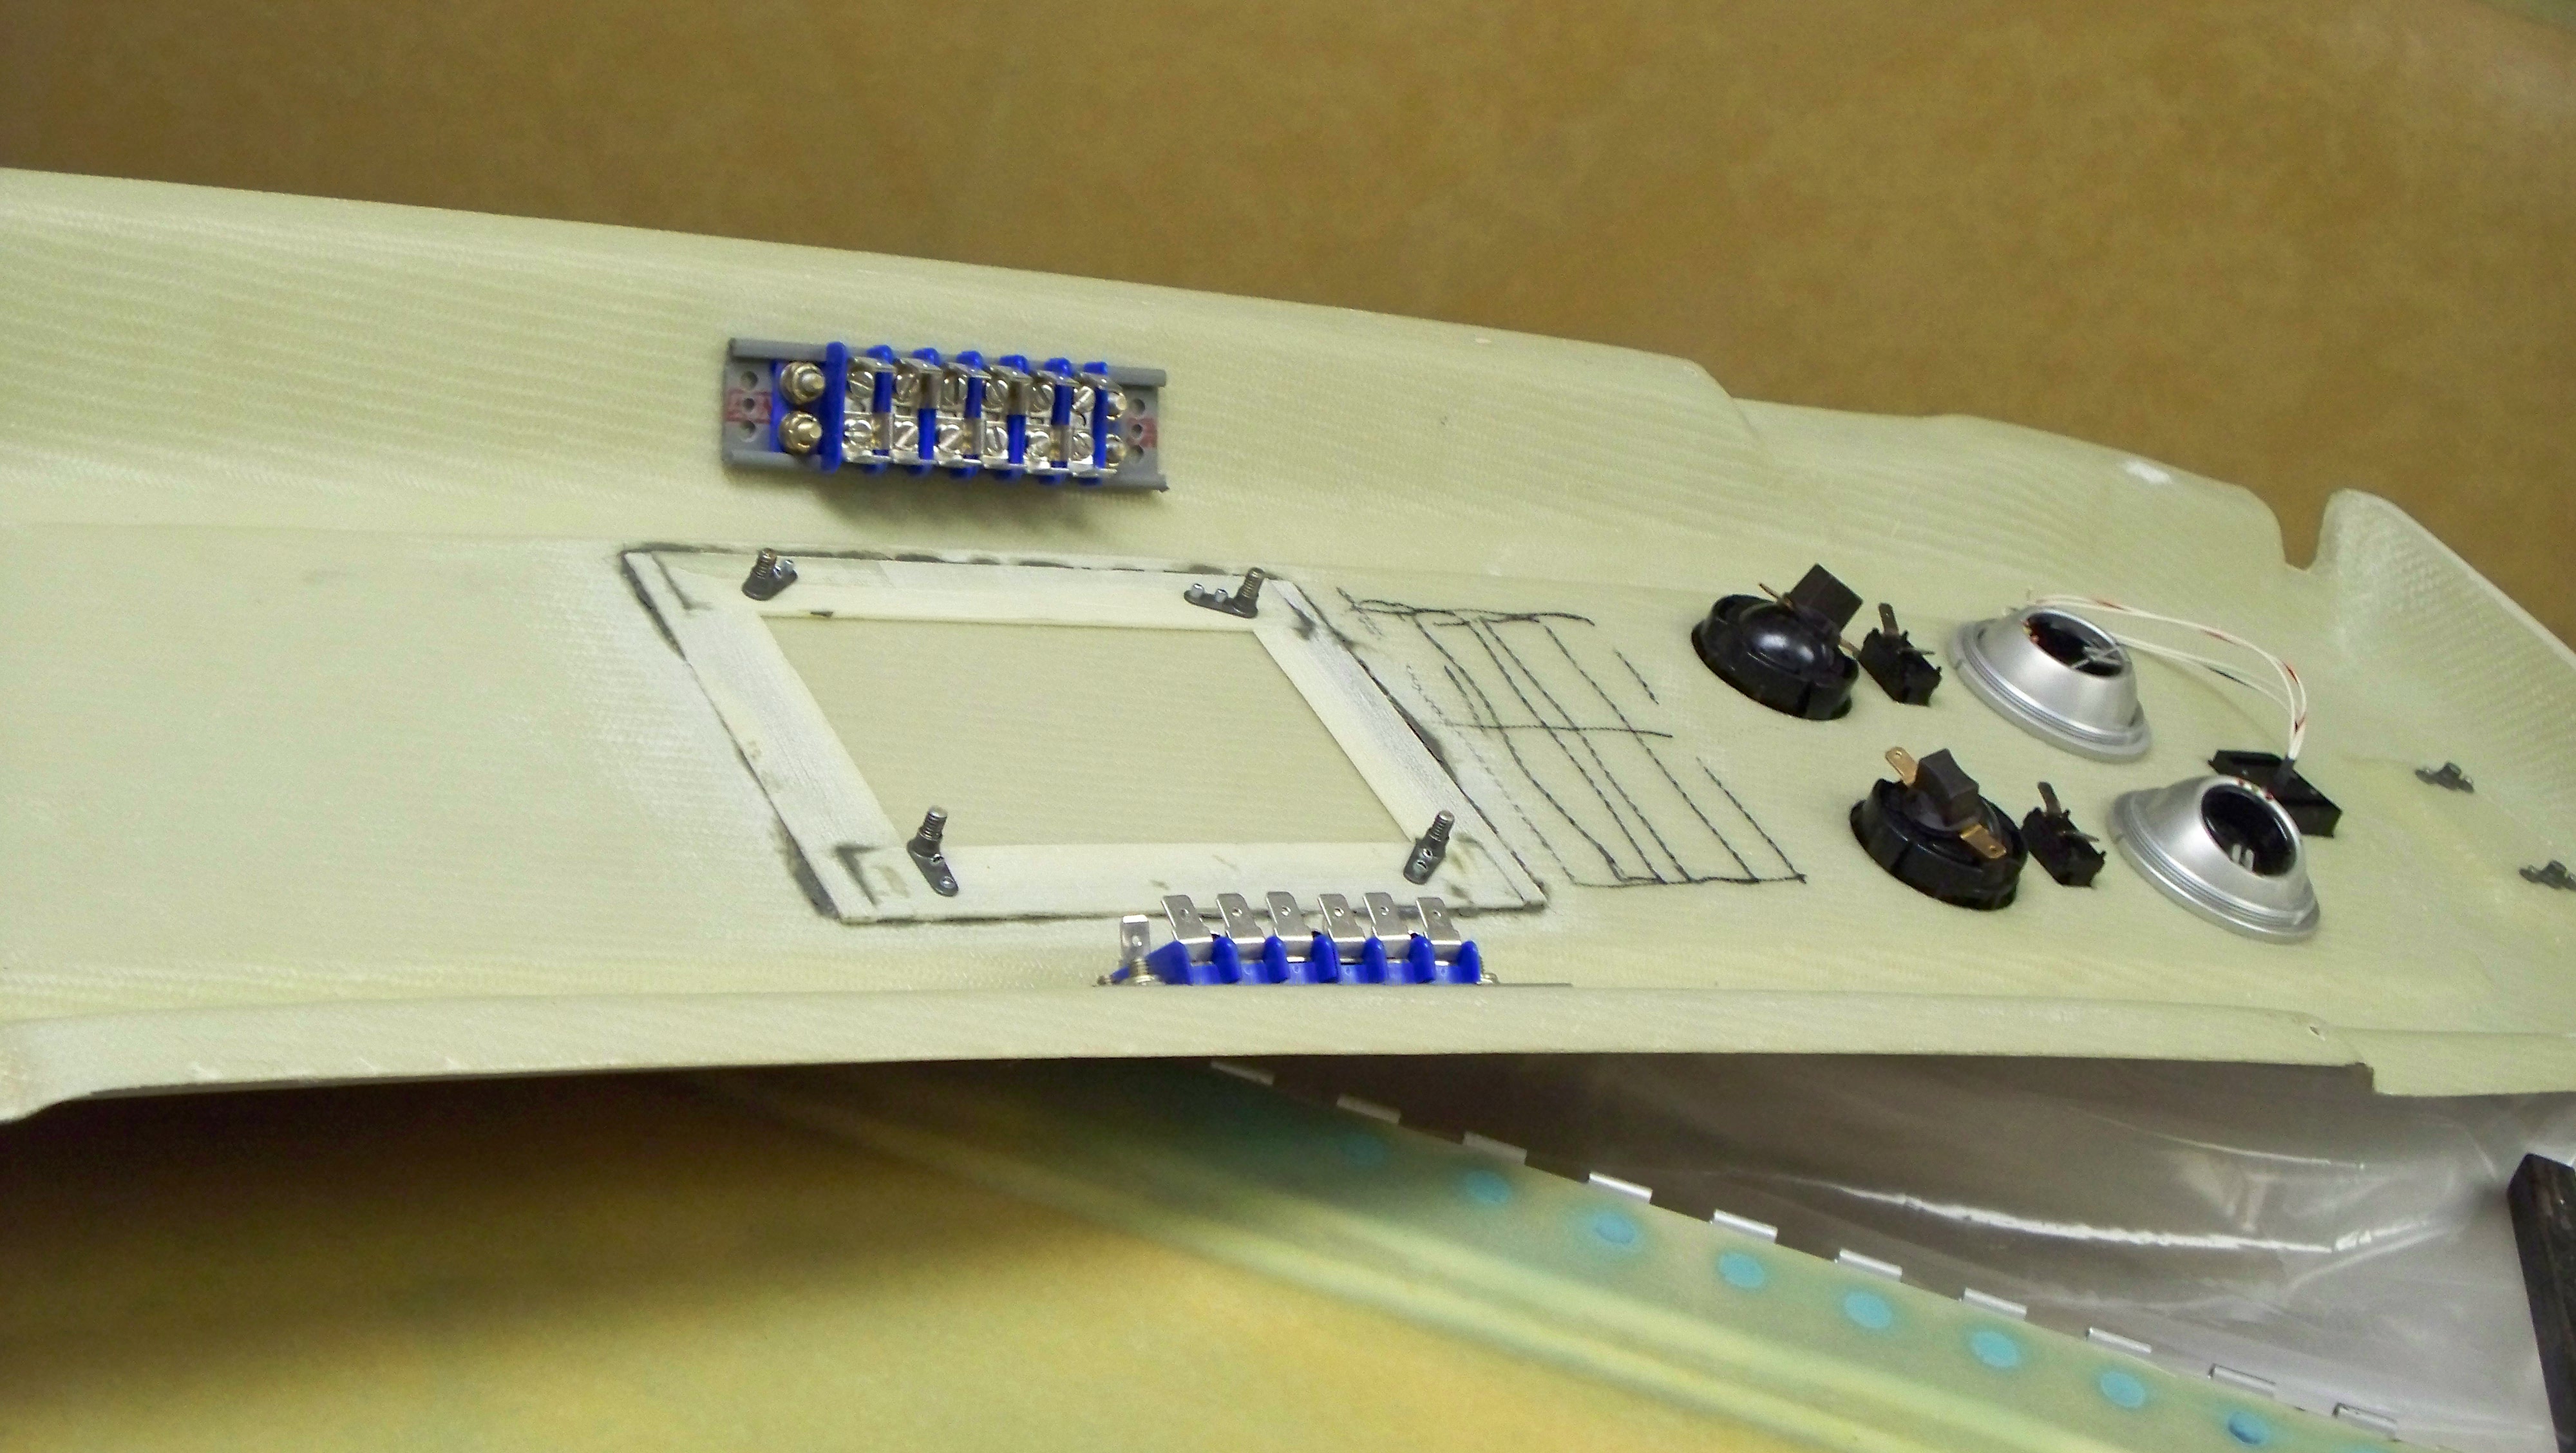
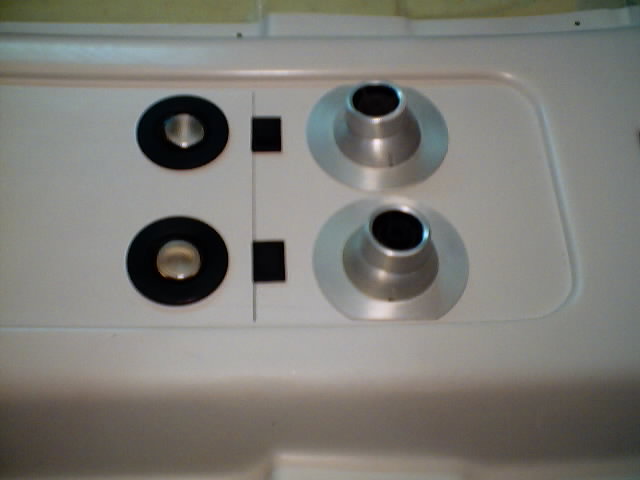
This shows the initial installation of the air outlets in
the console. The flanges were a bit large so I trimmed them to
allow a side-by-side fit. Part of the reason for the air shutoff
is that these air outlets do not completely close thus requiring a more
positive close. The rocker switch for control of the servo will be placed in the console behind the to air outlets shown. I will add more photos when available. The bracket at the front is for the electronic Pilot Compass. |
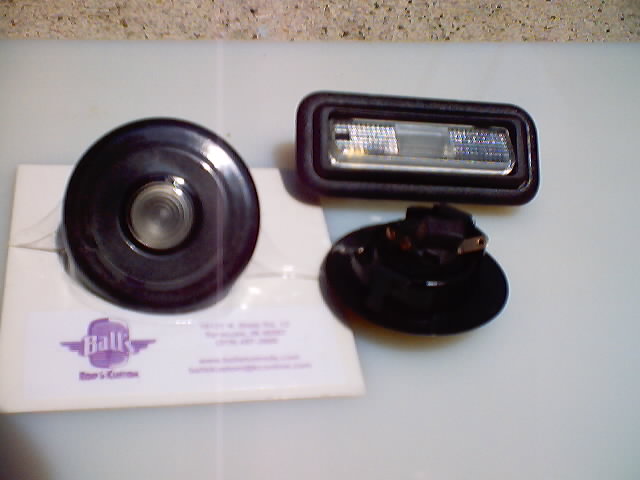 |
After Several costly attempts to find some good looking
overhead lights, I finally found some which will work and look great
too. I obtained these from a Rod and Custom supplier found on the
internet. http://www.BallShotRods.com
The round light swivels to place the light where needed but does not have a switch. I bought some miniature rocker switches for them. The Rectangular Light has a built in switch activated by pushing one side of the light and is good for the baggage area. |
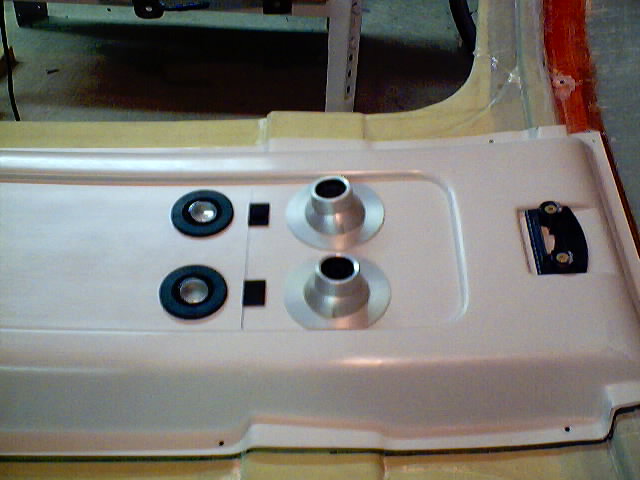 |
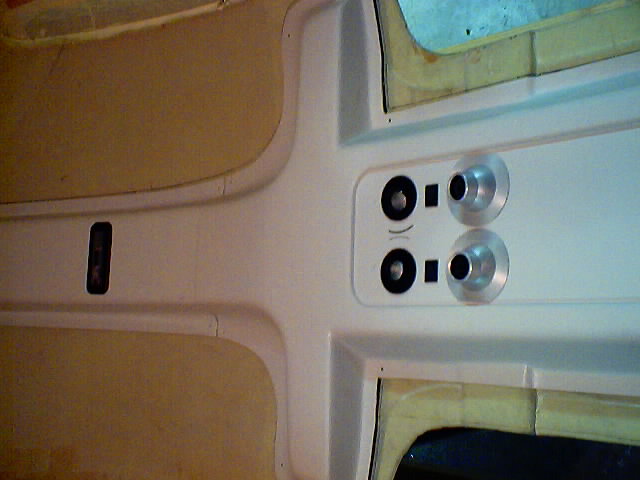
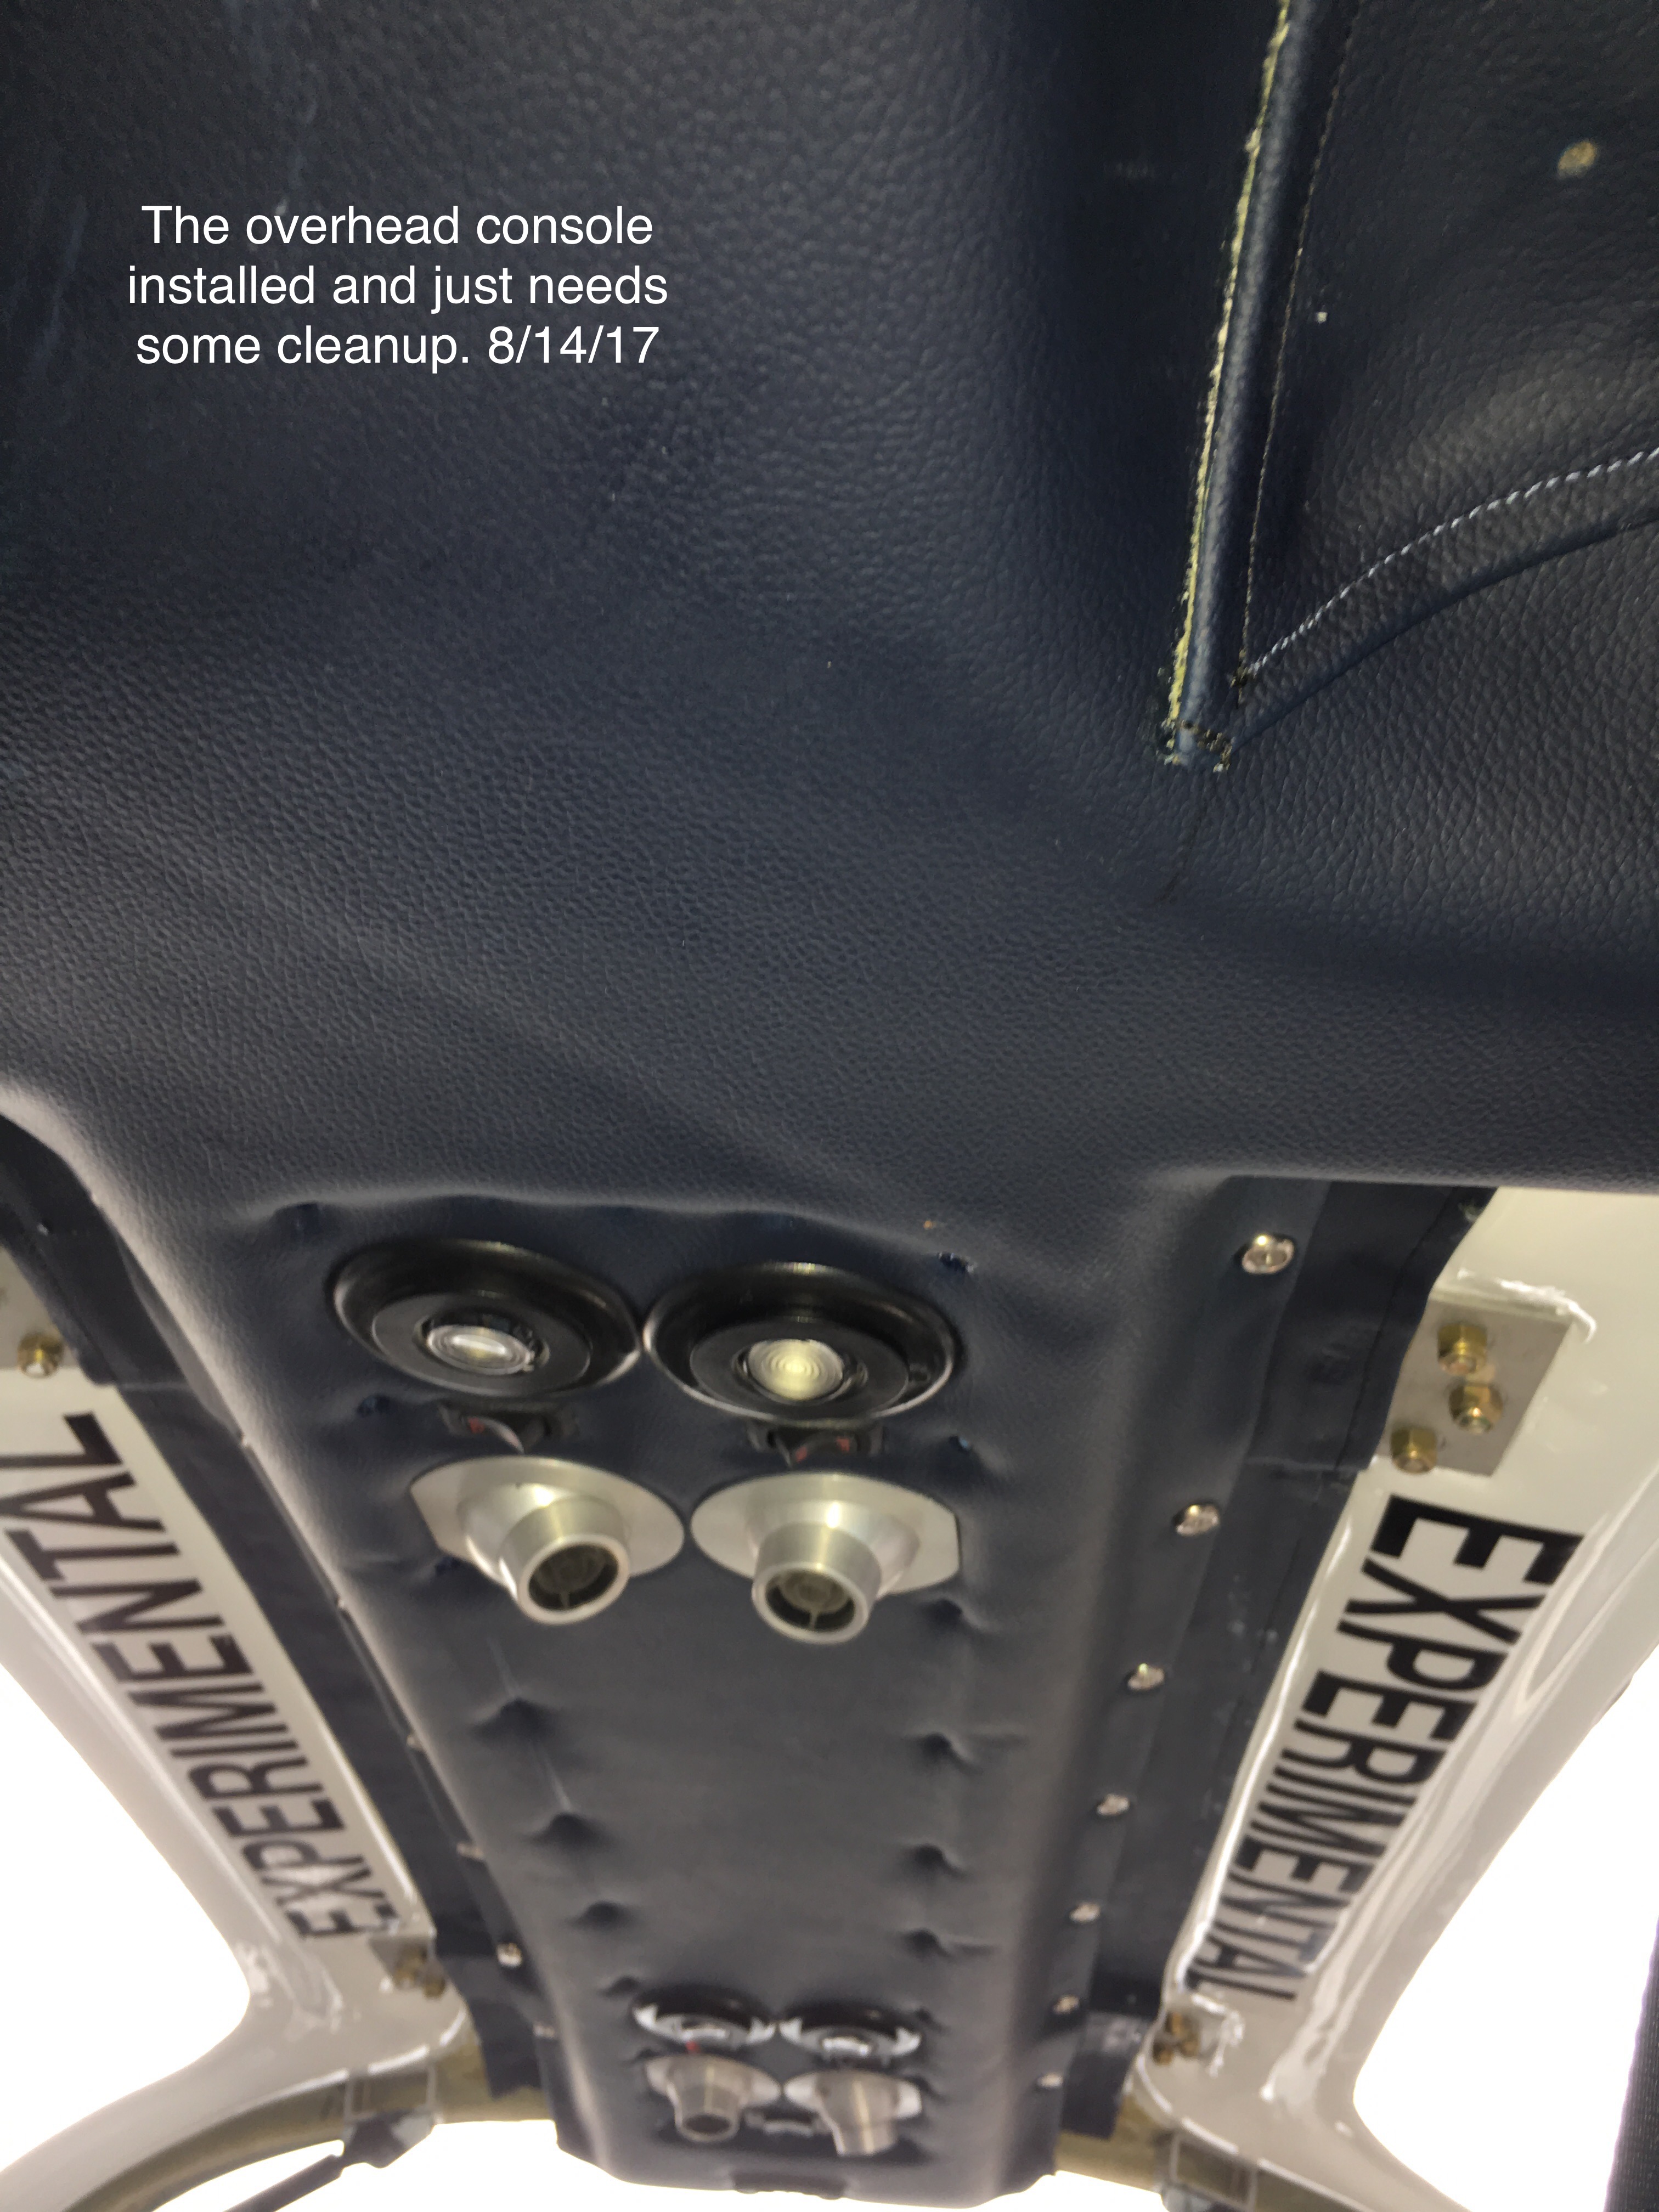
The three photos show the installation of the overhead lights along with the miniture switches. I removed the center light module from the mounting ring and mounted them directly into the console. A screwdriver can be used to pop the unit out for bulb replacement. This seemed like a more convienent mounting for my purposes. This put the rim of the lights and the rim of the switches on the same level. The plan is to put a burled wood (simulated) panel into the center of the console. The bottom photo shows the final light over the baggage area. |
 |
|
|
|
|
 |
There has been quite a bit of discussion about removing air from the interior as well as air inlets. I live an a very warm (hell make that HOT!) part of the country and helping fresh air move through the cabin is a primary concern. I have installed an inverted NACA duct on the bottom of the fuselage to provide for both exhaust air movement and an additional outlet for any water accumulation. I will be placing some type of control for closing this if needed but it should aid greatly in air movement. |
|
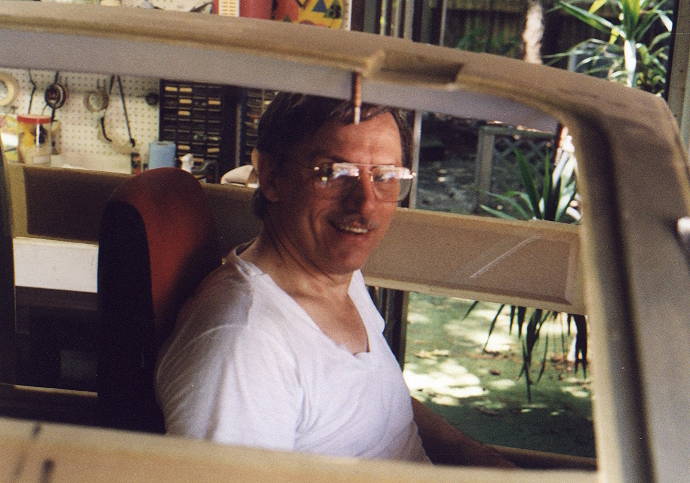
Part
of the rules for building an experimental aircraft is ensuring that YOU
in fact built the plane rather than having professional help and they
what photographic proof of same. So, even though I try to avoid
having photos of myself I have included the horrible shot to prove that
YES I AM THE BUILDER. |
 |
A
trial fit of the front and back portion of the overhead console is
clecoed into place to locate the attachment points and clear for the
seat belts. |
|
After
a test fit of the overhead it became clear that I would have to remove
some of the filler between the inner skin and outside skin to allow the
air vents and the lights to clear the inner skin. |
 |
I screwed up on the rear section of the overhead console and had to remove some of the upholstry and foam. |
 |
|
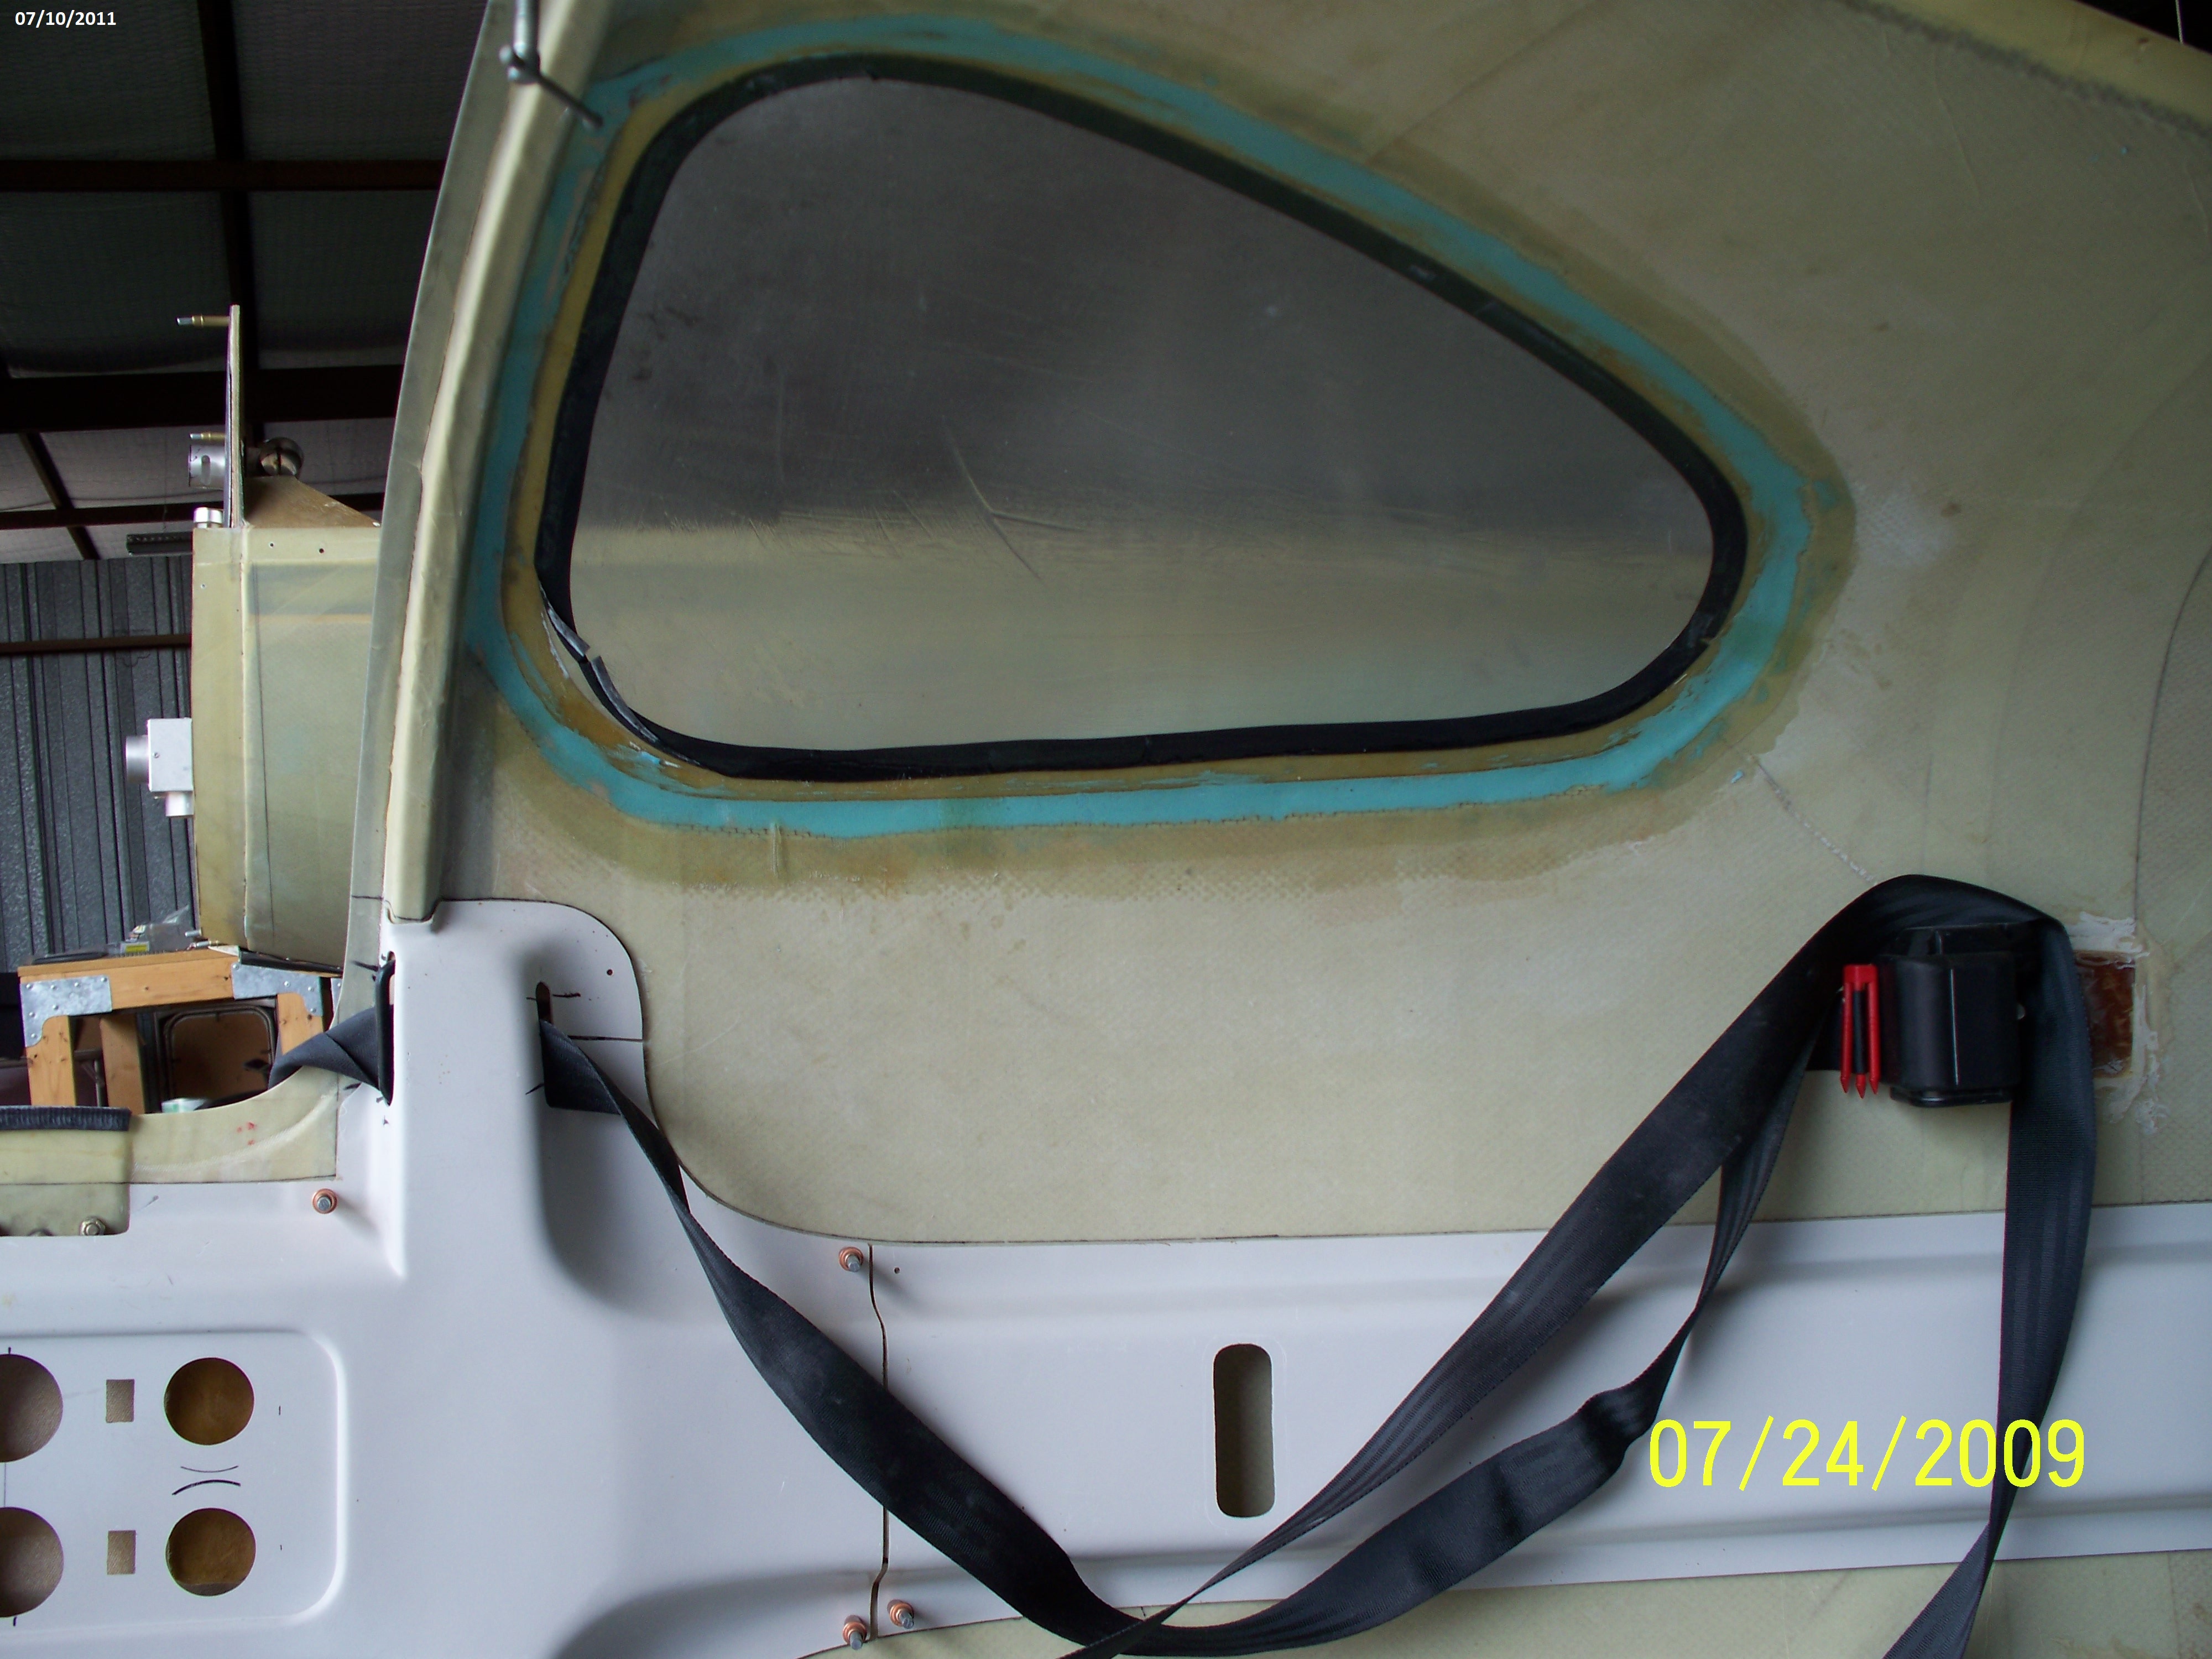
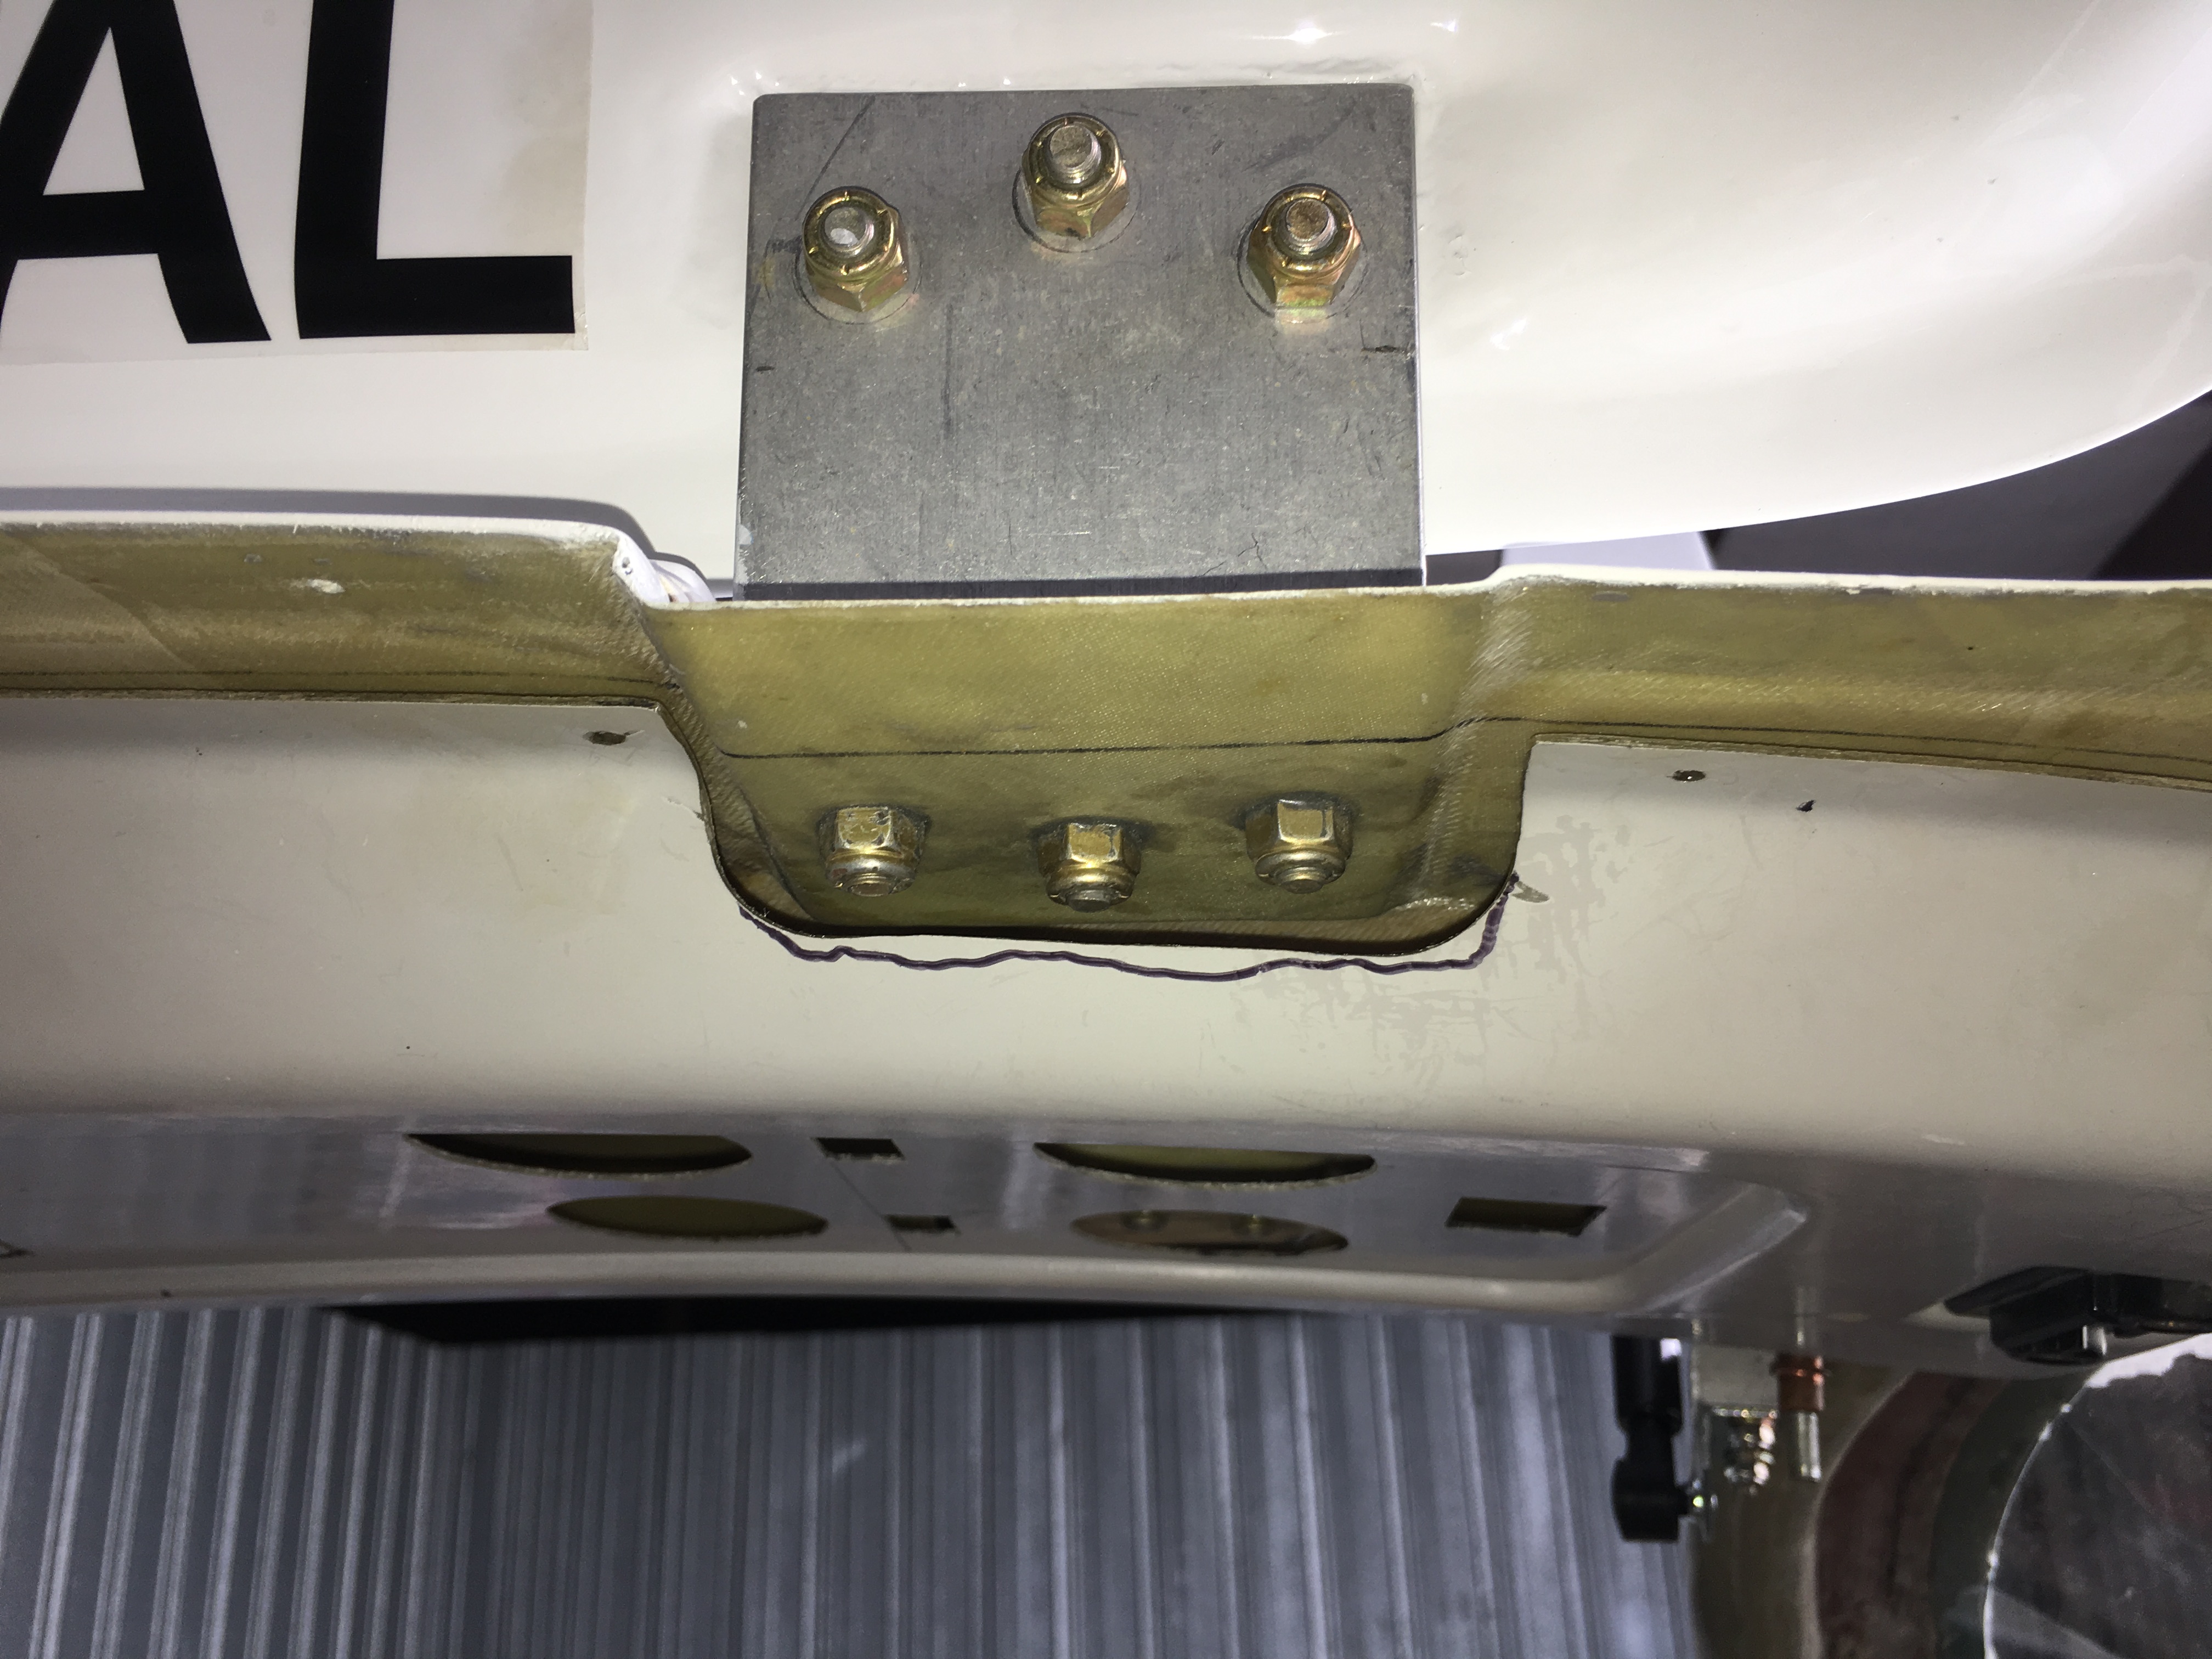
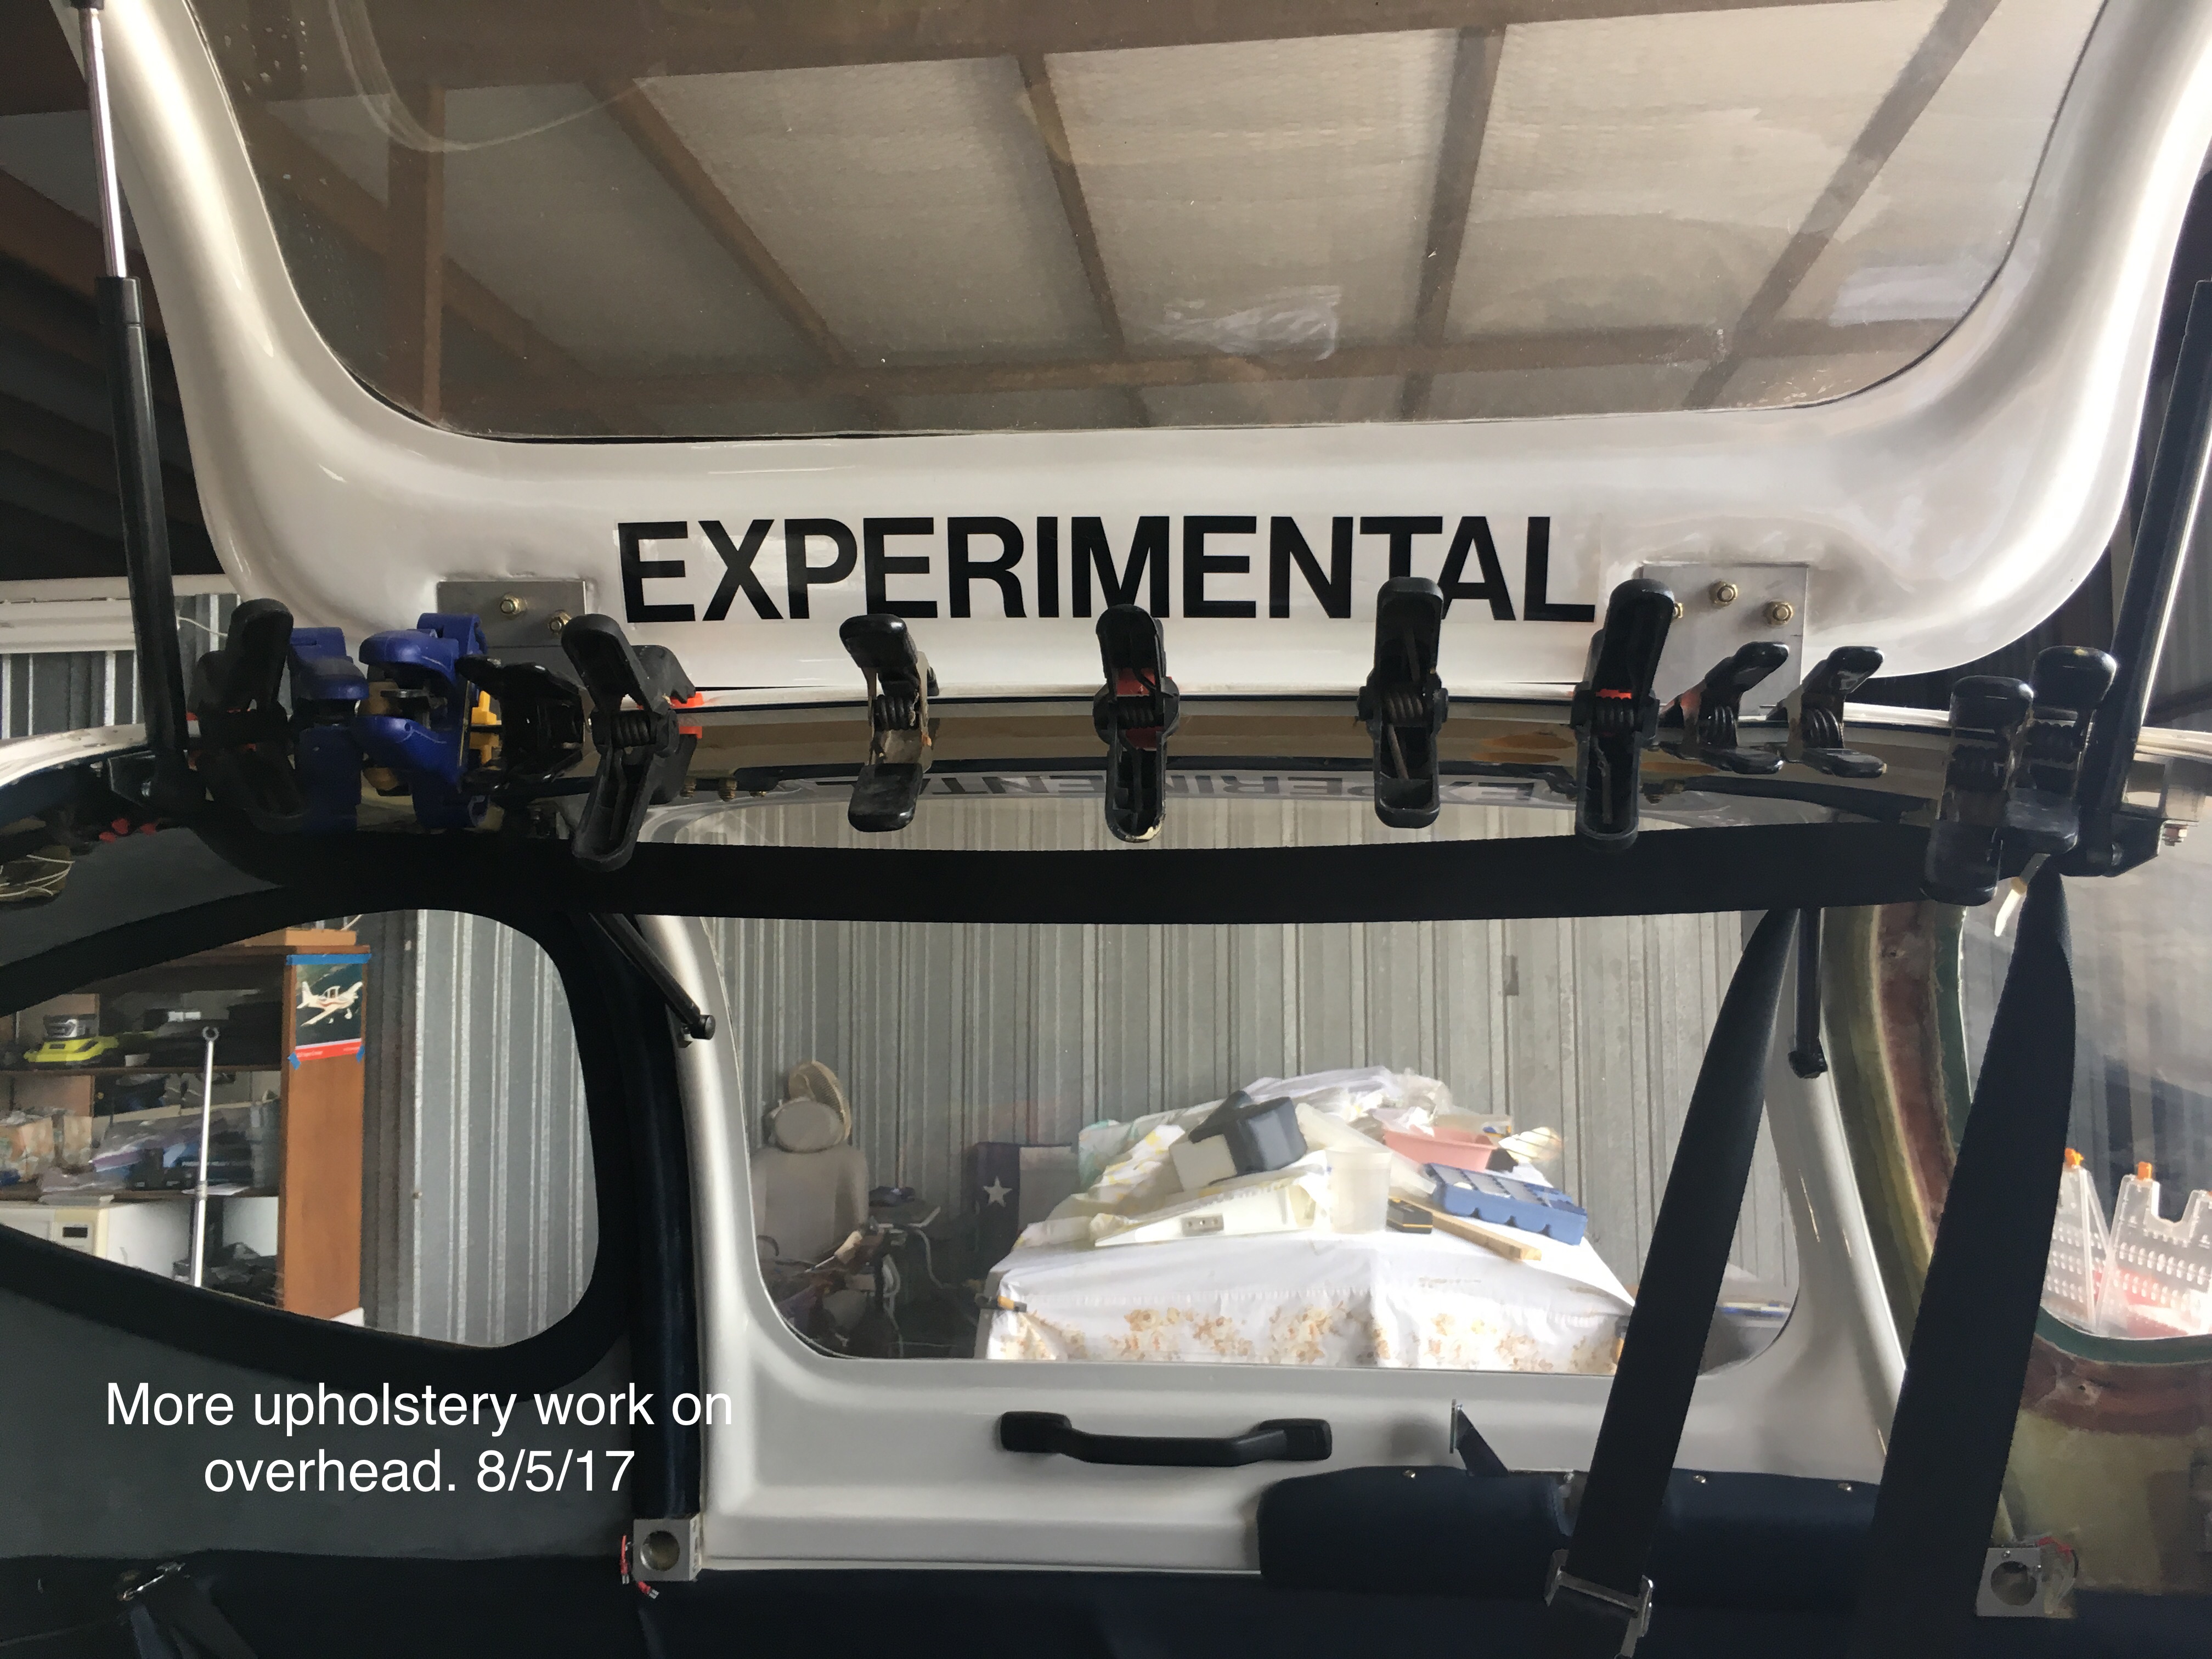
| Each
of the door mounting points extend inward several inches and the
mounting bolts/nuts are directly in the way of the overhead
console. I tried several different methods to cover these and
seal the overhead with more failures than successes. I finally
gave up on making a glass seal and simply doubled over the upholstry
material and let the ultra-leather form a seal around the hinge
pads. It worked. The photos above and below show the
problems and one attempt to get around the issue. Nothing is as
simple as it sounds. |
|
 |
 |
 |
 |
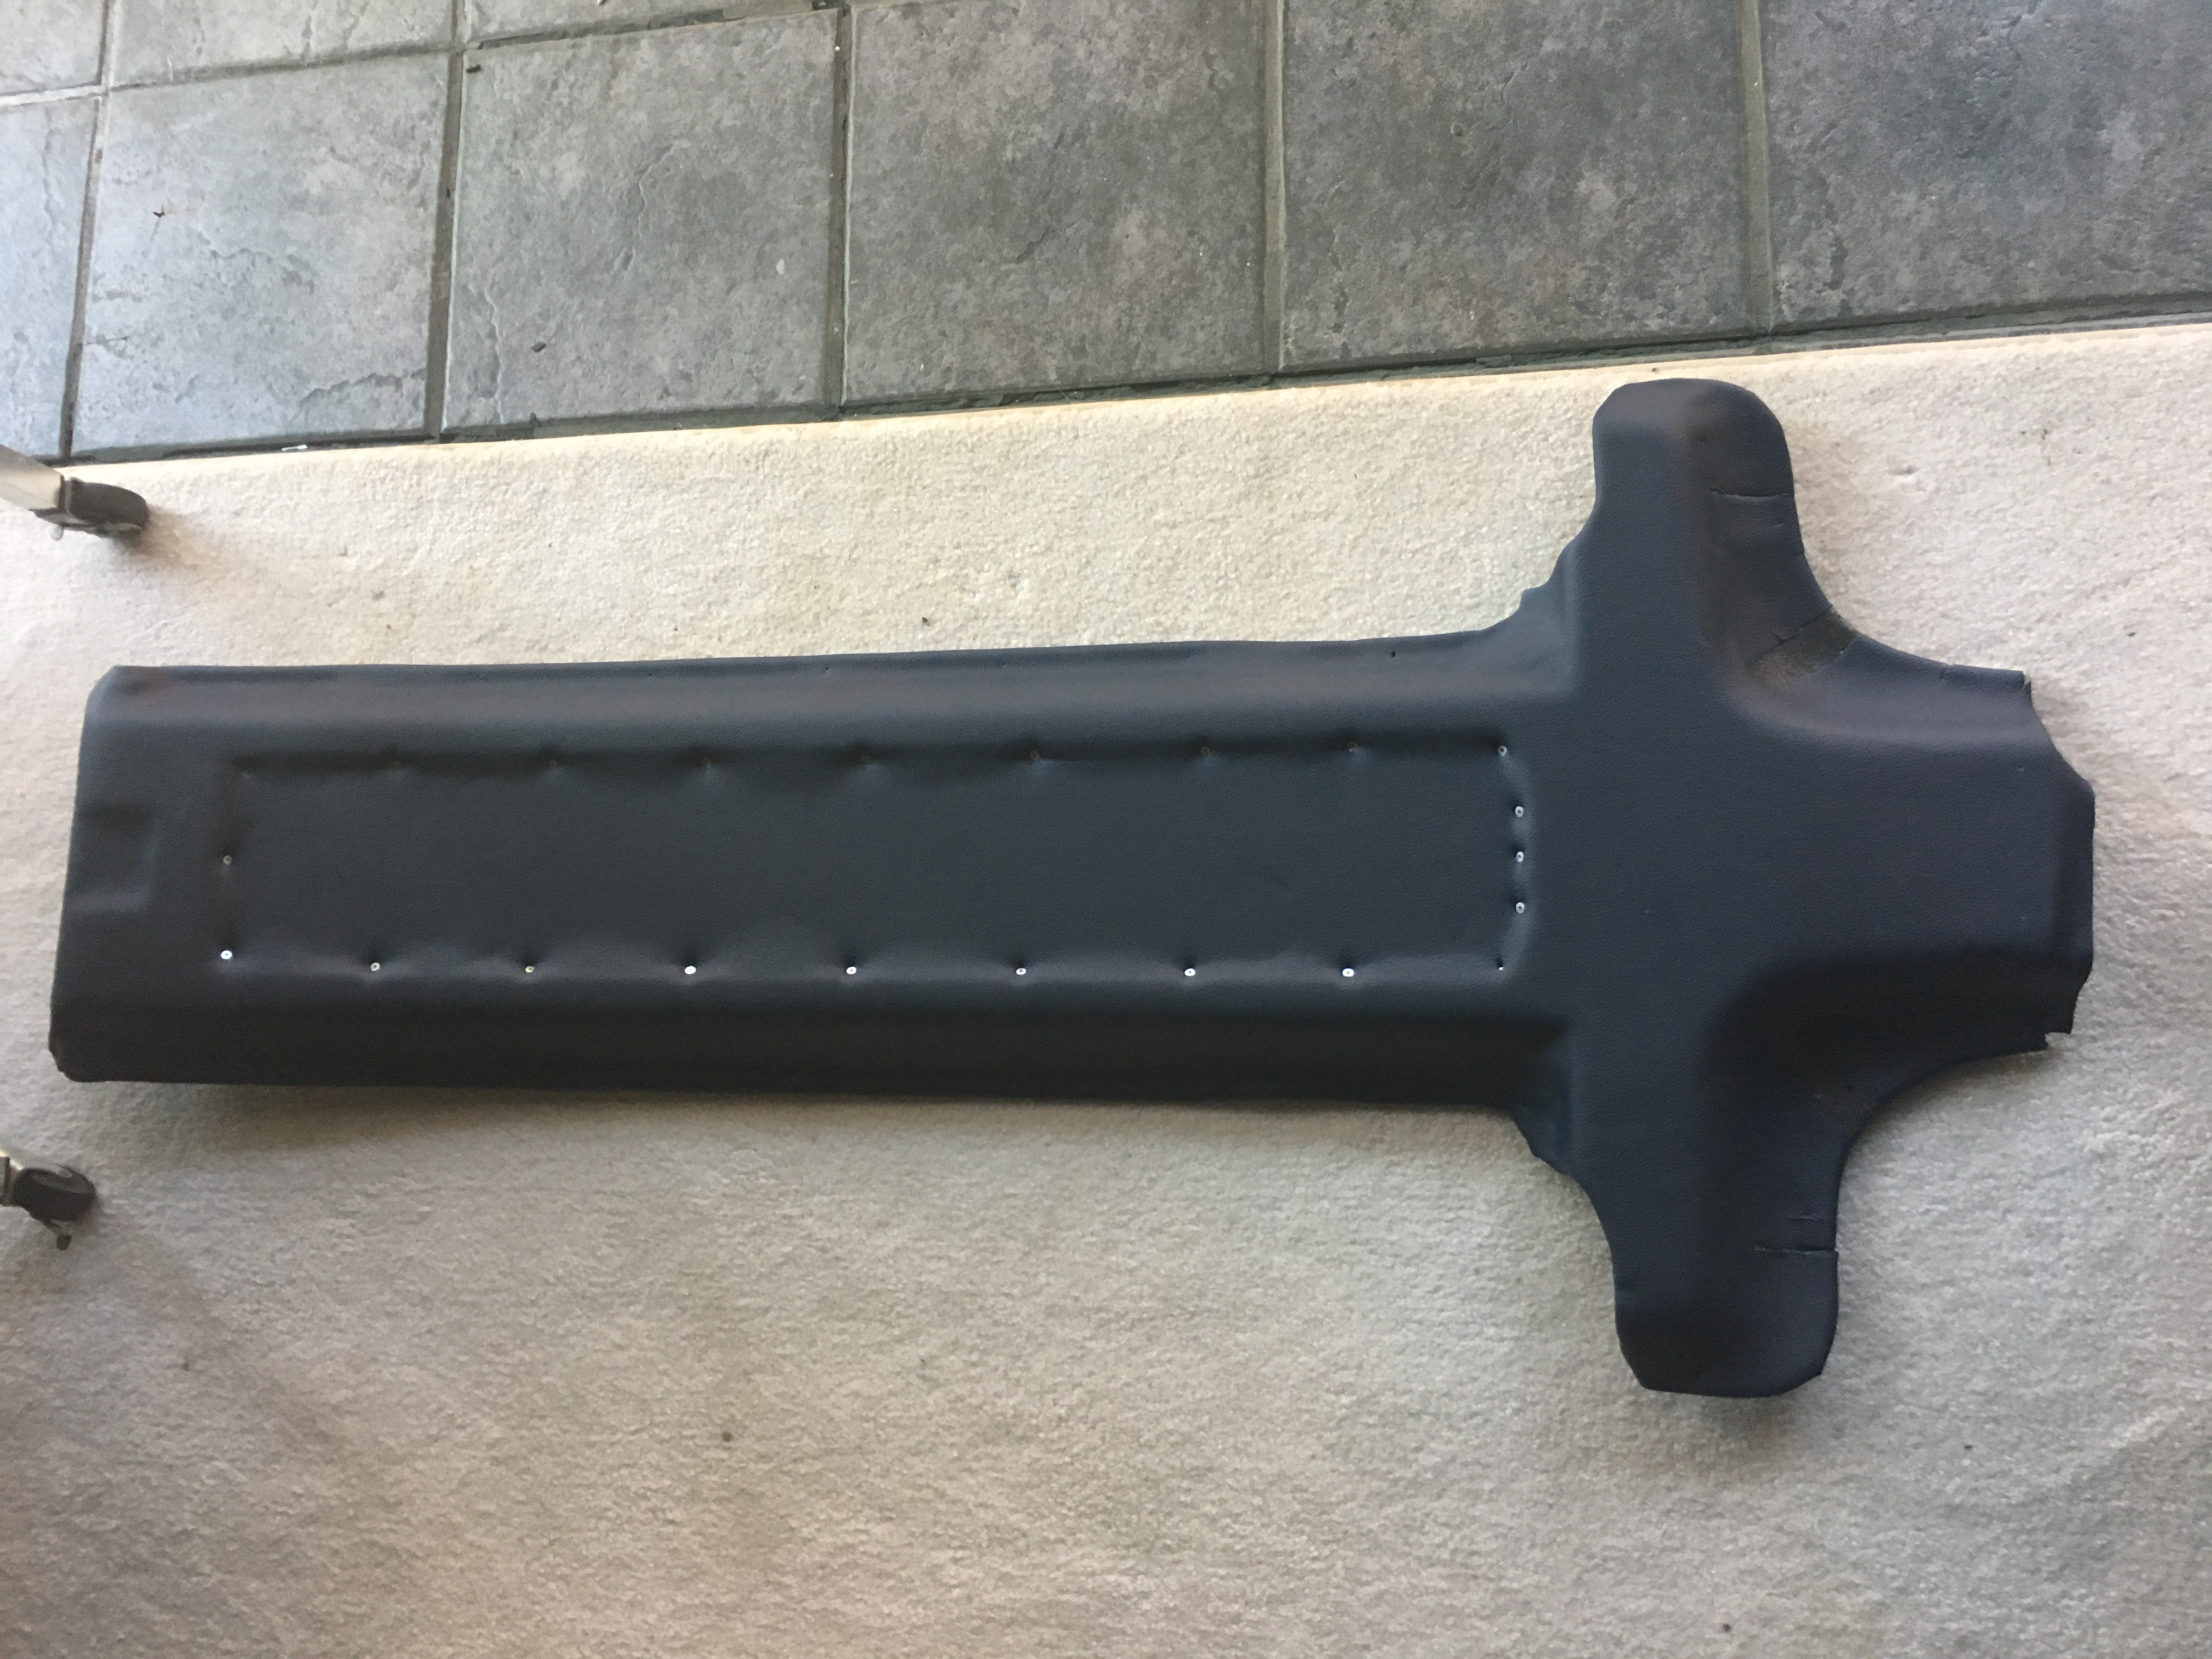 |
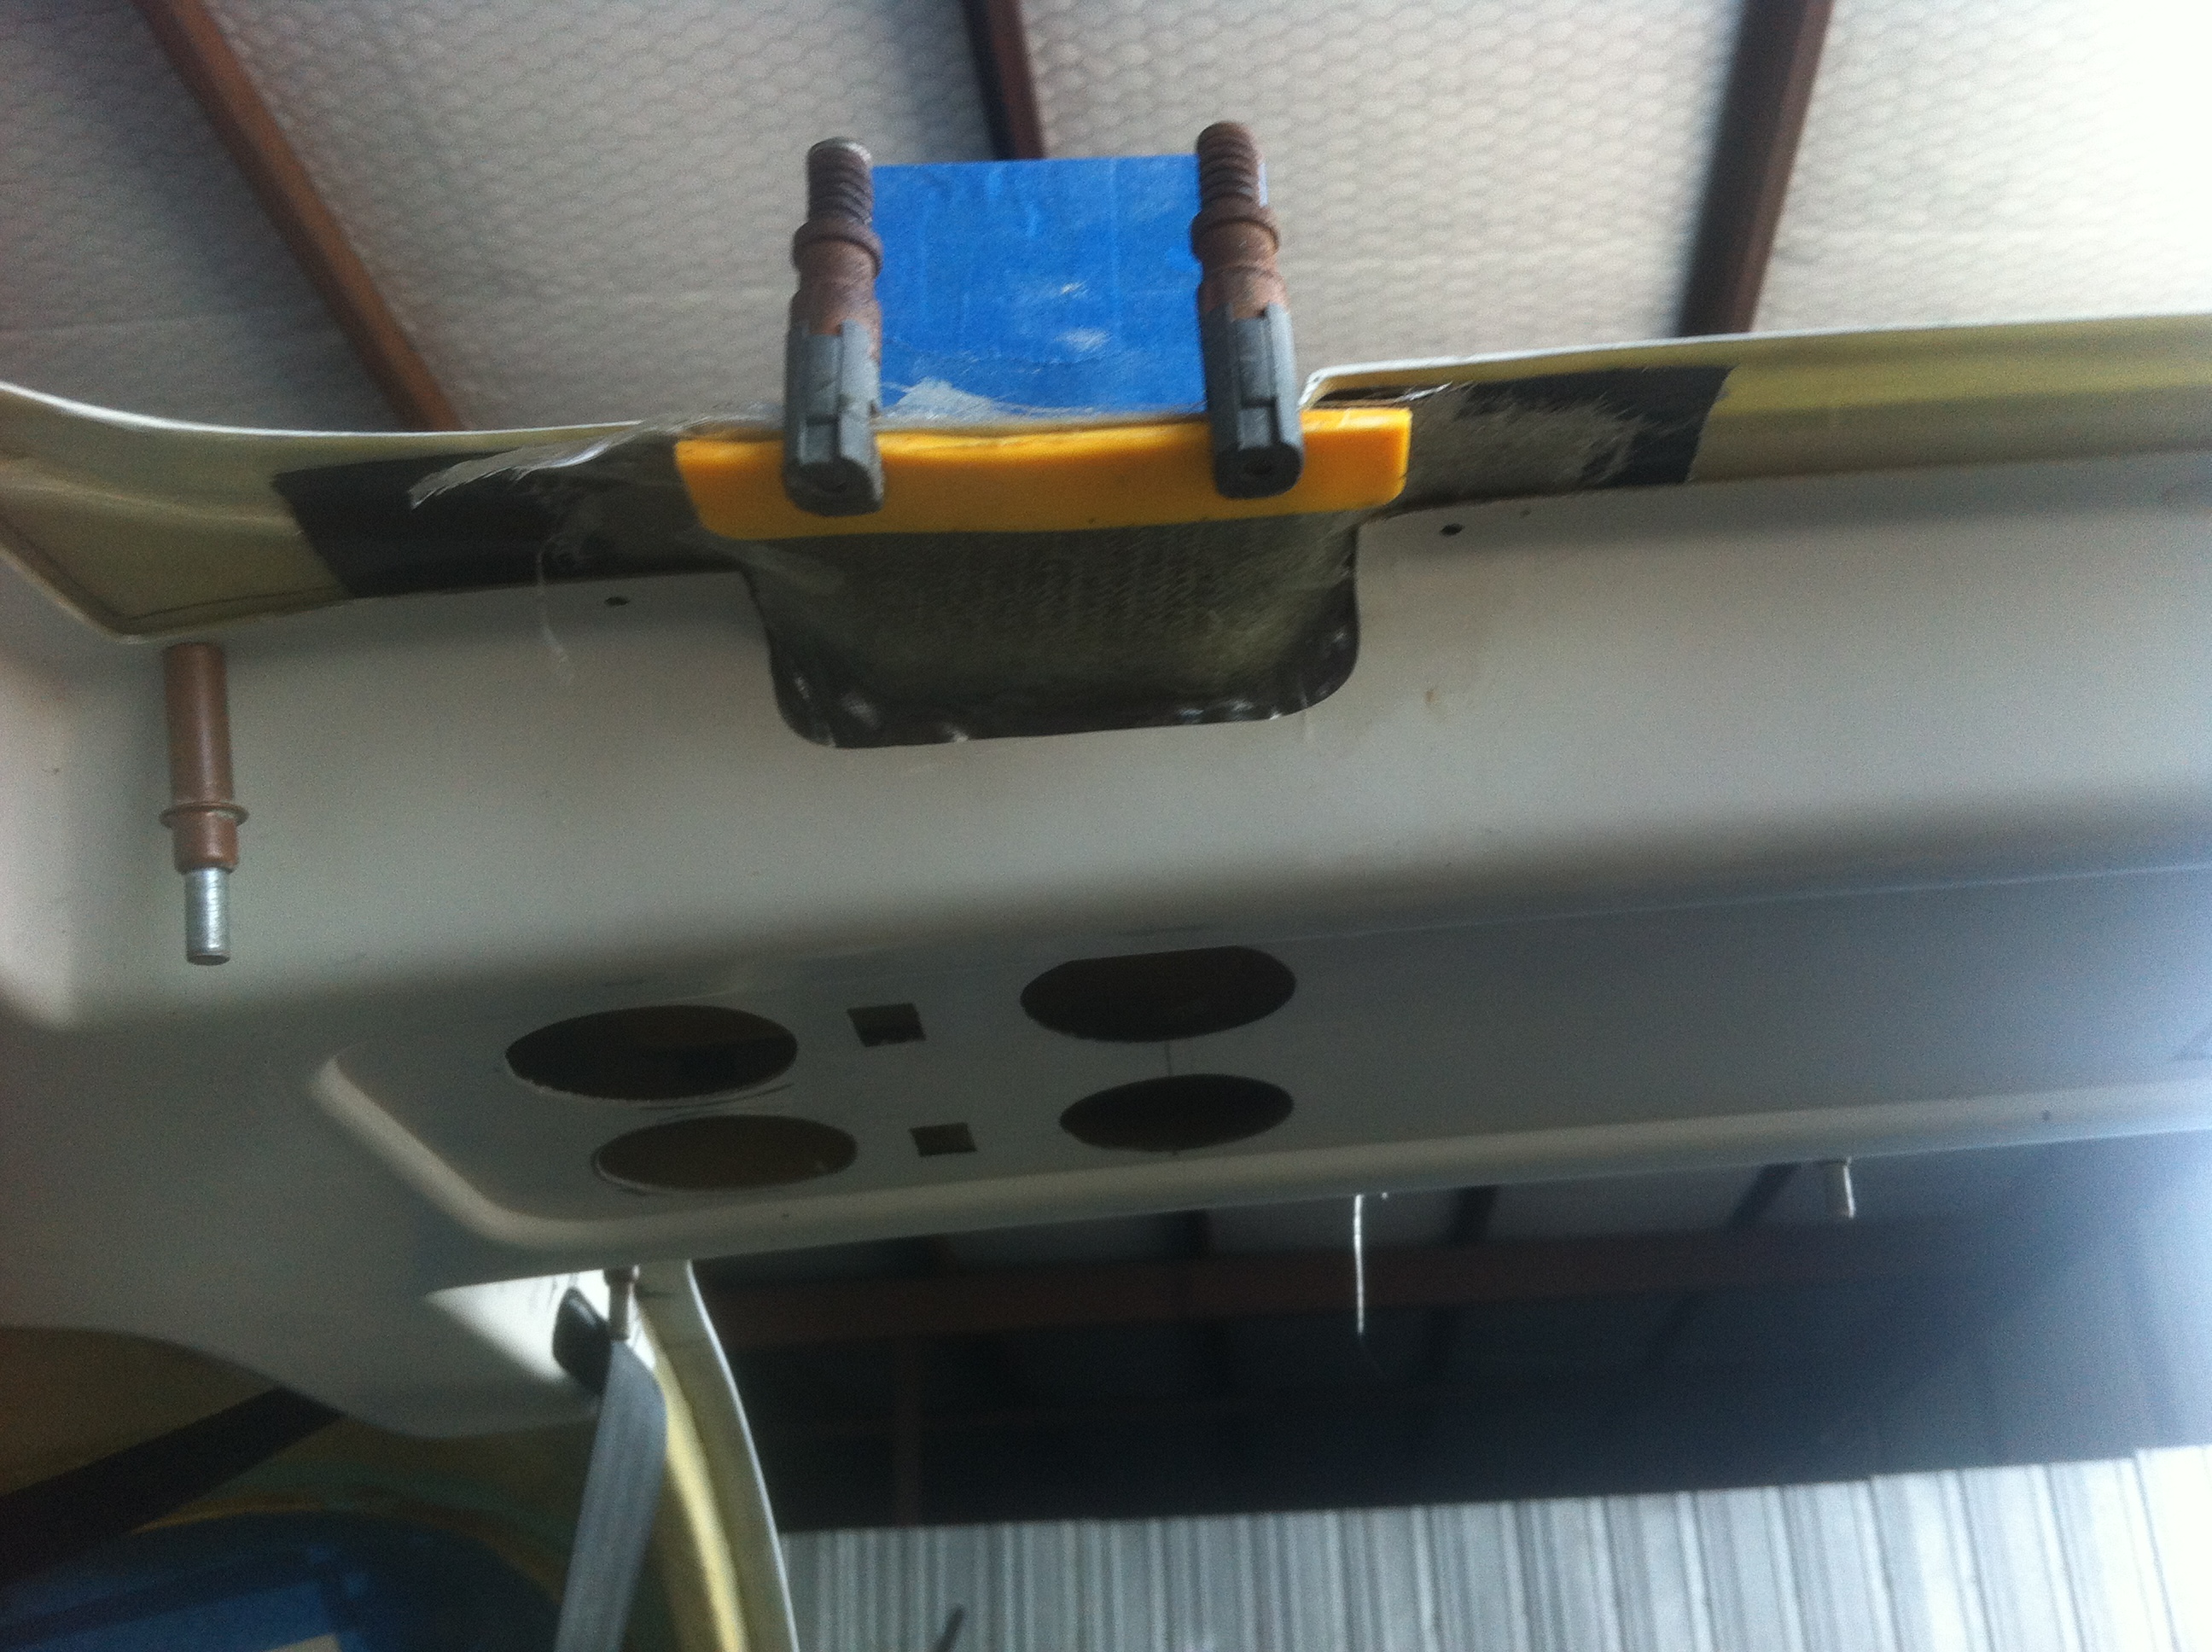
I
covered the overhead with a 3/16 inch black foam that is tested for
fire resistance. It was glued on using a contact cement.
The upholstry material (Ultra-Leather) is then glued on to the foam
again using contact cement. The Ultra-Leather provides for a
limited amount of stretch to fill in the curves of the console. I
wasn't real happy with the way the center part attached and it seemed
to want to pull away so I used pop rivets to keep it in place.
Doesn't really hurt the look either. |
 |
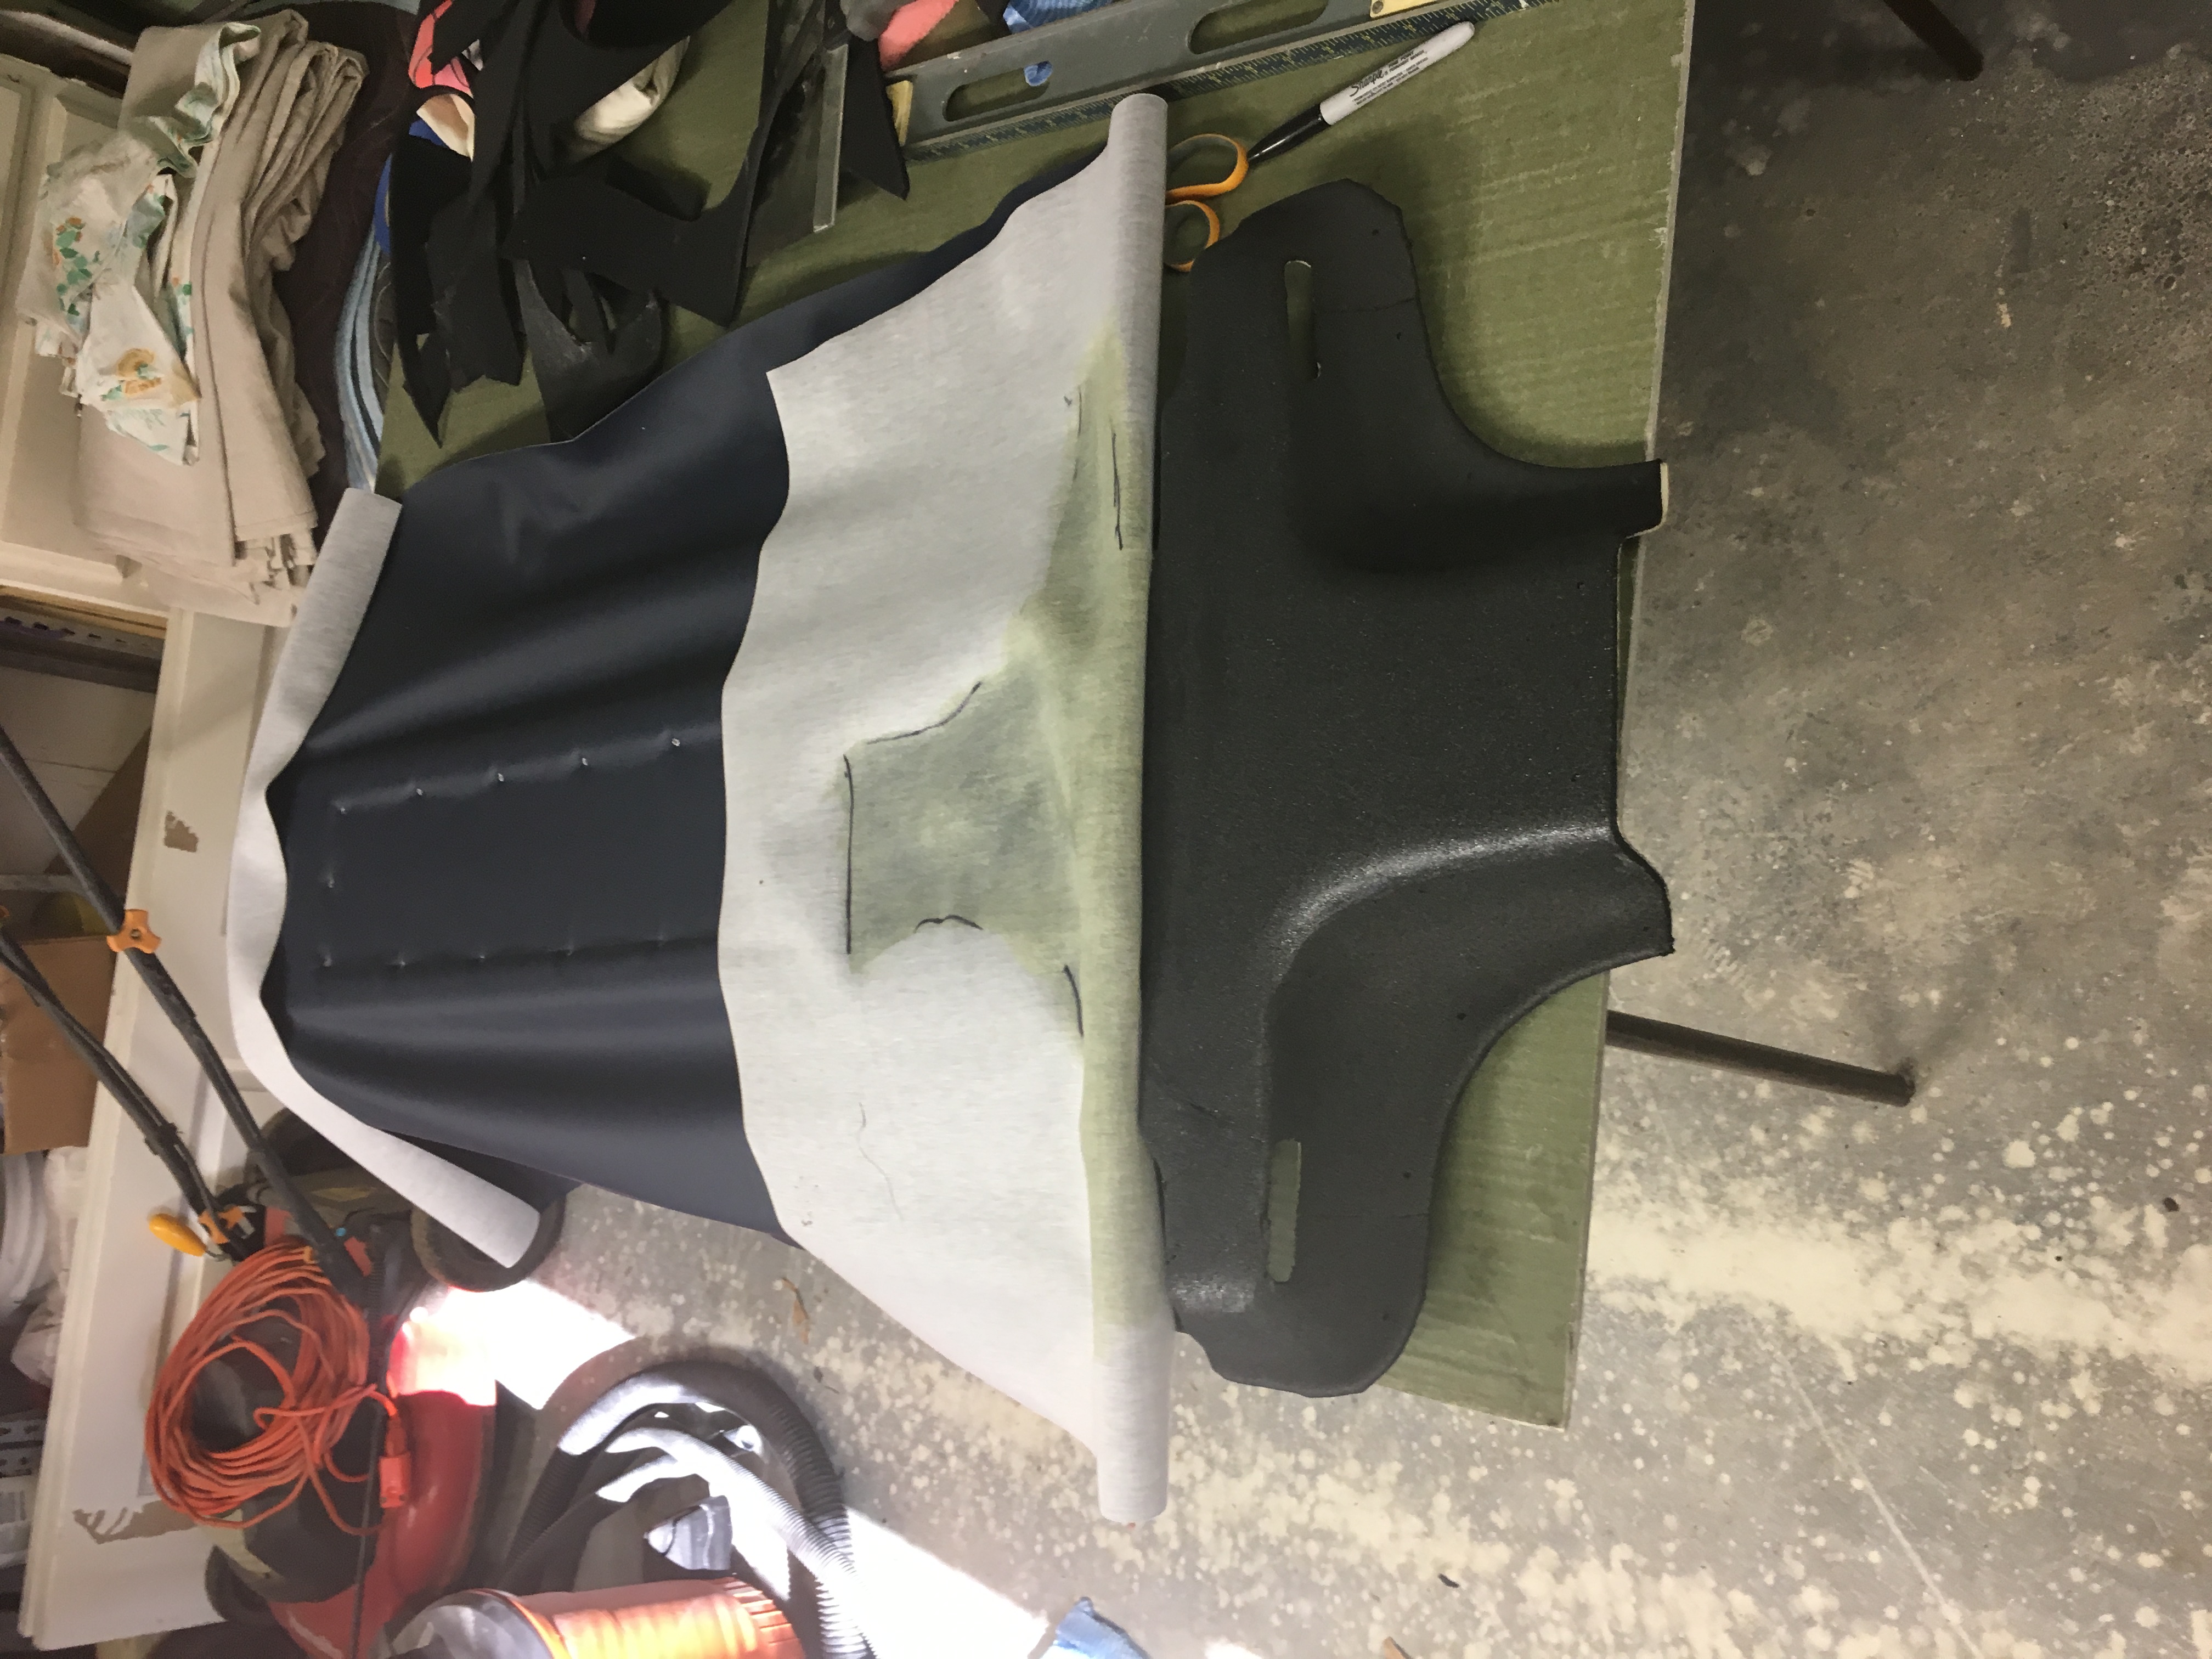
This
photo shows the rear section of the overhead along with the upper
section of the rear baggage bulkhead just covered in the black foam
before the ultra-leather was applied. |
 |
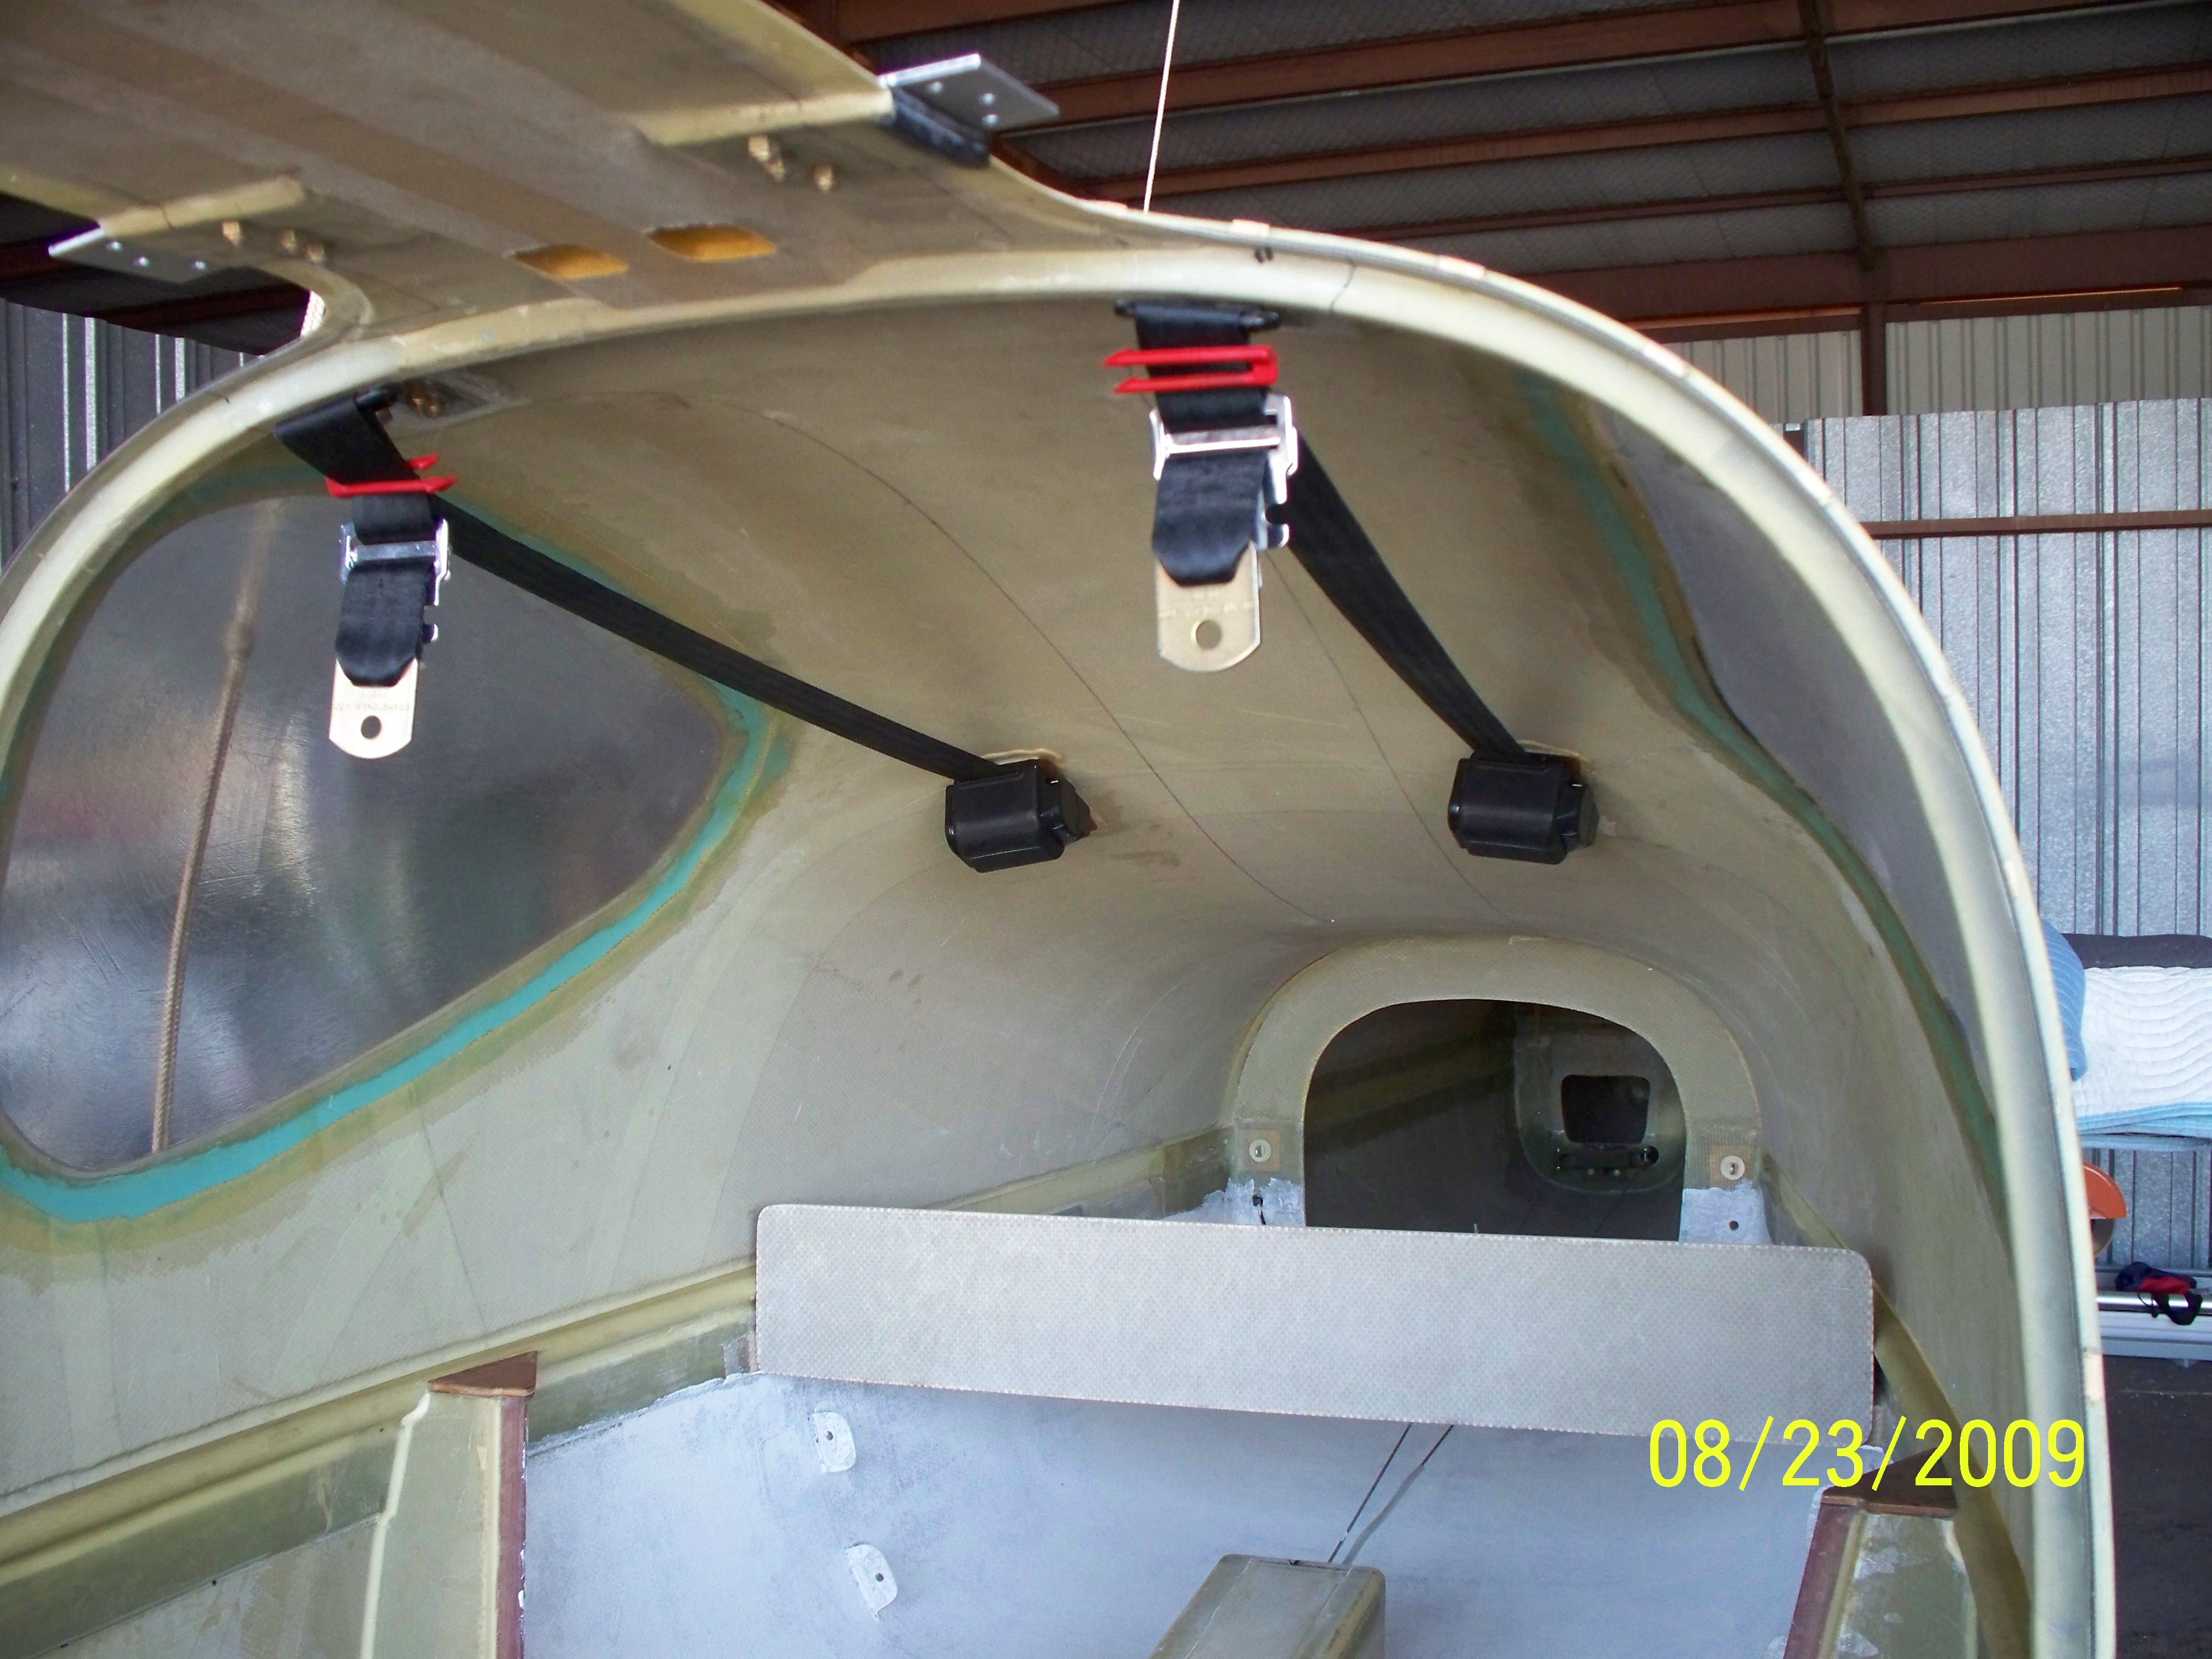
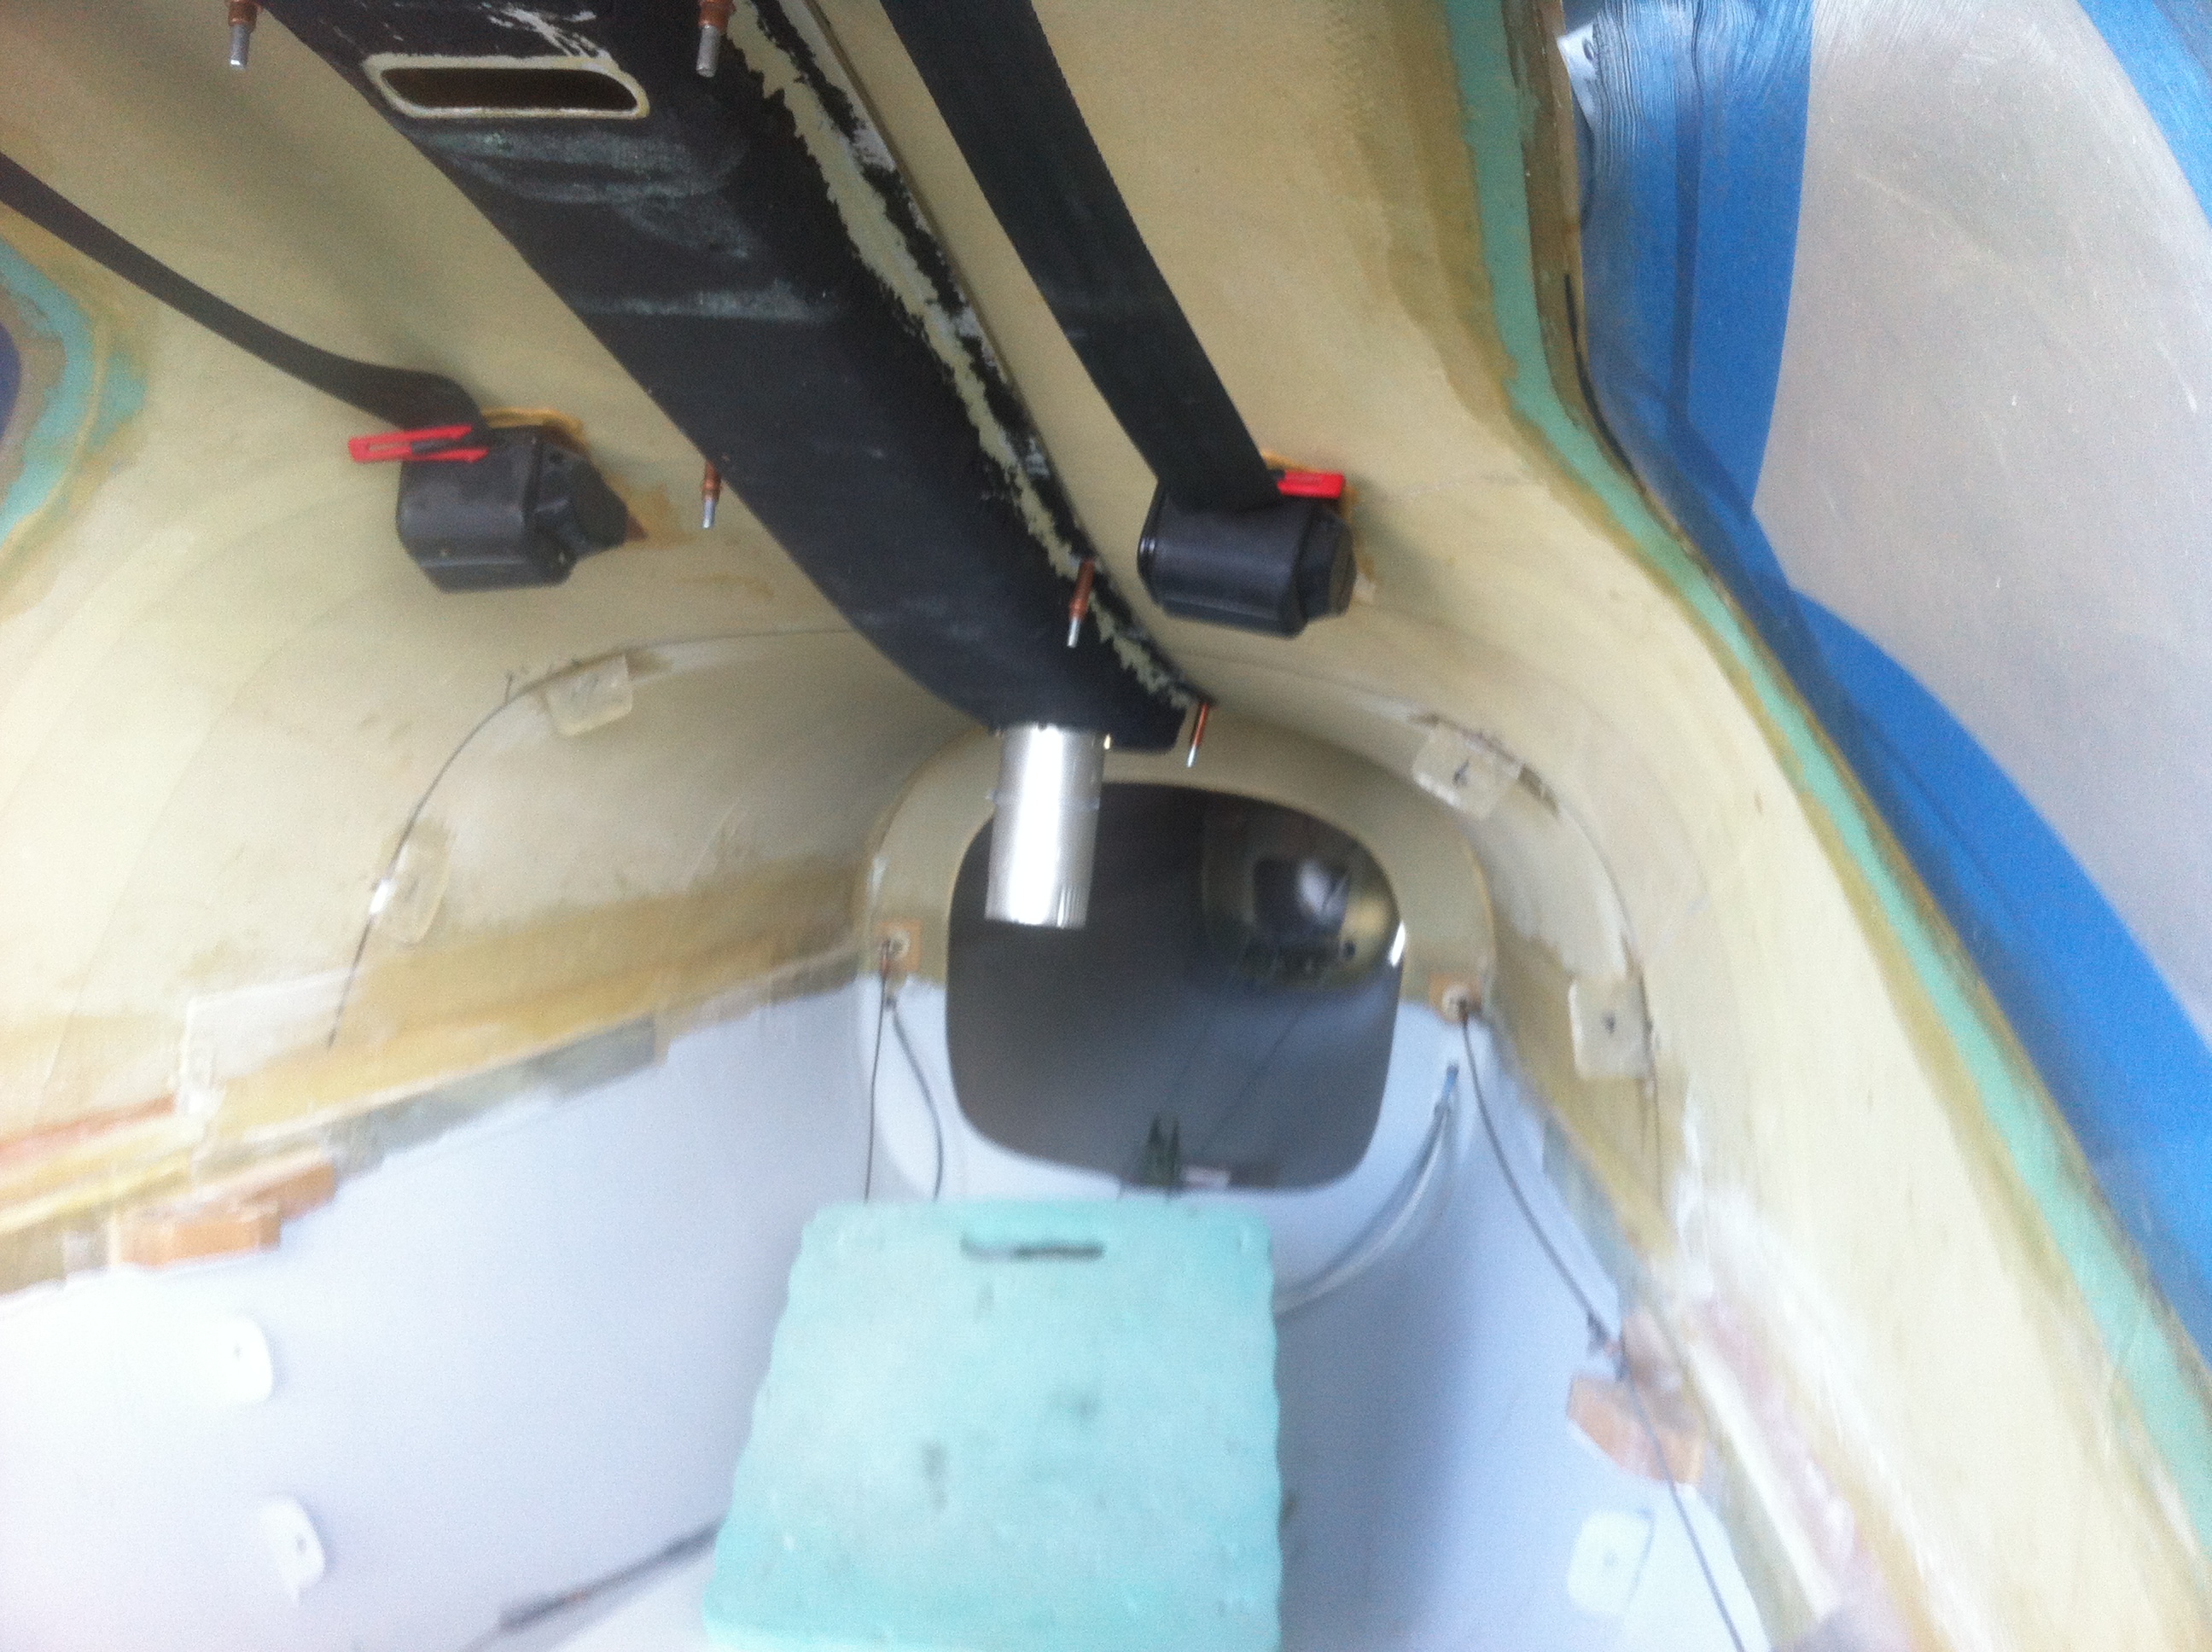
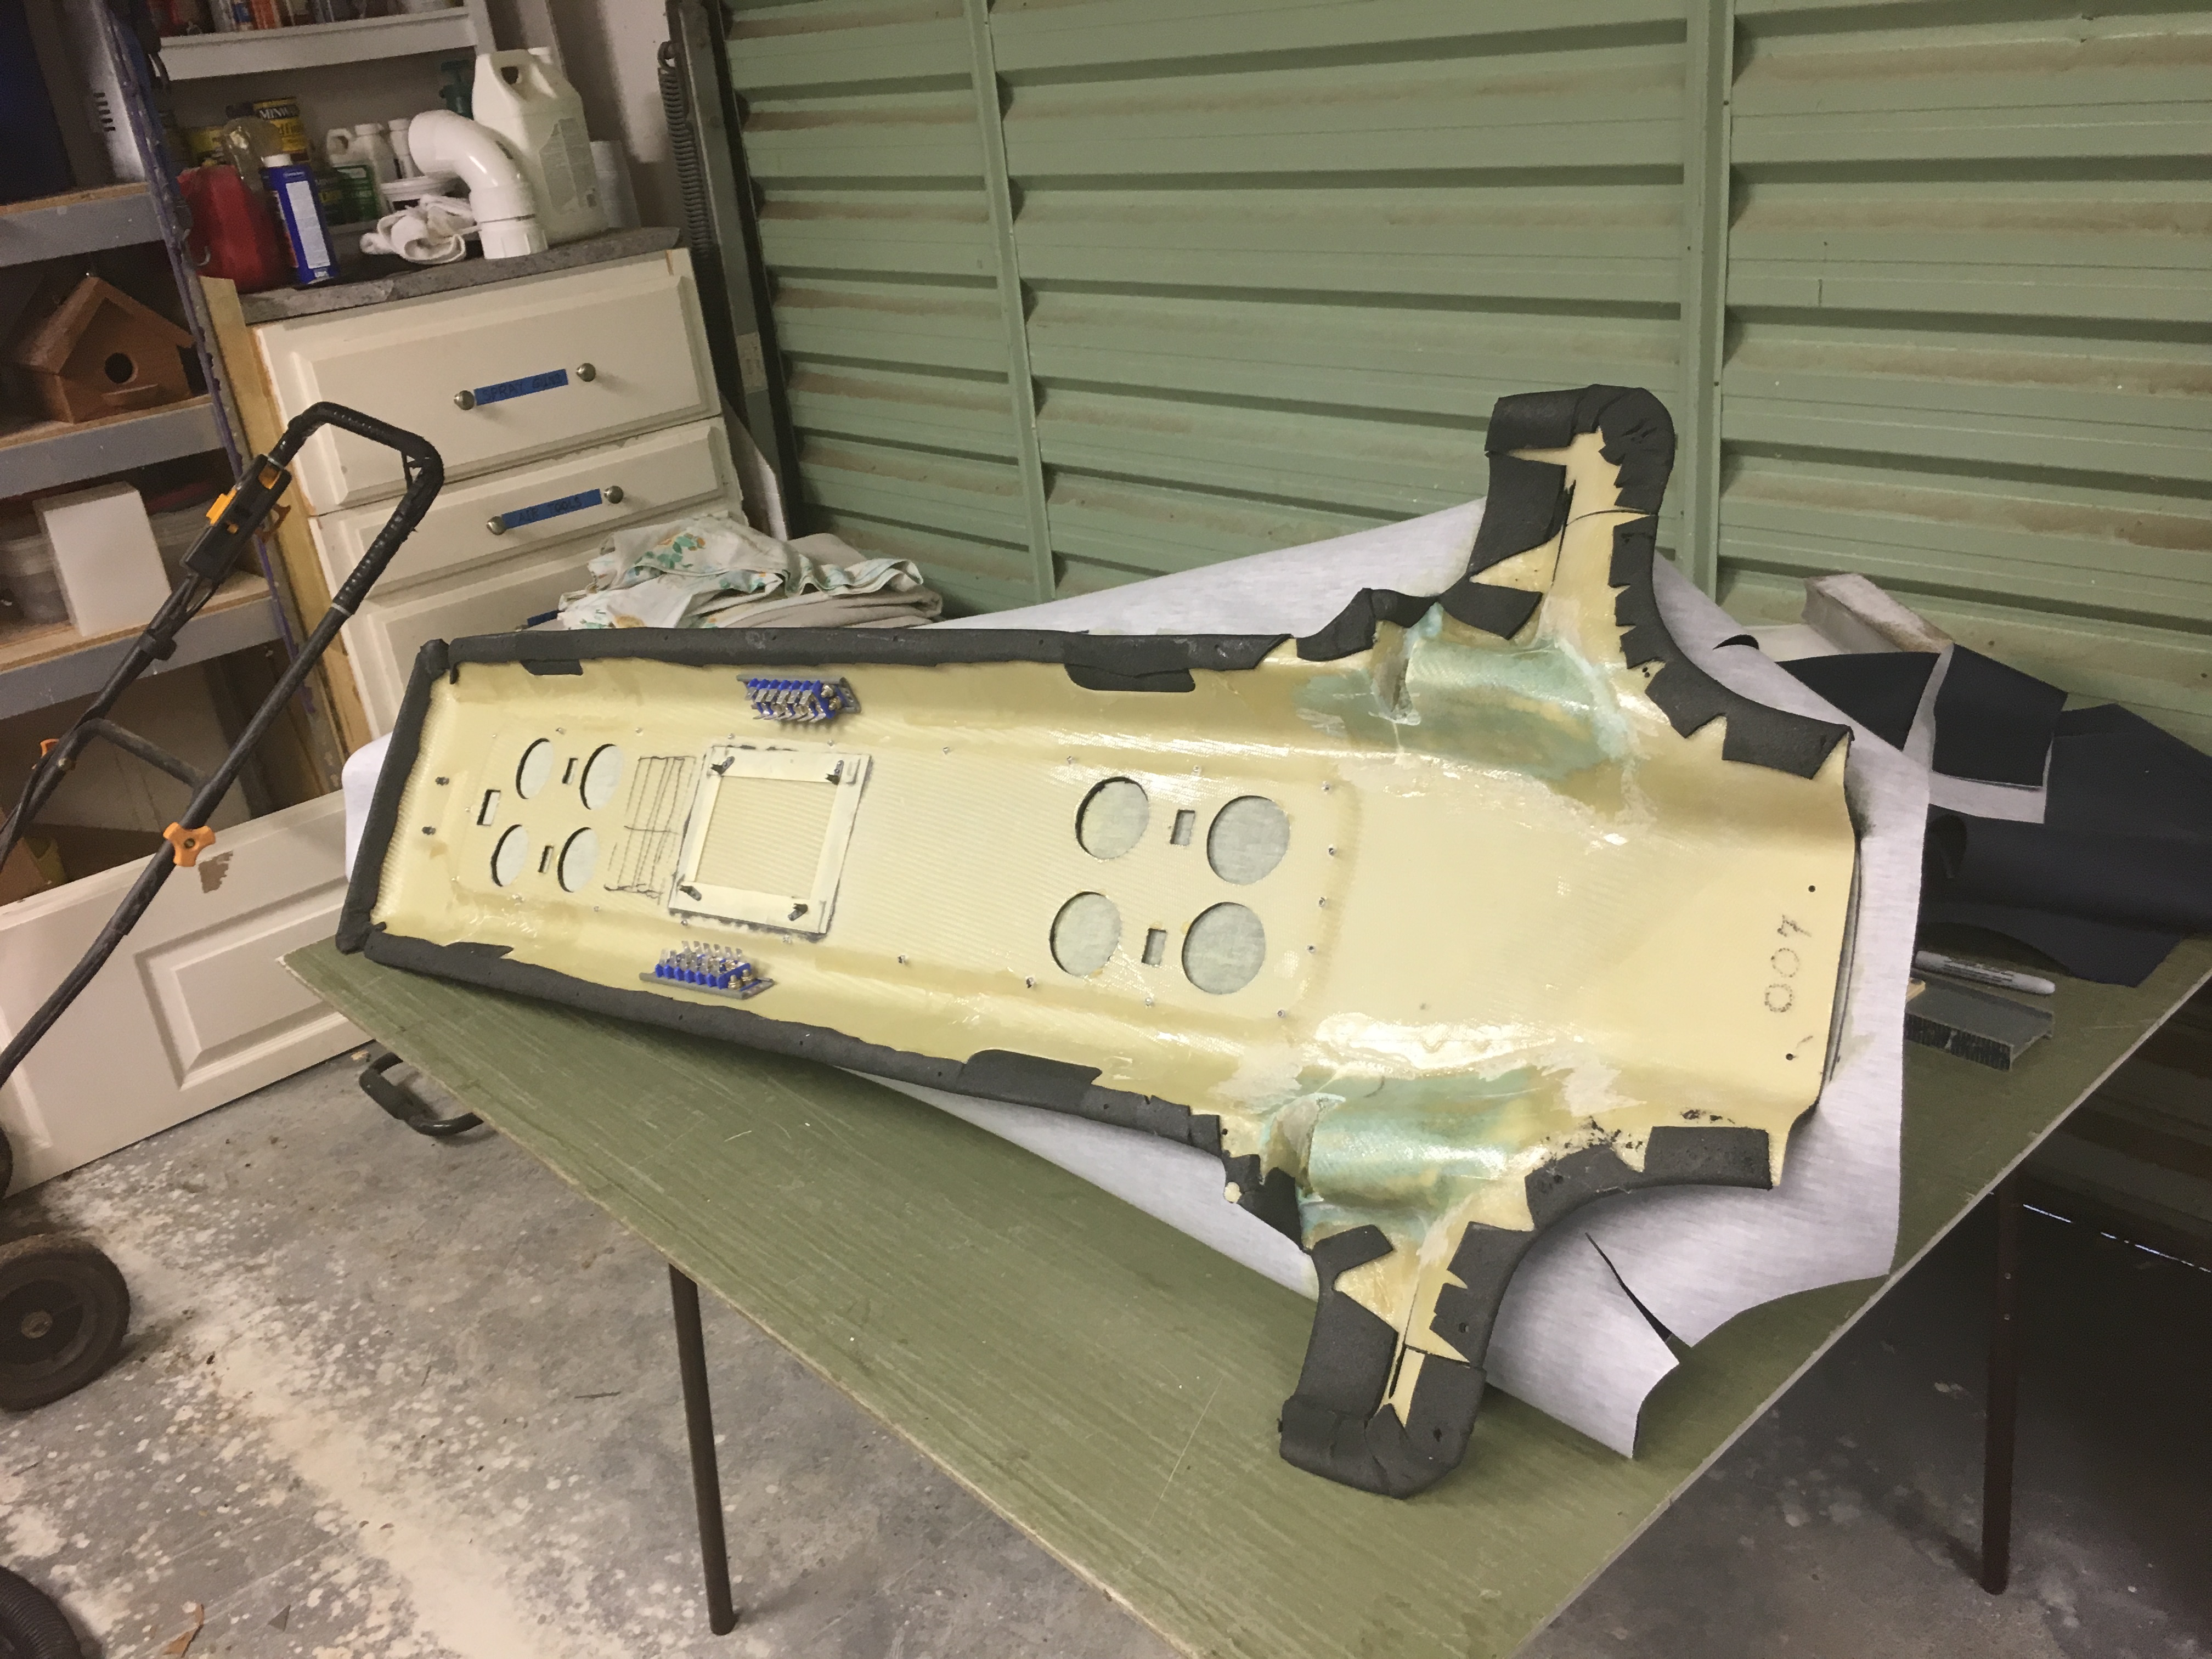
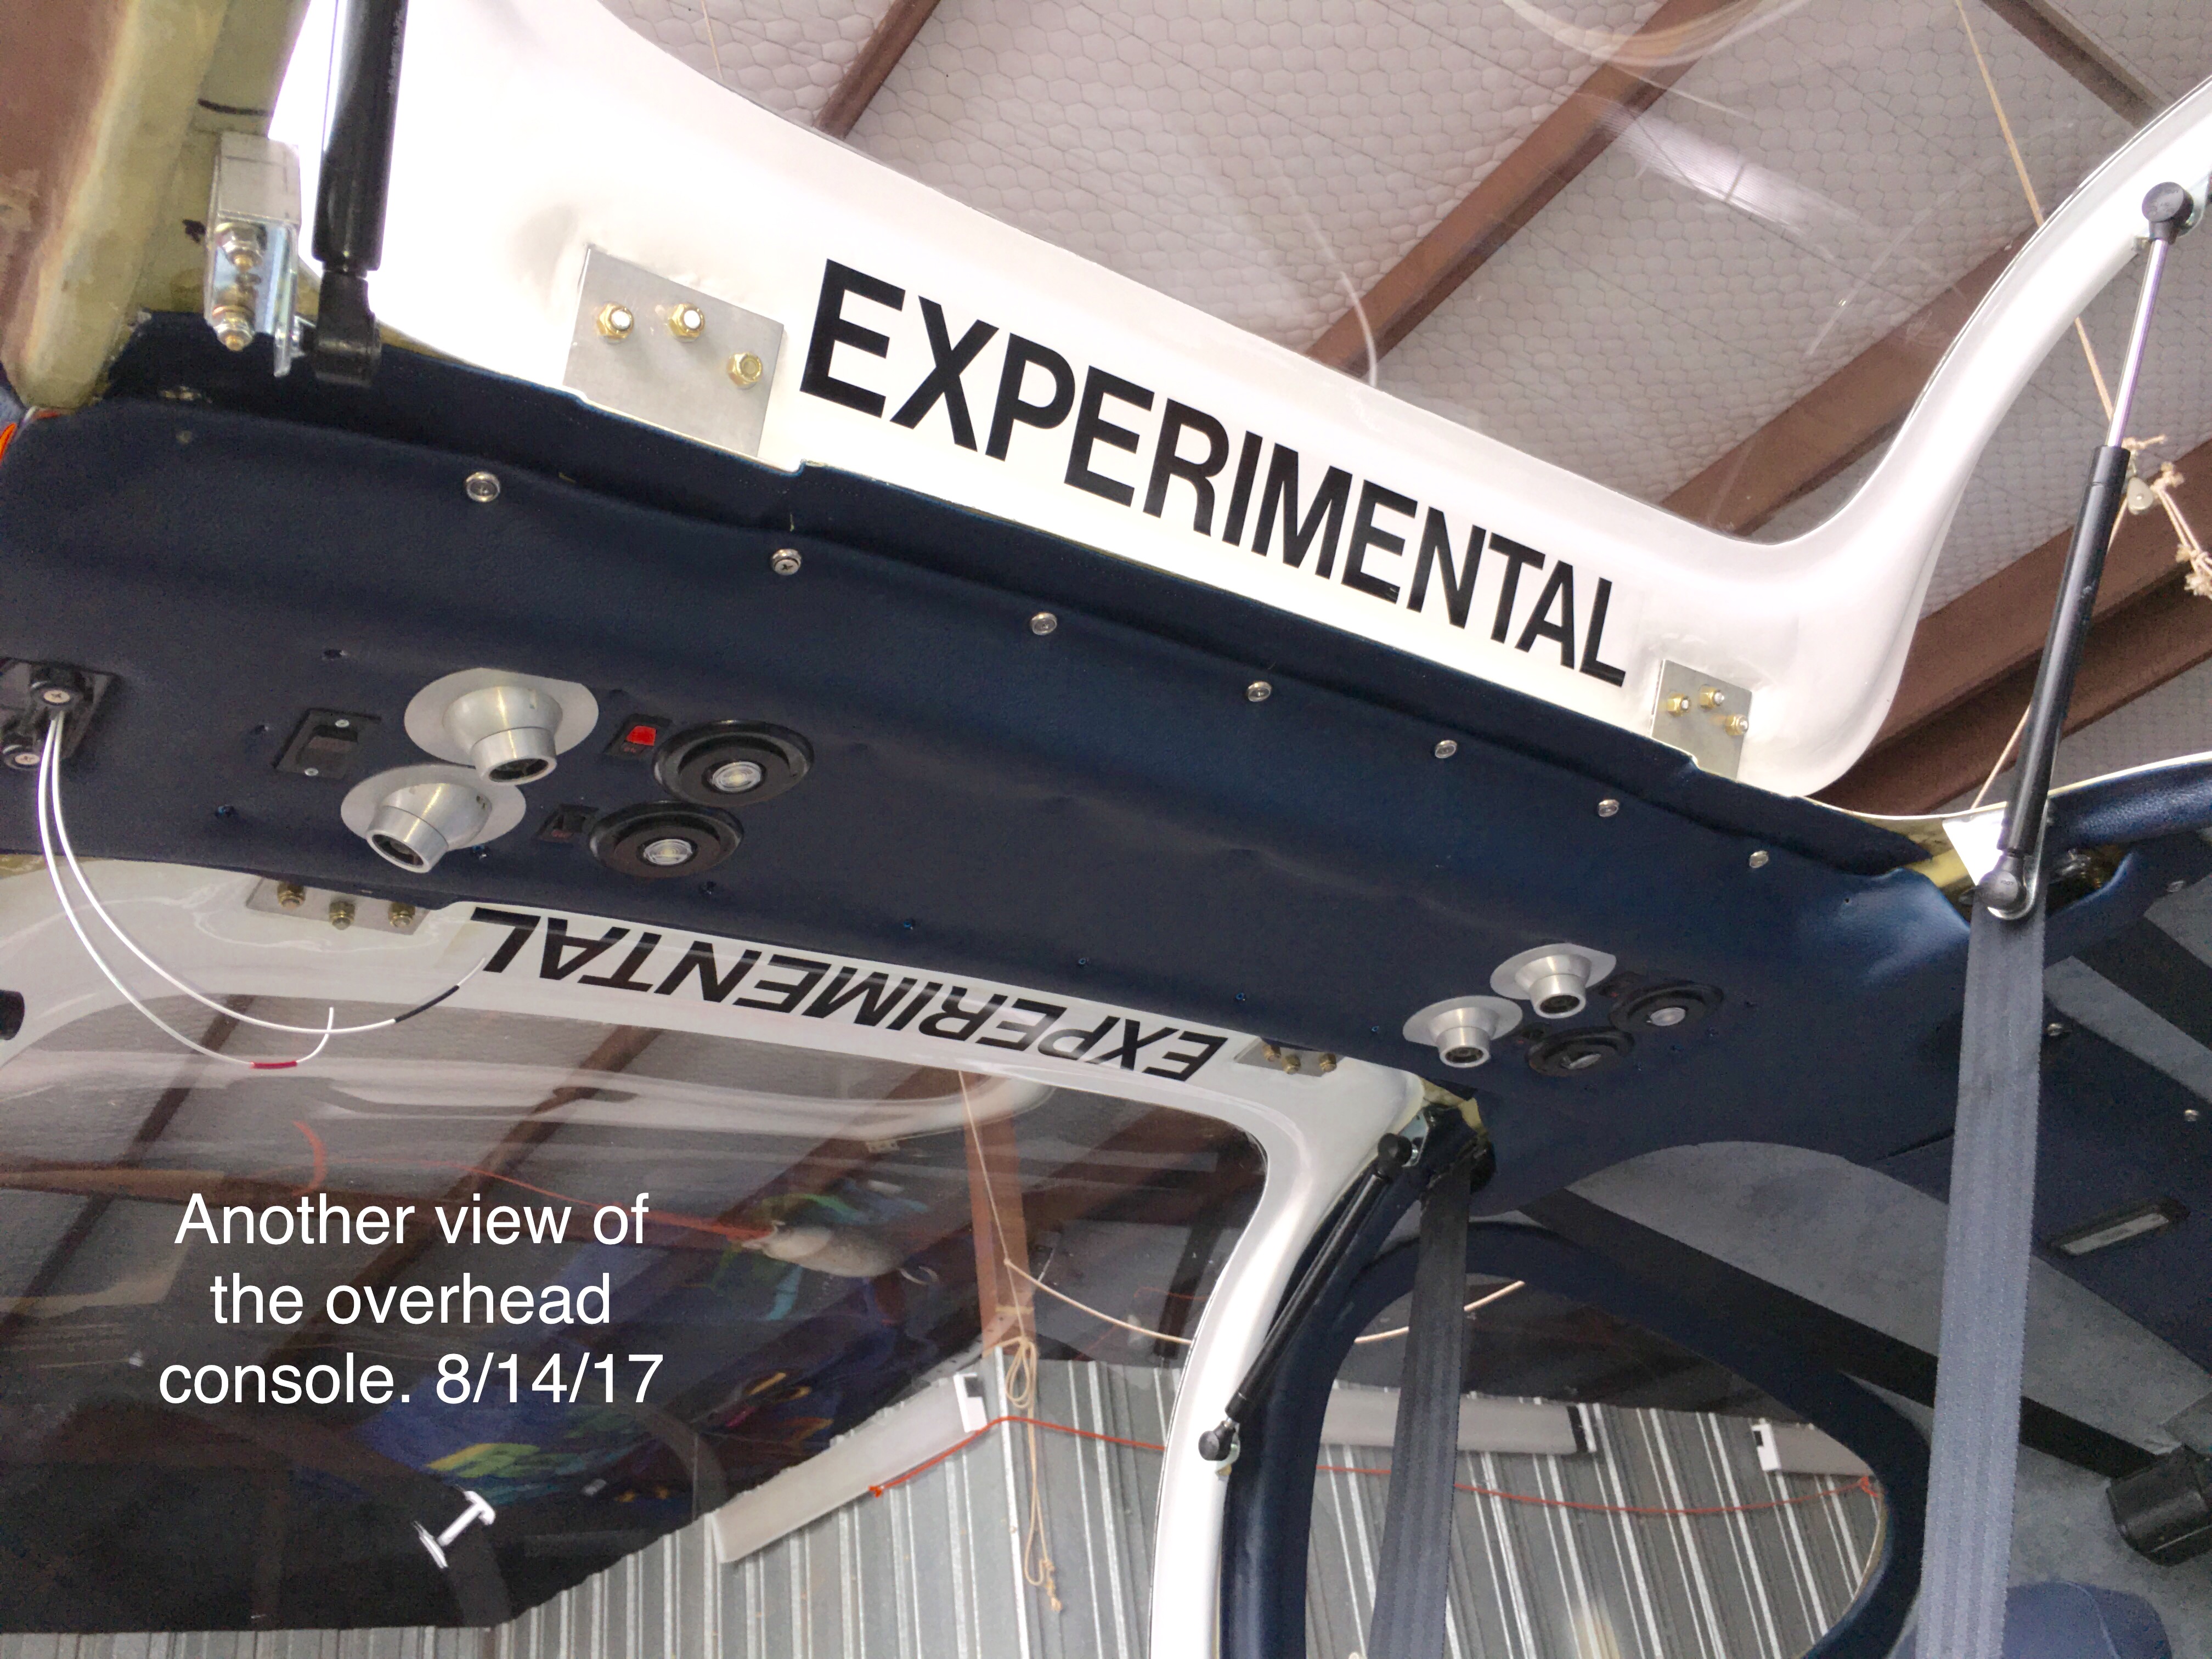
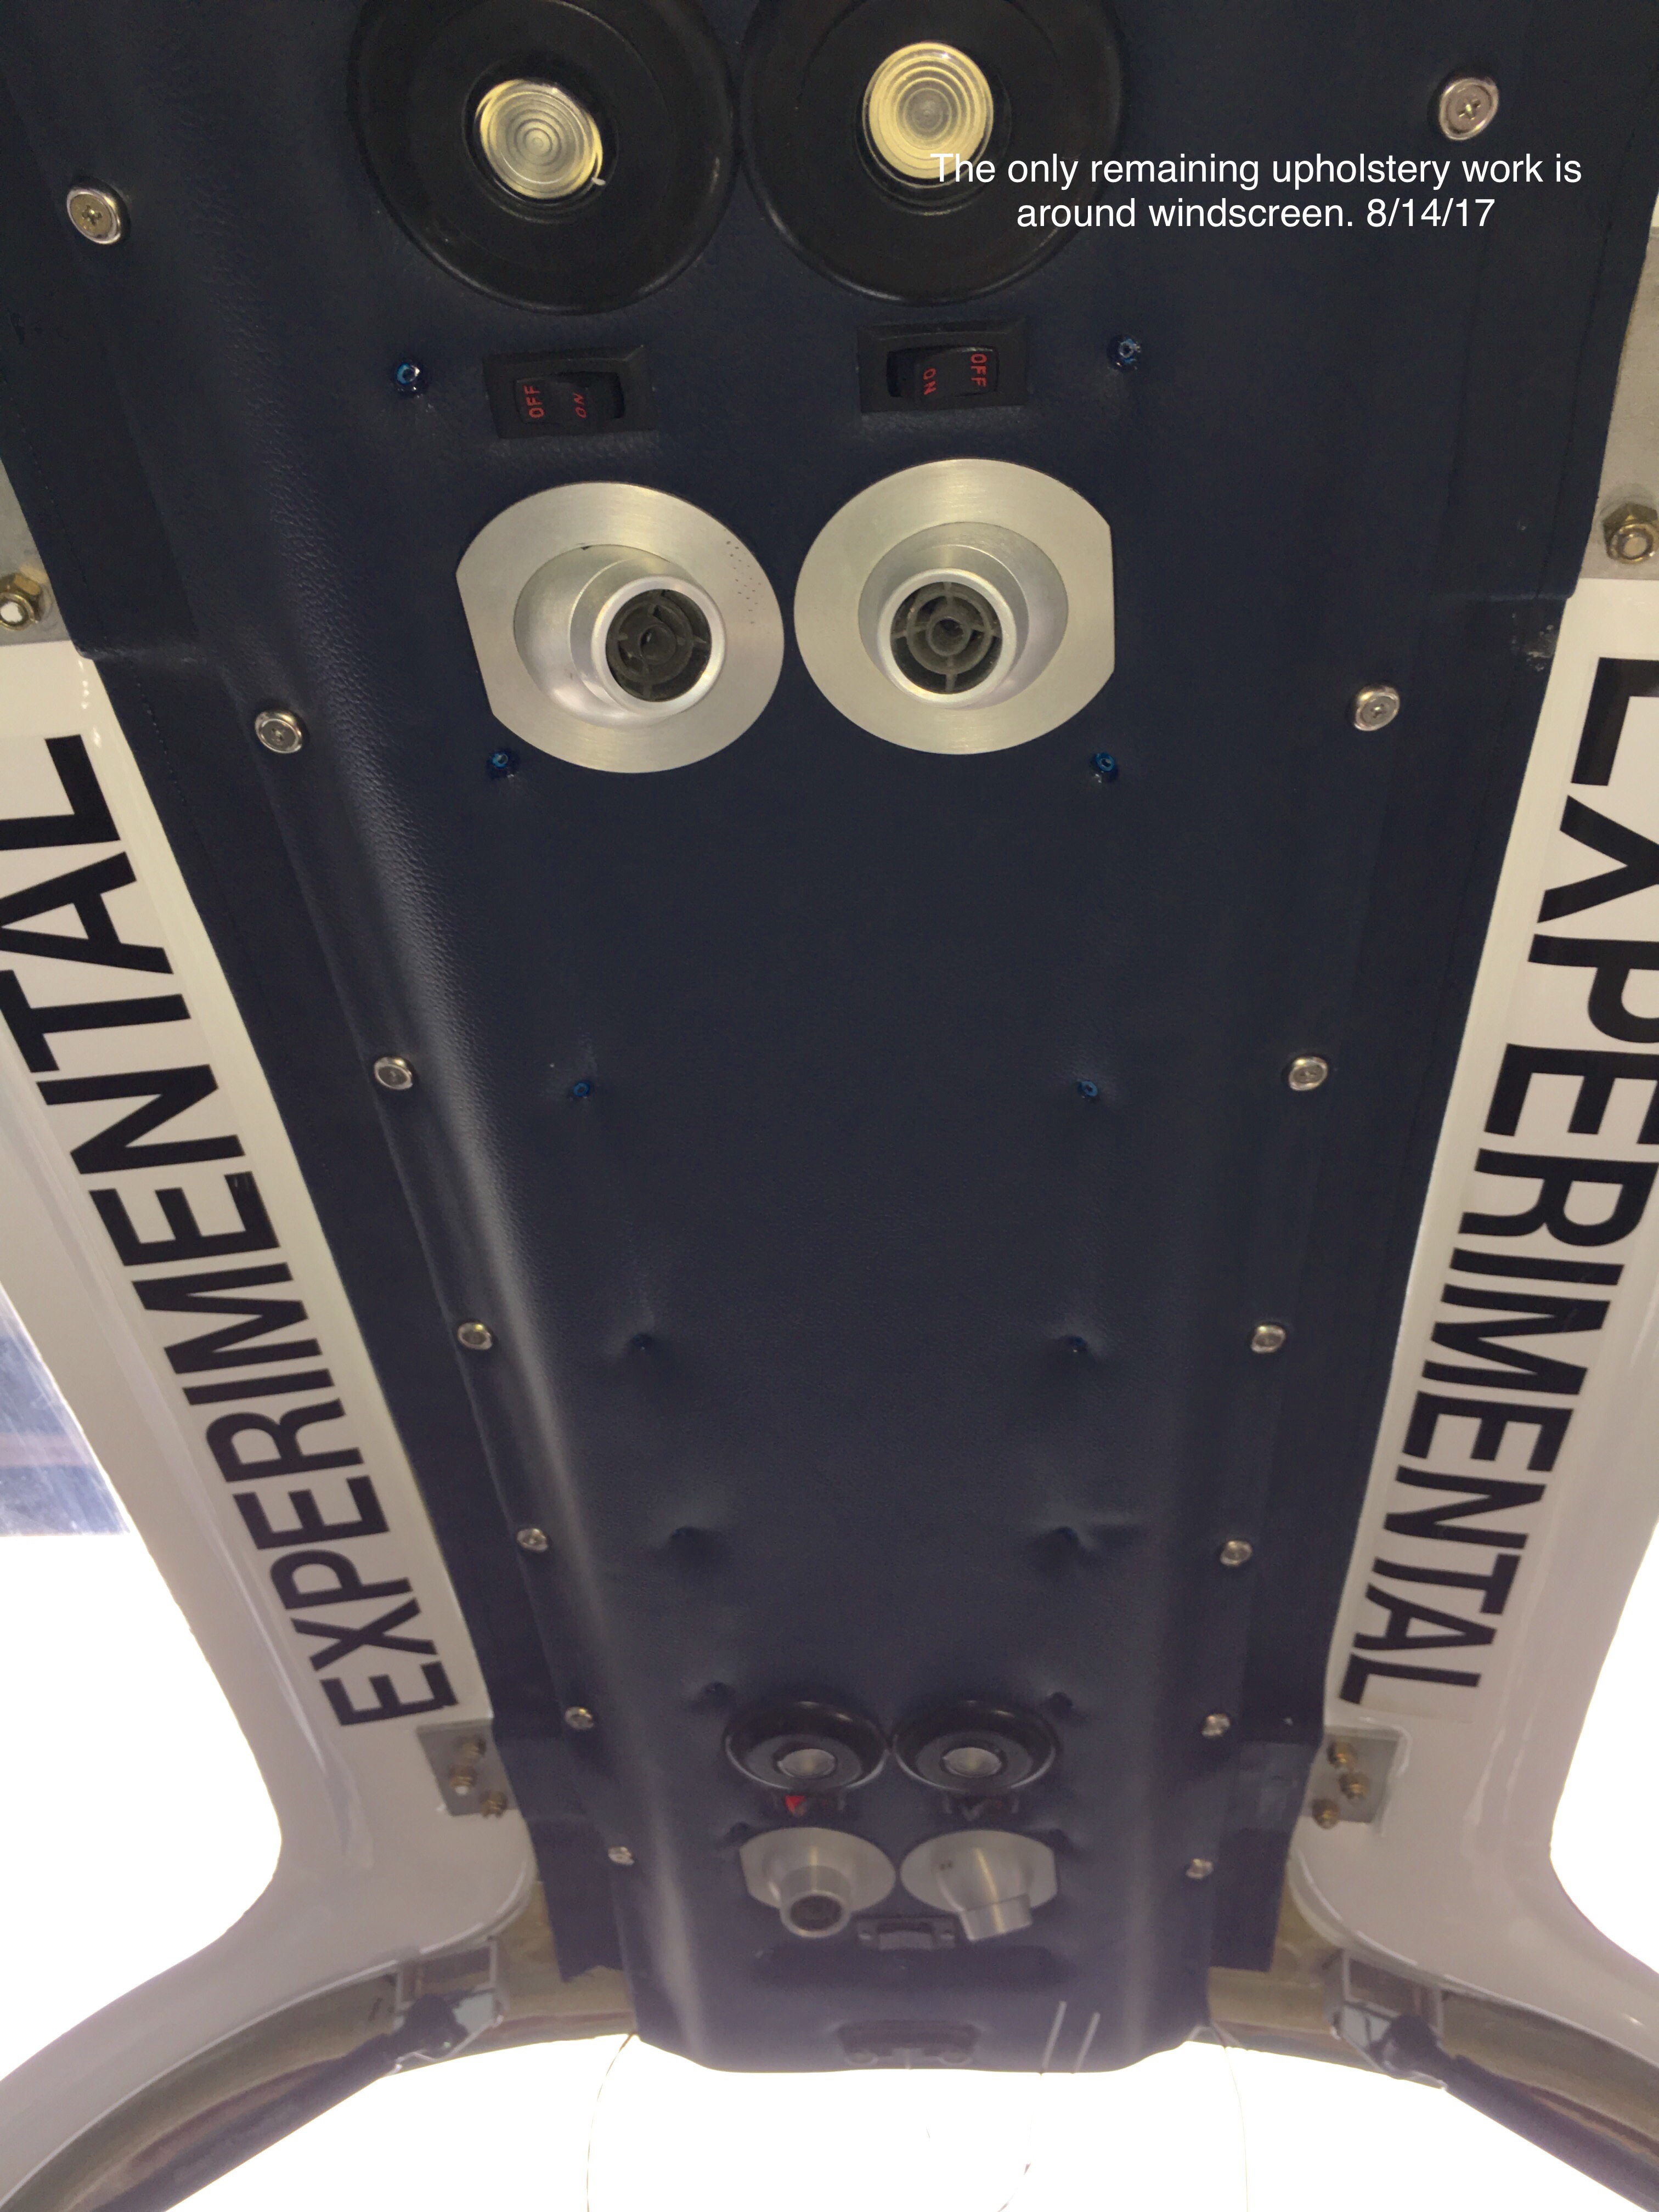
This shows
the inside of the overhead console just prior to the final
install. From the top of the photo down you can see the filler
used to seal the overhead to the side rails and prevent all the air
from flowing out the sides. In front of you can see a pair of
lights and a pair of the vents. In the center is the small
secondary GPS receiver. The primary GPS that is 2020 compliant is
already mounted on the top of the fuselage. In the center is a power distribution and grounding blocks. I have an opening in the center that can be accessed if absolutely necessary in the future but I sure hope it won't. In front of that is another pair of lights and two more air vents. The little black device with wiring and a DB-9 connector is a rocker switch that will control the air control flapper servo at the rear of the overhead console. This connector will be connected to a long wire running from the servo. The additional wires seen are the power and ground wires that will run down along the front window. There are also a pair of wires running through a hole at the very front. These are planned for powering a camera to be attached. |
 |
Attachment
of the remaining upholstry over the doors required some epoxy and a lot
of clamps to hold everything in place while it setup. My
inexperience with upholstry was really evident during this
process. It came out alright but far from perfect. I had to
upholster the area around the doors before I did the final mount of the
overhead console. |
 |
The
final results? Well it's not perfect but I am satisfied with it
for now. Yes, I could probably do better if I tried again but
it's time to quit doing everything two and three times. I just
want to get it finished and flying. Funny, I see every single flaw and they bother the heck out of me but other people have looked at it and think it looks great. |
 |
 |