N247BR
Pilot / Co-Pilot Seat
 |
I also bought and trimmed the excess steel from rails but
they are still rather heavy. I am planning to do another search to see
if I can find some light weight rails. I had seen some during my search
that seemed to be a bit lighter but I will take the scales to be sure.
I also located a web site that sells aluminum rails for car seats.
After mounting the main spar in the fuselage, I tried to find a good method of mounting these. They were just too heavy and the seat release was not going to clear station 30 without cutting some slots for them. That was basically unacceptable. Back to the old drawing board! |
 |
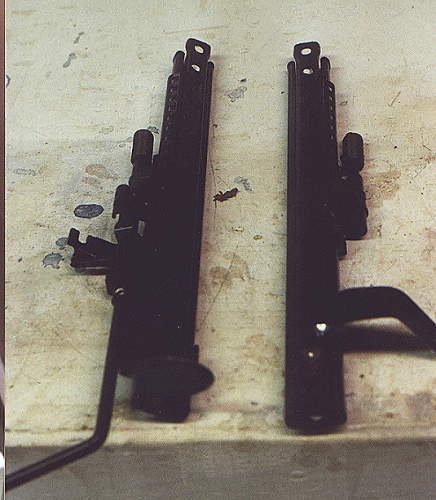
A lot more searching time and digging in the mud came up with these. They are out of a Mazda Miata. They are a little bit lighter than the original rails but are still a bit on the heavy side. A hack saw, grinder, hammer and anvil brought these to a usable condition. As can be seen, they had some odd shaped ends and large pins protruding from the units. I cut off all excess metal not required for operation or mounting. I flattened the ends and ground them down to a uniform shape and then bent them to the same angles. A good paint job and they are a go. |
 |
The first trial mount was to put the front mounting bracket through station 30 in an attempt to keep it as low as possible. It placed the rail too far forward for the rear mount as can bee seen here. |
 |
Further efforts finally came up with this mounting configuration. The rear of the rail is mounted on a pad firmly bonded to the top of the main spar. The front mounting point is turned down and bolted to a hard point added to station 30. Final adjustment will require an aditional buildup around the rear bolt mount to give less slope and allow the seat to go further back. |
 |
The mounting bolts for the seats are constructed from 1/4" phenolic . I used a forsner bit to cut a recess in the bottom to allow the stud to fit flush. The stud was bonded into place with an epoxy-flox mix. The completed unit was bonded to the main spar and then glassed into place. The glass bid wraps from the front of the spar, over the mounting plate, and down the back of the main spar. The last thing I want is for the seat to move when I don't expect it. It won't move! I am using the same technique for the seat belt and shoulder harness mounting points. |