Tri-R Technologies TR-4
BUILDER'S MANUAL
This Builder's Manual is NOT the official manual as published by TRI-R Technologies.
4 PLACE NOSE GEAR ASSEMBLY – STEERABLE VERSION
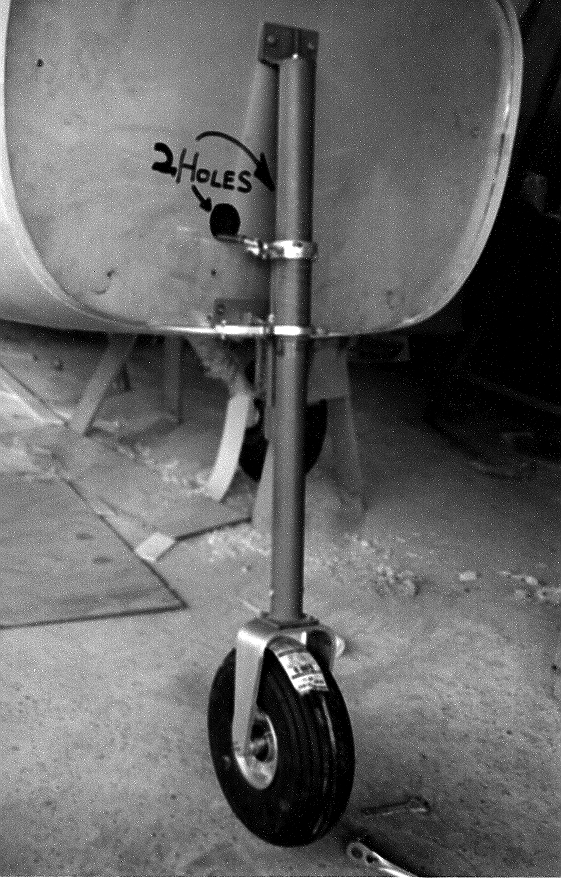
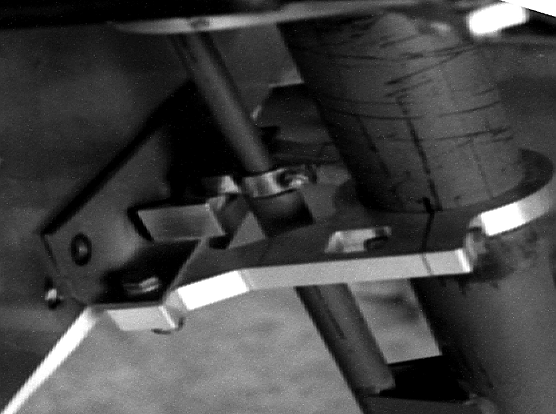
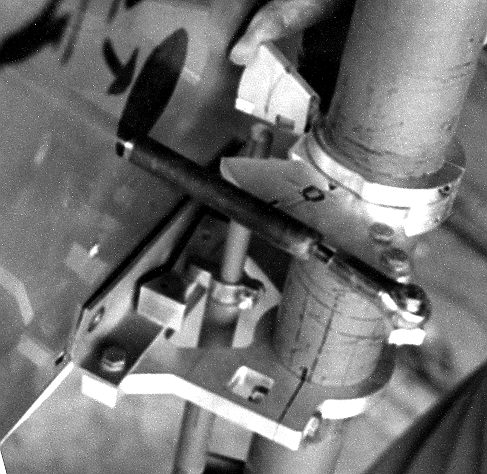
The 4 place steerable nose gear is supplied in an assembled condition and only requires mounting to the fuselage firewall. Establish a vertical centerline on the firewall face and align the gear to this line. The lower mounting bolts are mounted just far enough above the fuselage bottom to permit the installation of area washers on the inside surface of the firewall to clear the inside radius of the glass reinforcing layers at this point (roughly 1 ¼ inches up from the bottom corner on the outside face of the firewall). Check the resulting location of the two upper bolts in relation to the stiffening flange and added layers of glass on the back side of the firewall in this region. If this back surface is not flat, or the added glass layers do not extend at least 2 inches in all direction of where the hole will be drilled, make corrections as required. Grind the surface and add at least 8 layers of glass if required.
Drill 5/16 in diameter holes for the bottom bolts using the gear as a drill fixture, and temporarily fasten with supplied bolts. Likewise, drill the two upper bolt holes 3/8 inch diameter and temporarily install supplied bolts.
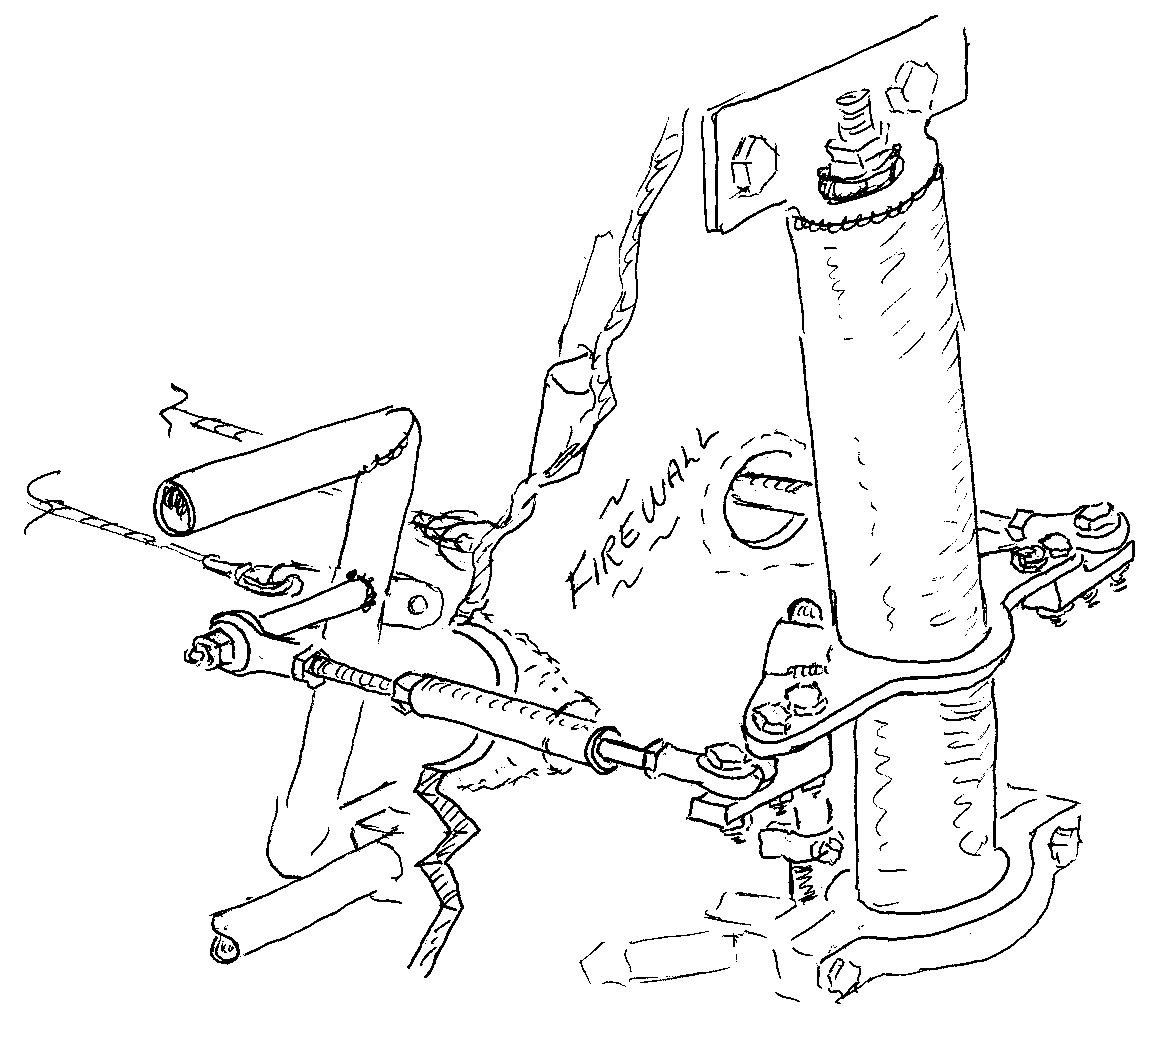
Center the steering arm on the gear assembly, and center the rudder pedals. The ruder cables should have been measured and attached prior to this point (the rudder pedals for the steerable gear should have the welded tube cross members and they should be installed with these tubes in the center pedals). Mock up the rod ends on the steering arm ends and the rudder pedals. Mark the point on the firewall where the rods between these rod ends would pass , and cut a hole centered on these marks roughly 1 ½ inches in diameter on each side.
Pull the slack out of the rudder cables and measure the length required between the two rod ends. Use the spring plunger assemblies and cut a section of ¼ inch threaded rod for each assembly which will result in the proper length with added thread length for adjustment. The spring plungers will provide tensioning for the rudder cables, and this can be provided by adjustment of the threaded ends. Do not use up all the spring travel in setting up rudder cable tension.
Disassemble the gear and steering and set aside until the insulating paper and stainless firewall covering are installed. Remount the assemblies for permanent installation with appropriate bolts nuts and washers. Install a sealing "boot" on each spring plunger assembly to seal the steering rod holes in the firewall.
 |
 |
It is recommended that the aluminum lower wheel "forks" be reworked for maximum durability by radiusing and polishing edges. This is particularly important in the upper bend radius to prevent any cracking from vibration loads.
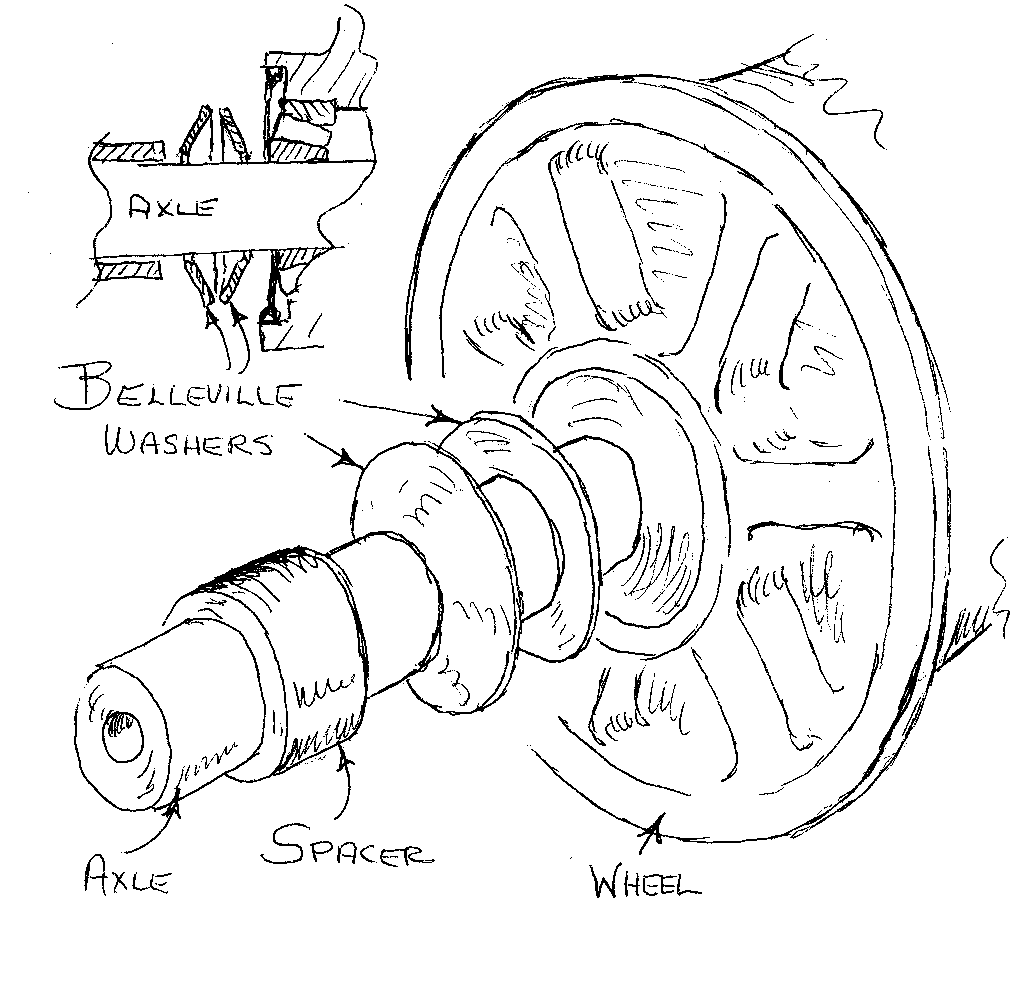
The current 4 place gear assemblies are being provided with nose wheels using ¾ inch I.D. tapered roller bearings. The preload for these bearings is provided by using a Belleville spring washer pair on each side of the wheel. The Belleville washers should be assembled in pairs with the "high" edge outer diameters facing each other (like base to base cones). These pairs should be assembled against the wheel bearing faces on each side with the one inch long spacers on the axle on the outside. Assembled in this manner, the spacers will extend slightly beyond the axle ends. When clamped in the wheel fork with the long 3/8 inch dia. Bolt, these spacers will be forced down flush with the axle ends, compressing the Belleville springs to provide bearing preload. Pre-lam
 |